Overview
Product Conditions indicate to your customers if the item they are purchasing is brand new, used, refurbished, etc. Marketplaces often have different classifications, and condition names vary. Sellercloud allows you to create a central In-House Condition and map it to corresponding channel-specific names to help you save time and streamline the process of preparing your products.
In this article, you will learn how to create in-house conditions, configure them for different channels, and assign them to your products in Sellercloud.
Create Product Condition
Sellercloud’s Product Conditions feature allows you to configure an internal Condition Name and choose the channel-specific conditions to which it corresponds.
To create a new Product Condition:
- Go to Settings > Products > Conditions.
- Click on the + icon to add a profile in the top-right corner of the Product Conditions panel.

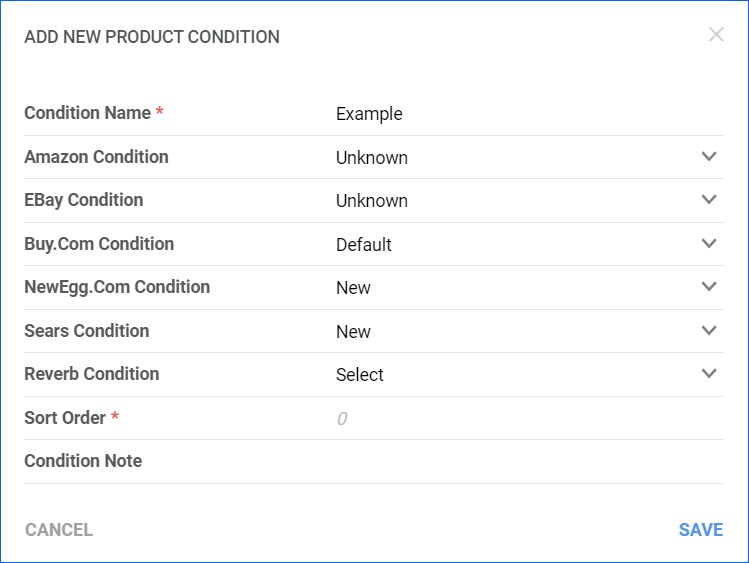
- In the Add New Product Condition modal, fill in the following fields:
- Condition Name – the In-House Condition Name. This name will be visible on the Product Details page of your SKUs.
- Channel Condition – map your In-House condition to the corresponding options for Amazon, eBay, Buy.com, NewEgg.com, Sears, and Reverb. It is not necessary to map all channels. You can select any combination or even leave them all empty to use this as an internal default condition for your products.
- Sort Order – indicates where on the list this condition will appear. For example, if the Sort Order is set to 1, this will be the top option in the Condition dropdown on the Product Details page. You can re-arrange the options at any time.
- Condition Note – optionally, you can add a note for internal reference.
- Click Save.
Assign Product Conditions
You can easily assign product conditions to products, either manually or in bulk. However, the following Client Settings affect this workflow:
- Enable Product Condition Display must be enabled to view and edit the Condition field on the Product Details page.
- You can also select a Default Condition, which will automatically be applied to products you create.
Individually
To assign a condition to an individual SKU:
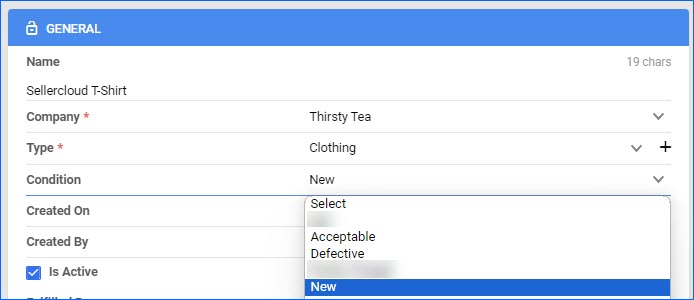
- Go to Catalog > Manage Catalog > Open a product.
- Click Edit.
- In the General panel > Select a condition from the drop-down menu.
- Click Save.
In Bulk
You can assign Conditions to multiple SKUs via file import using our Bulk Update Products tool. To do that:
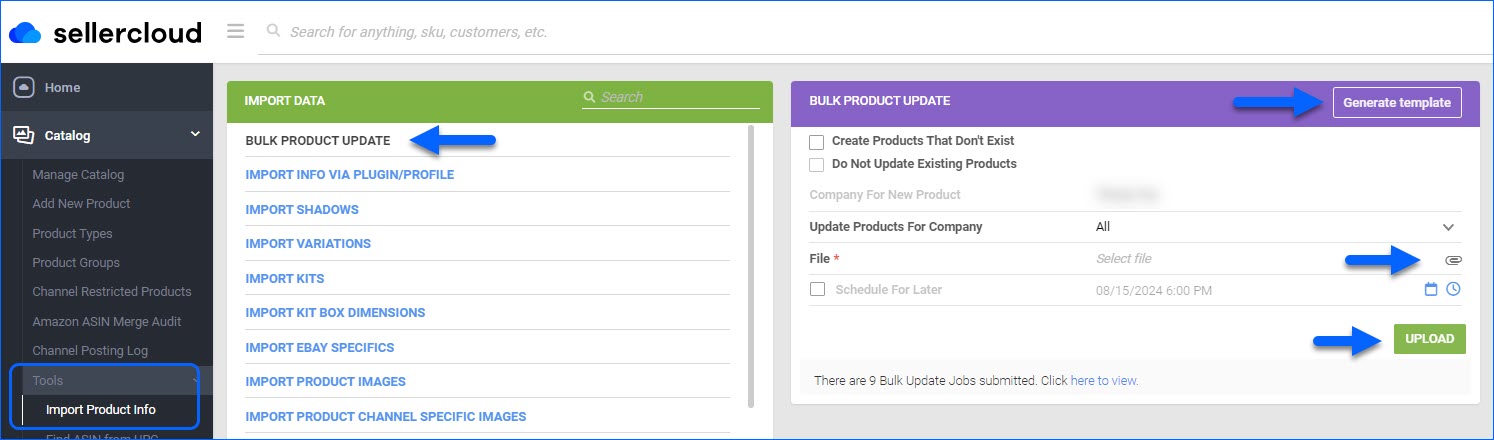
- Go to Catalog > Tools > Import Product Info.
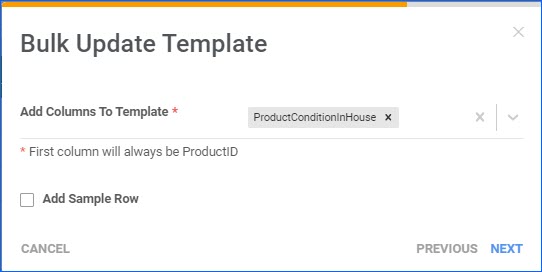
- Click on Bulk Product Update > Generate Template.
- If you create a new template, use the column header ProductConditionInHouse. You can use the Condition Name or Condition ID.
- Download and populate your template > Upload.
You can use the same column header in a Custom Export to export the selected product conditions.
Manage Product Conditions
You can reach the Product Conditions page by going to Settings > Products > Conditions. There, you can view, edit, rearrange, export, and delete existing conditions.
- To Edit a Condition, click the Pencil icon in the corresponding row. This will open a modal where you can update the name, channel mapping, sort order, and note.
- To Delete a Condition, click the Bin icon in the corresponding row.
- Click on the arrows to move a Condition up or down to change the Sort Order. The way conditions are organized on this page corresponds to how they appear in the dropdown of the Product Details page.
- You can Export all your existing conditions to an Excel spreadsheet by clicking the icon in the panel header, as shown in the screenshot below.
