Overview
Stripe is one of the leading payment processing services globally, known for its robust API, ease of integration, and support for businesses of all sizes. It is commonly used on marketplace platforms for online transactions, as well as in-person payments. In this article, you will learn how to integrate Sellercloud’s Waytopay.me application with Stripe. When it comes to configuration, Stripe is the fastest and simplest service to integrate with.
This integration allows you to accept payments from the following channels:
- Wholesale
- Local store
- Website
- Magento
With Stripe, customers can pay using credit and debit cards and Automated Clearing House (ACH) payments. Note that ACH payments are only available if you sign up for Stripe from the United States, and only payments in US dollars are accepted.
Stripe supports vaulting, which saves your customers’ payment details as a token. This allows customers to order multiple times without re-entering card details. It also allows you to quickly charge or refund your customers without re-entering details. In addition, card data will be stored safely by Stripe instead of being stored on your servers.
Prerequisites
To set up Stripe for payment processing, you must first:
- Open a ticket with Sellercloud Support to ensure that the Stripe Payment Processor Plugin is installed on your server.
- Configure your Payment Settings to accept order payments using Waytopay.me.
Integrate Stripe
To integrate Stripe with Waytopay:
- Log into the Waytopay Merchant Portal with your Sellercloud team name and login credentials.
- Click the company for which you want to set up Stripe.
- Click Enable Waytopay for this company.

- Click Connect with Stripe.

- Follow the next steps to create a new Stripe account or connect your existing account.
- That’s it, once the account is connected, the integration is complete, and you can now accept payments with Stripe. Waytopay’s Stripe settings let you do the following:
- Enter the Statement Descriptor text to show on customers’ bank statements.
- Enable or disable Credit Card payments and set a Minimum charge.
- Enable or disable ACH Bank Transfers and set a Minimum charge.
Note: After you are done with these steps, be careful not to click the Custom payment gateway option because it will disable Stripe. To use Stripe, make sure that Stripe is selected under Payment Methods and has the green dot next to it, indicating that it’s active.
Additional Settings
Apart from connecting a payment processor, you can configure the following settings in Waytopay:
Channels:
- Click Manage channels to enable or disable Waytopay for specific channels
Company alias:
- Enter an alternative name for the company to appear on the payment page.
Customer support:
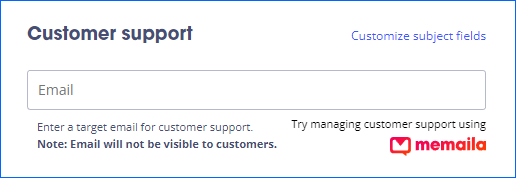
- Try Sellercloud’s live CRM service Memaila to communicate with buyers.
- Enter an email for customer support from the payment page.
- Click Customize subject fields to configure predefined frequently asked questions.
Payment notifications:
- Check Automatically email receipt to payer to automatically send invoices to customers after they pay.
- Check Email payment notifications to merchant to automatically receive payment notifications when customers pay.
Payment preferences:
- Check the Accept partial payments box to let customers make partial payments.
- You can also set a minimum charge amount for partial payments.
Compare Payment Methods
Refer to the table below to compare and understand the main differences between credit/debit cards and ACH bank transfer payments:
| Credit/Debit Cards | ACH | |
| Authentication and Authorization | Handled by Stripe | Handled by Plaid |
| Best Use Case | Any scenario | Repeating payments to a trusted business |
| Convenience | Enter card details manually for each payment | Only enter the last 4 digits of your bank account |
| Countries | All countries | USA only |
| Currencies | 135+ currencies | USD only |
| Processing Fees | 3% + $0.35 | 1% + $1.50 (Max $10) |
| Time to Process | Instant | Can take up to a few days |
Pay via ACH
To make an ACH payment as a customer for the first time:
- Visit the Waytopay payment link sent by the merchant.
- Click Bank Account in the Select Payment Method section.

- Click Log into your bank.

- Click Get started to connect your bank account to Plaid.

- Select your institution.

- Authenticate yourself.

- Select the account you want to use and click Continue.

- If you connect successfully, you will see this message. Click Continue.

- Click Continue.

- Click Pay now.
- Once you pay, you can Enter your email to receive the invoice by email or click the download link to download it directly.


