Overview
While you must always configure shipping defaults in Seller Central as an account-level setting, you can use the Amazon Shipping Templates workflow in Sellercloud to override them for specific listings. This feature allows you to adjust the shipping charges for your products based on the shipping service.
Sellercloud automatically updates shipping overrides on Amazon products once every 24 hours. Alternatively, you can post your products again to apply changes immediately.
Prerequisites
To enable this feature:
- Contact Sellercloud Support to ensure that the Windows Service AmazonShippingTemplateUpdateServices is running on your server.
- Go to Company Settings.
- Click Toolbox and select Amazon Settings > General Settings.
- Click Edit.
- In the Credentials section, disable Enable Ship By Region Templates.

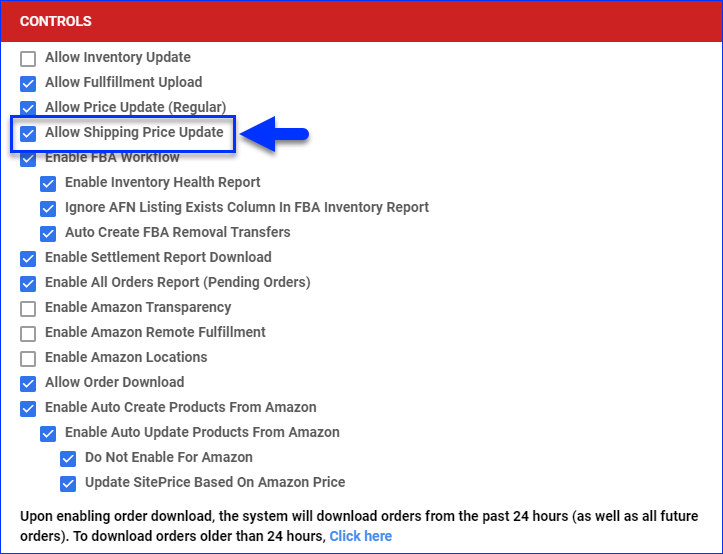
- In the Controls panel, enable Allow Shipping Price Update.
- Click Save.
Create Templates
To create a new template:
- In Sellercloud, go to your Company Settings.
- Click Toolbox and select Amazon Settings > Shipping Templates.
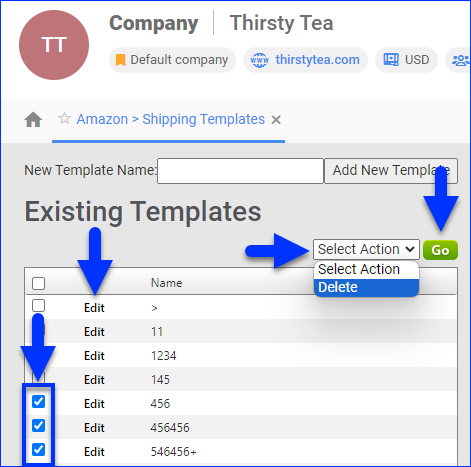
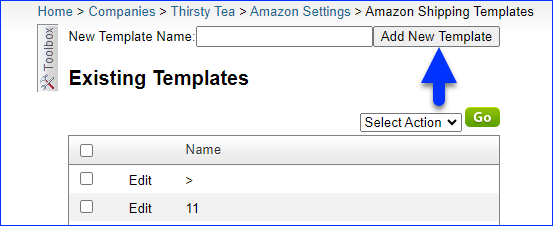
- Enter a New Template Name and click Add New Template.

- Populate the details of your template:
- Option – Select a shipping option for the template.
The options on the menu are all of Amazon’s available shipping options, including Standard, Expedited, Next (day), and Second (day) shipping with their locales. For example, Exp Cont US Street Addr refers to Expedited shipping – 1-3 business days – when shipping to a street address in the continental United States. - Amount – Set the shipping price.
- Type – Select a type for the shipping price:
- Additive – The Amount field will be added to the shipping price in the Seller Central price settings.
- Exclusive – The Amount field will be the exact shipping price the customer is charged, regardless of what is set on Seller Central.
- Restricted – Restrict the product’s shipping to the locale selected in the Option menu. With this option enabled, you will not be able to ship products with this template to any location other than the selected locale.

- Option – Select a shipping option for the template.
- Click Save Template.
Manage Templates
To manage your Amazon shipping templates:
- In Sellercloud, go to your Company Settings.
- Click Toolbox and select Amazon Settings > Shipping Templates.
- To edit a template, click the Edit link next to it.
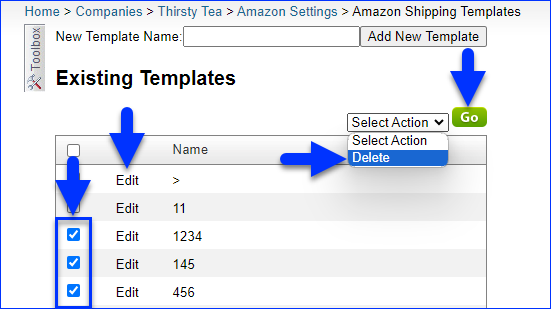
- To delete a template, check the box next to it, then click Select Action, select Delete, and click Go.
- To clone a template, check the box next to it, then type the name of the new template in the Clone Selected to field and click Go.
Set a Default Template
To set a default template:
- Go to Company Settings.
- Click Toolbox and select Amazon Settings > Product Defaults.
- Click Edit.
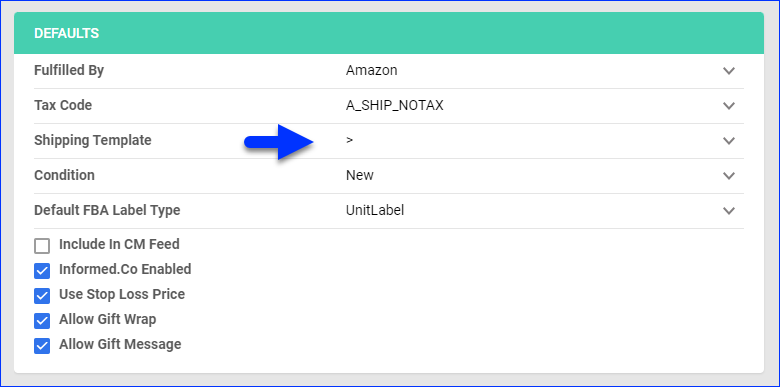
- Select a Shipping Template.
- Click Save.
Assign Templates
You can assign Amazon shipping templates individually per product or in bulk by uploading a file.
Individually
To assign a template to a single product:
- Go to the Product Details Page.
- Click Toolbox and select Amazon Properties.
- Click Edit.
- In the Shipping panel, check Enable Shipping Override.
- Select a Shipping Template. The selected template will be the only one taken into account, regardless of all other shipping rules and templates applied.
If you only see Ship By Region templates as Shipping Template options, go to Company Settings > Amazon Settings > General Settings and disable the Enable Ship By Region Templates checkbox.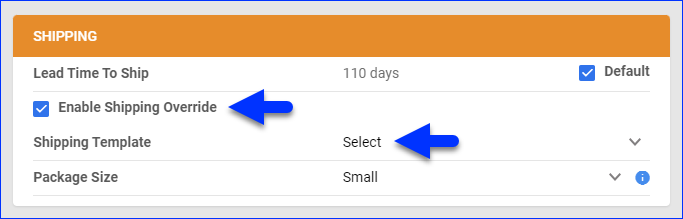
- Click Save.
In Bulk
To assign templates to multiple products:
- Follow the steps to Bulk Update Products.
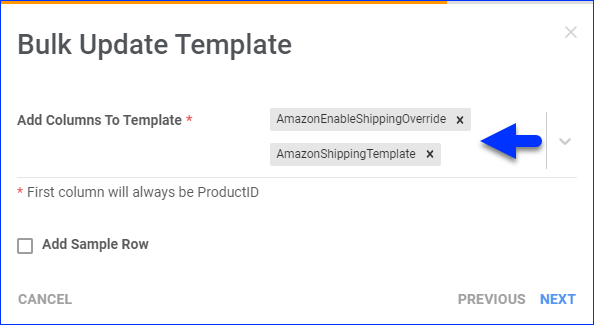
- Generate a template file with the column headers AmazonEnableShippingOverride and AmazonShippingTemplate. Then enter True below the AmazonEnableShippingOverride header and enter the shipping template names under AmazonShippingTemplate.
- Fill out the file, save it, and upload it.
Overview
While you must always configure shipping defaults in Seller Central as an account-level setting, you can use the Amazon Shipping Templates workflow in Sellercloud to override them for specific listings. This feature allows you to adjust the shipping charges for your products based on the shipping service.
Sellercloud automatically updates shipping overrides on Amazon products once every 24 hours. Alternatively, you can post your products again to apply changes immediately.
Prerequisites
To enable this feature:
- Contact Sellercloud Support to ensure that the Windows Service AmazonShippingTemplateUpdateServices is running on your server.
- Go to Company Settings.
- Click Toolbox and select Amazon Settings > General Settings.
- Disable Enable Ship By Region Templates.
- Enable Allow Shipping Price Update.
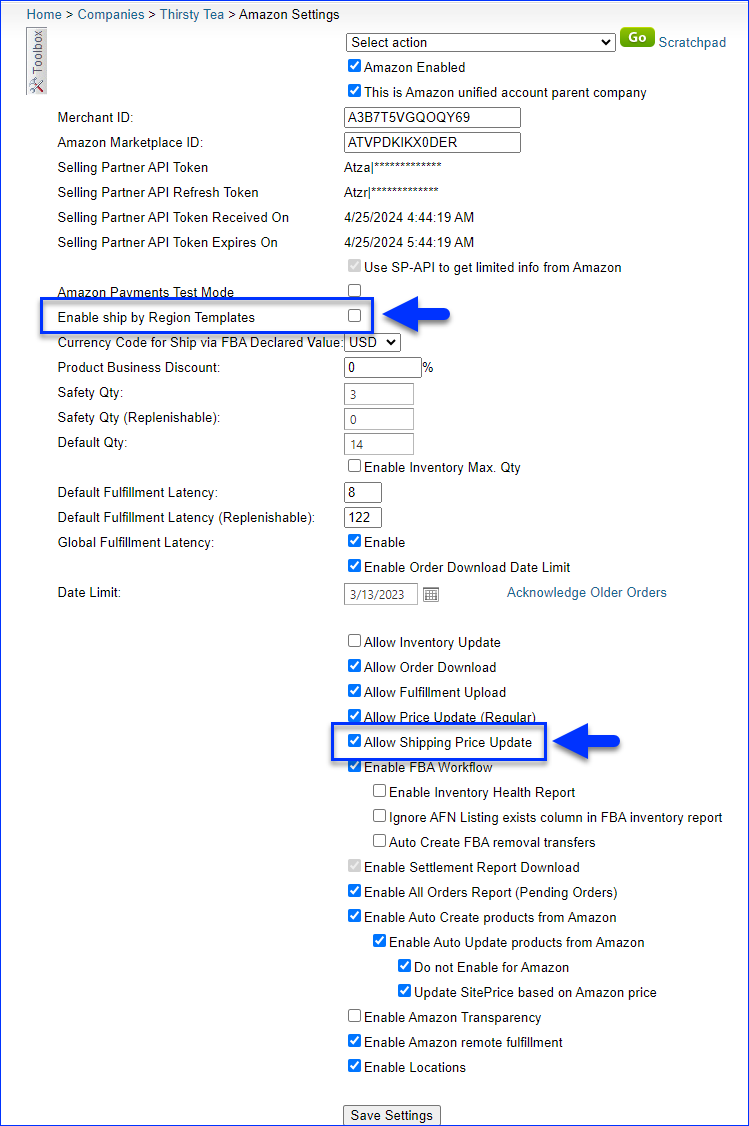
- Click Save Settings.
Create Templates
To create a new template:
- In Sellercloud, go to your Company Settings.
- Click Toolbox and select Amazon Settings > Shipping Templates.
- Enter a New Template Name and click Add New Template.
- Populate the details of your template:
- Option – Select a shipping option for the template.
The options on the menu are all of Amazon’s available shipping options, including Standard, Expedited, Next (day), and Second (day) shipping with their locales. For example, Exp Cont US Street Addr refers to Expedited shipping – 1-3 business days – when shipping to a street address in the continental United States. - Amount – Set the shipping price.
- Type – Select a type for the shipping price:
- Additive – The Amount field will be added to the shipping price in the Seller Central price settings.
- Exclusive – The Amount field will be the exact shipping price the customer is charged, regardless of what is set on Seller Central.
- Restricted – Restrict the product’s shipping to the locale selected in the Option menu. With this option enabled, you will not be able to ship products with this template to any location other than the selected locale.

- Option – Select a shipping option for the template.
- Click Save Template.
Manage Templates
To manage your Amazon shipping templates:
- In Sellercloud, go to your Company Settings.
- Click Toolbox and select Amazon Settings > Shipping Templates.
- To edit a template, click the Edit link next to it.
- To delete a template, check the box next to it, then click Select Action, select Delete, and click Go.
- To clone a template, check the box next to it, then type the name of the new template in the Clone Selected to field and click Go.
Set a Default Template
To set a default template:
- Go to Company Settings.
- Click Toolbox and select Amazon Settings > Product Defaults.
- Select a Shipping Template.

- Click Save.
Assign Templates
You can assign Amazon shipping templates individually per product or in bulk by uploading a file.
Individually
To assign a template to a single product:
- Go to the Product Details Page.
- Click Toolbox and select Amazon Properties.
- Check Enable Shipping Override.
- Select a Shipping Template. The selected template will be the only one taken into account, regardless of all other shipping rules and templates applied.
If you only see Ship By Region templates as Shipping Template options, go to Company Settings > Amazon Settings > General Settings and disable the Enable Ship By Region Templates checkbox.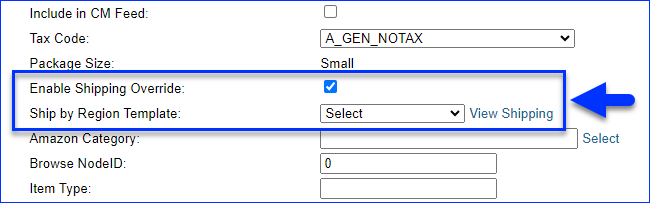
- Click Save.
In Bulk
To assign templates to multiple products:
- Follow the steps to Bulk Update Products.
- Generate a template file with the column headers AmazonEnableShippingOverride and AmazonShippingTemplate. Then enter True below the AmazonEnableShippingOverride header and enter the shipping template names under AmazonShippingTemplate.
- Fill out the file, save it, and upload it.