Overview
A Credit Memo is a record created to log the return of purchased products back to their vendor and to document the credited amount corresponding to the returned items’ price. This is often attributed to various factors, such as defective or damaged good, overstocked or excess inventory, quality issues, recalls, and more.
With Sellercloud Credit Memo Workflow you can effectively create, adjust and send Credit Memos to your Vendors, to ensure that your inventory and accounting records are up to date.
Create Credit Memo
You can create a Credit Memo with or without a related Purchase Order.
To issue a memo without an existing purchase order:
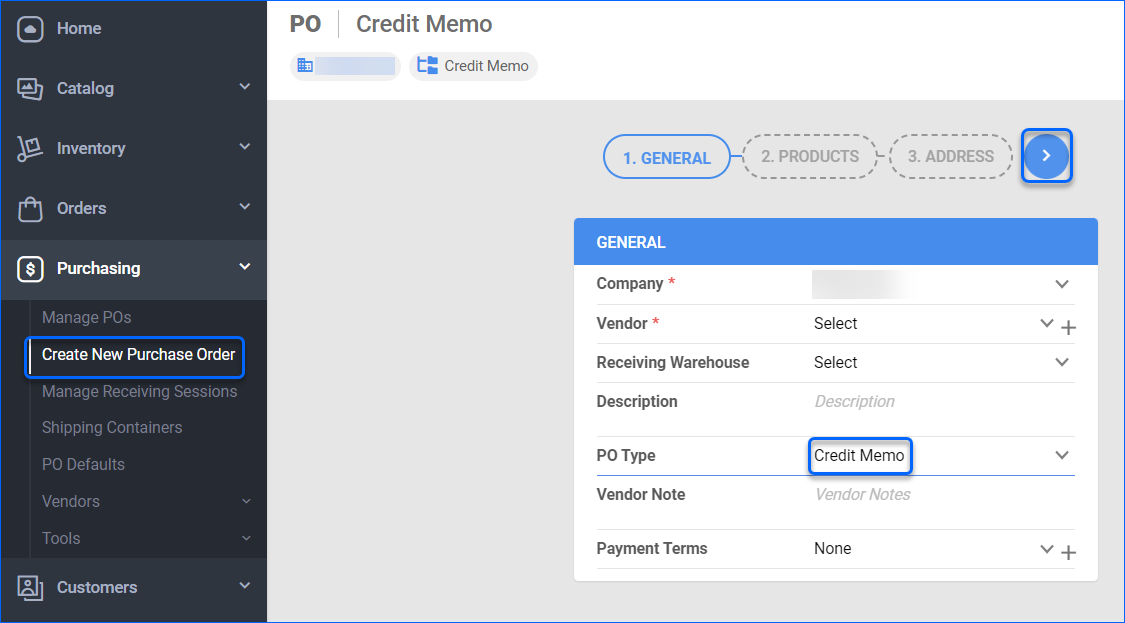
- Go to Purchasing > Create New Purchase Order.
- Select the associated Company.
- Choose the Vendor you are returning the products to.
- If necessary, add:
- Items Receiving Warehouse
- Description of the memo.
- Custom Vendor Note.
- Payment terms – add custom payment terms, or select an existing one from the dropdown menu.
- In the PO Type field, select Credit Memo and proceed.
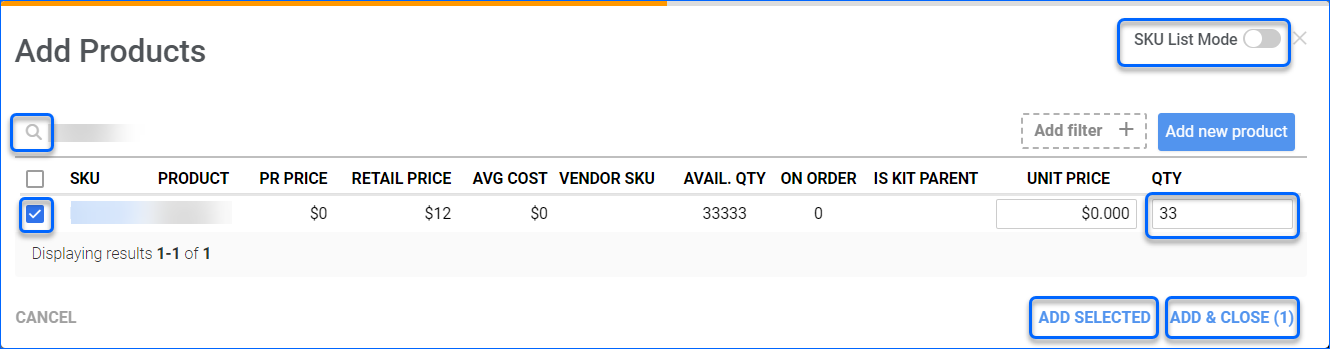
- Click the Add Products + button or the plus icon.
- In the following pop-up, click the SKU List Mode toggle to display a search textbox, in which you can enter a list of SKUs, You can also Add filter to limit your search, or Add new product, if required.
- Search and check the desired products to select them.
- Define return items Qty and Unit Price.
- Click Add Selected, or Add & Close.
- Alternatively, you can also upload products in bulk with an import file.

- You also have the option to Enable Case Qty mode and define Total Cases, Qty/Case and Case Price.
- When done with return products details, click Next step.
- Provide Billing Address and Ship To information and click the green flag to Save.

- A message with the Credit Memo ID appears on your screen. Click View Credit Memo to display its details.
Create Credit Memo from PO
To issue a Credit Memo from an existing approved and received PO:
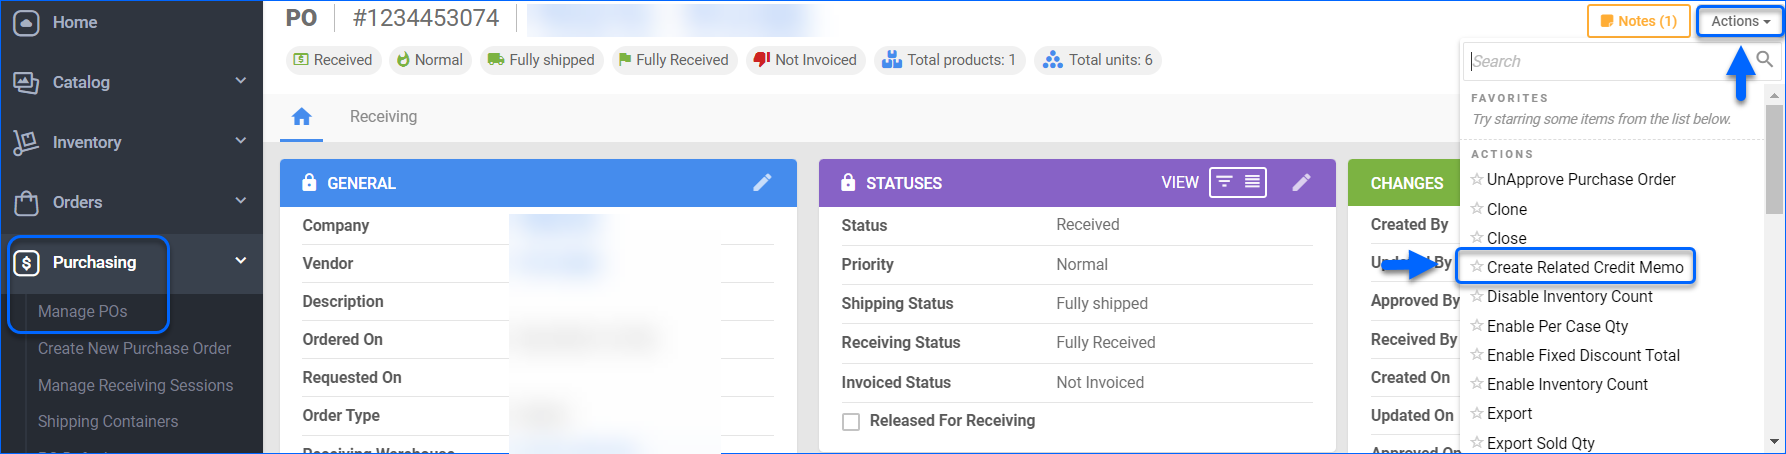
- Go to Purchasing > Manage POs.
- Open the Purchase Order based on which you want to create a Credit Memo.
- Click Actions and select Create Related Credit Memo.
- A successful generation message with a Credit Memo ID link appears on your screen. A memo hyperlink ID is also present at the top of the PO page.
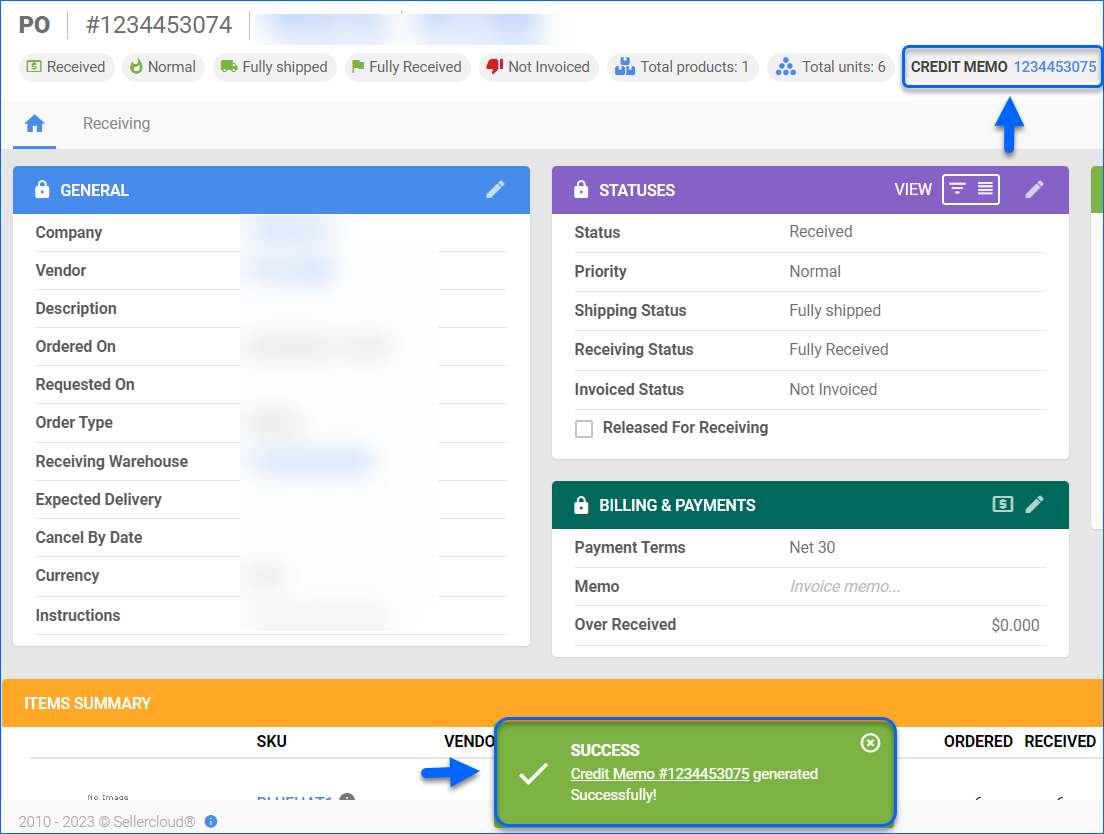
- The created Credit Memo is for all products covered by the respective PO. If required, open the Memo and click Edit, to adjust the Total Units of the returned items.

- Click Save. Respective products Inventory quantities will be updated shortly.
You can review your Credit Memos on your Home page Purchase Order Dashboard, or on your Manage POs page.
Ship Credit Memo
With Sellercloud’s Ship Credit Memo action, you can send a Vendor a custom Credit Memo:
- Go to Purchasing > Manage POs.
- If required, filter the PO Type by the Credit Memo to limit the list. Select the appropriate memo.
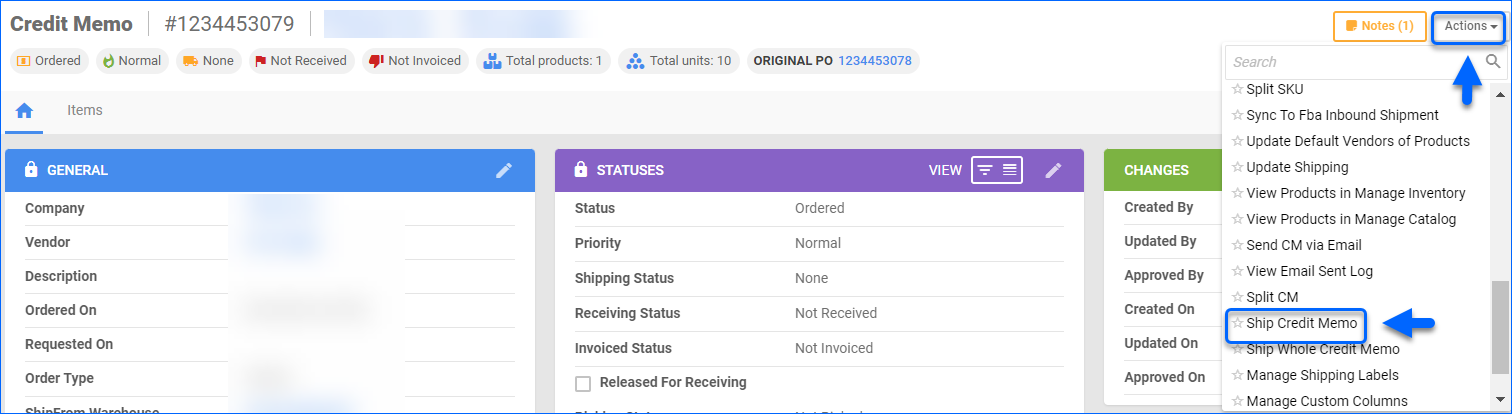
- In the upper right, click Actions, and select Ship Credit Memo, to define the memo’s scope. Alternatively, select action Ship Whole Credit Memo to send a memo for the whole PO.
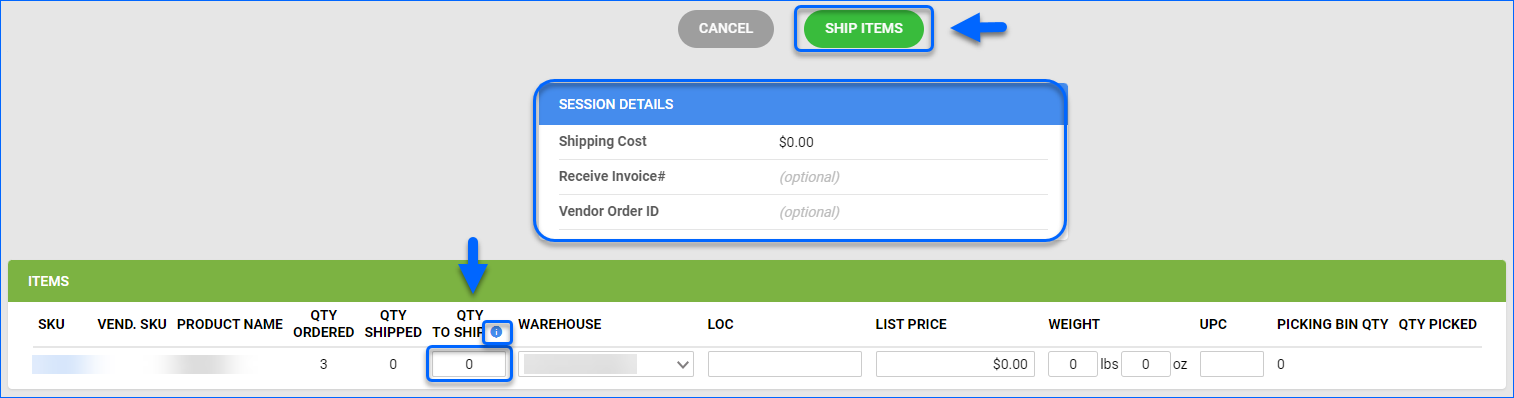
- Fill in Qty to Ship to determine the number of products to return. Populate all necessary fields, and click Ship Items.
- You generated:
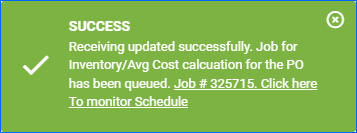
- A Queued job, which can be reviewed on your Manage Queued Job page. Once its status is Completed, product’s Inventory and PO’s Average Cost calculations will be updated.
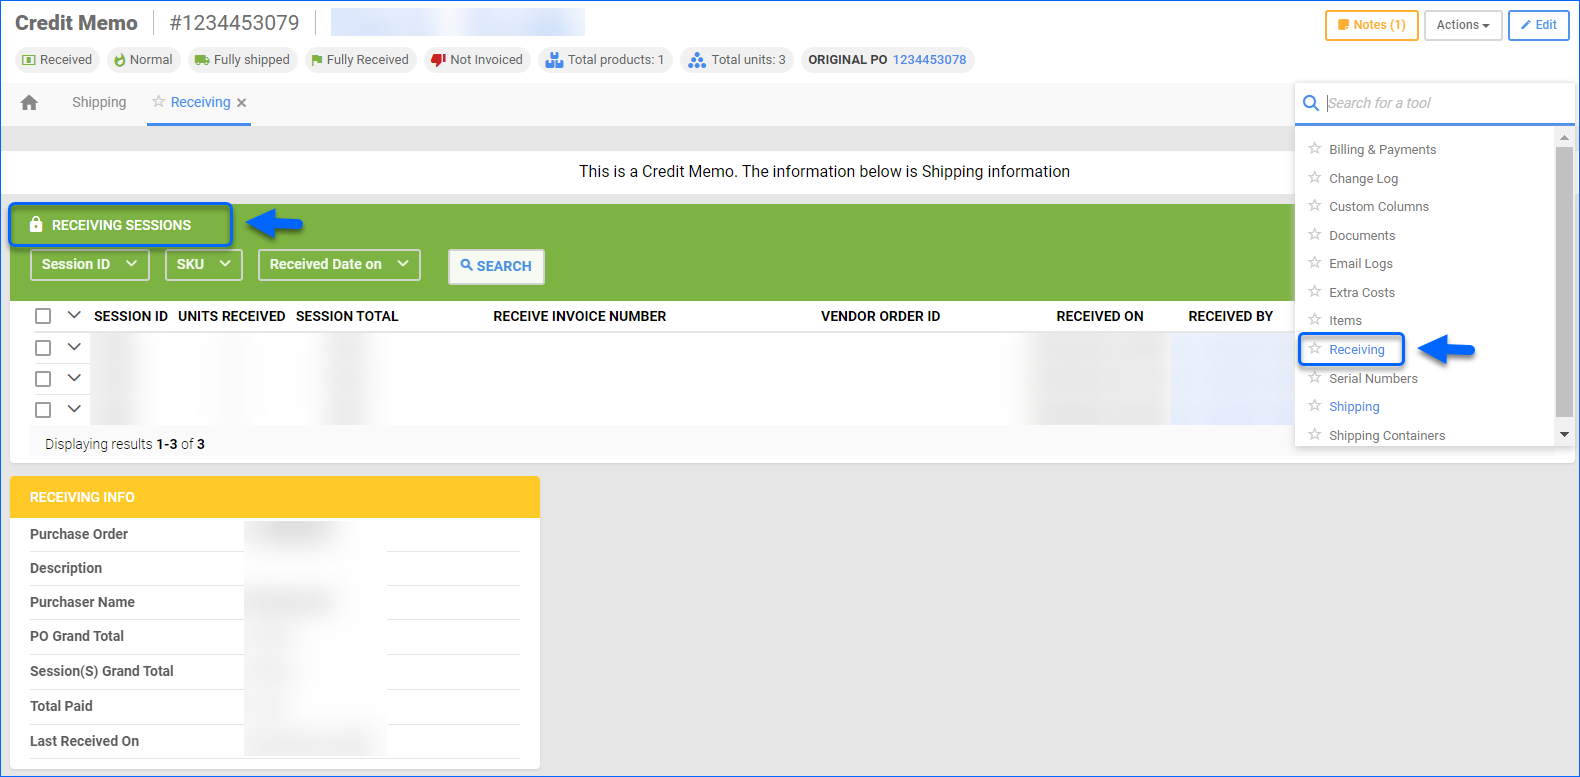
- A Receiving Session, which contains shipped memo details. Navigate to the memo’s Toolbox and choose Receiving, to find a full list of Receiving sessions.
- A Queued job, which can be reviewed on your Manage Queued Job page. Once its status is Completed, product’s Inventory and PO’s Average Cost calculations will be updated.
Manage Shipping Labels
Sellercloud allows you to Manage Shipping Labels for received/picked Credit Memo Products without a Shibridge order, so they can be labeled and shipped back to their respective Vendor.
Create Shipping Labels
To create a Credit Memo Shipping Label:
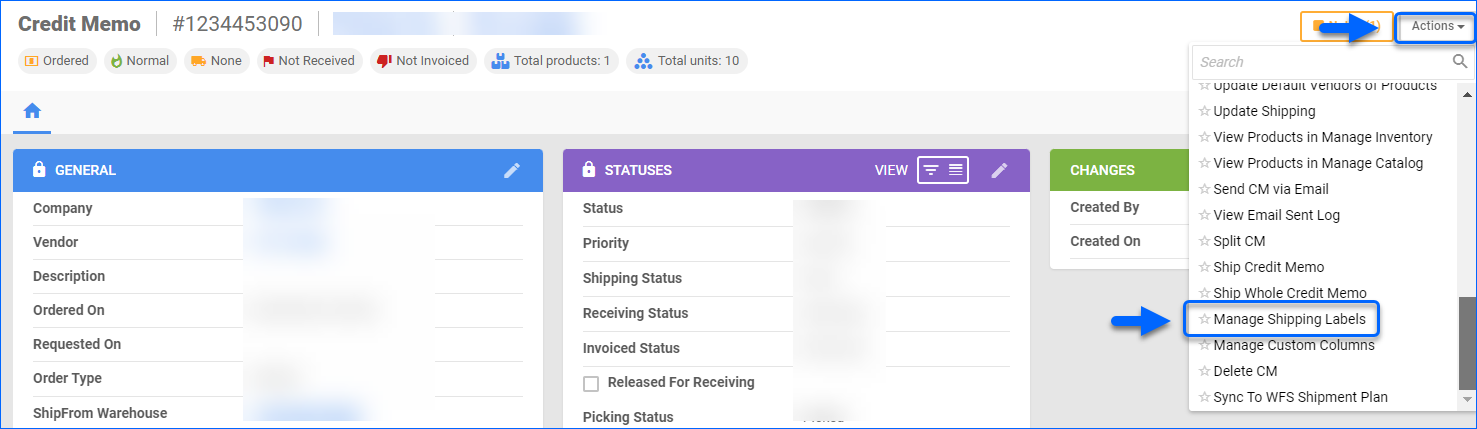
- Navigate to Purchasing > Manage POs > open the required Credit Memo.
- From the Actions dropdown, select Manage Shipping Labels.
- Click Create New Label.

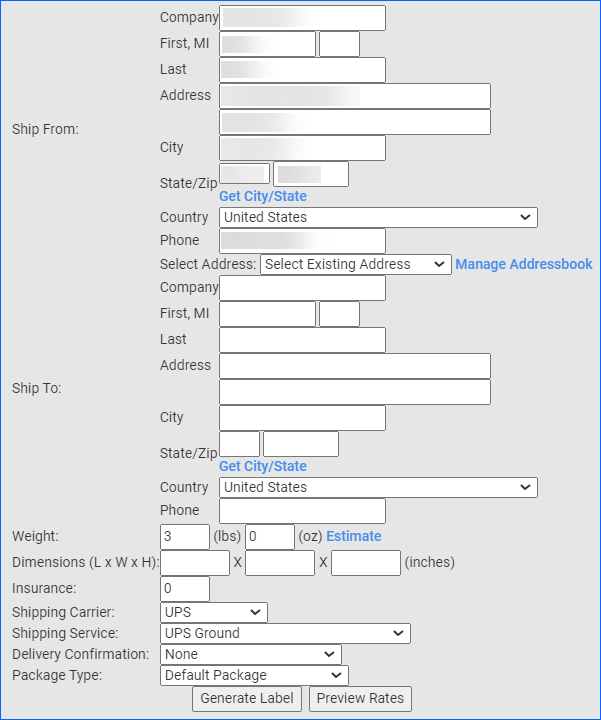
- Fill in the Ship from information to define the location from which the Credit Memo Products will be collected.
- Populate the Ship To details to indicate the Vendor location to which you are intending to return the Credit Memo Products. Alternatively, click on Manage Addressbook hyperlink to choose, or create an Address Book entry for the Vendor.
- Complete the following shipping specifics:
- Weight (lbs) (oz) of the returned products package. Click Estimate to automatically calculate the total weight of the package.
- Dimensions (L x W x H) of the shipped package.
- Insurance – Determine shipping insurance.
- Shipping Carrier – Select a shipping provider.
- Shipping Service – Choose a Shipping Carrier service from the dropdown menu.
- Delivery Confirmation – Pick a method of delivery verification (None, Signature Required, or Adult Signature Required).
- Package Type – Select a shipping package type from the dropdown menu.
- Select Preview Rates to inspect the drafted shipping label details.
To successfully Preview Rates when generating a shipping label, you must have valid carrier credentials configured on the Shipping API page of your company.
- Click Generate Label to complete the label creation.
- Shipping label(s) generated successfully message should appear on the top of the page. In case of unsuccessful label generation, you will receive a fail message with error details.

- Select Click here to download hyperlink to review the created label in your Existing Labels list. You can choose a label file type to download – pdf, JPG, for thermal printer. You also have the options to Download API Requests and Responses, sent to and received from the shipping carrier for troubleshooting purposes.

Void Shipping Labels
If deemed necessary, you can annul a Credit Memo’s Shipping Label:
- Navigate to the Credit Memo Existing Labels list and check the required label box.
- Pick Action Void Label and click Go.
- Selected labels voided message appears, and the Status of the label is Void.

Overview
A Credit Memo is a record created to log the return of purchased products back to their vendor and to document the credited amount corresponding to the returned items’ price. This is often attributed to various factors, such as defective or damaged good, overstocked or excess inventory, quality issues, recalls, and more.
With Sellercloud Credit Memo Workflow you can effectively create, adjust and send Credit Memos to your Vendors, to ensure that your inventory and accounting records are up to date.
Create Credit Memo
You can create a Credit Memo with or without a related Purchase Order.
To issue a memo without an existing purchase order:
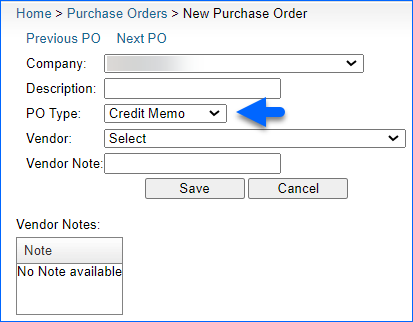
- Go to Inventory > Purchasing > Create New Purchase Order.
- Select the associated Company.
- Add a memo Description.
- In the PO Type field, select Credit Memo.
- Choose the Vendor you are returning the products to.
- If necessary, add a custom Vendor Note and click Save to proceed.
- Set the details on the newly created Credit Memo page and navigate to the Add Products button.
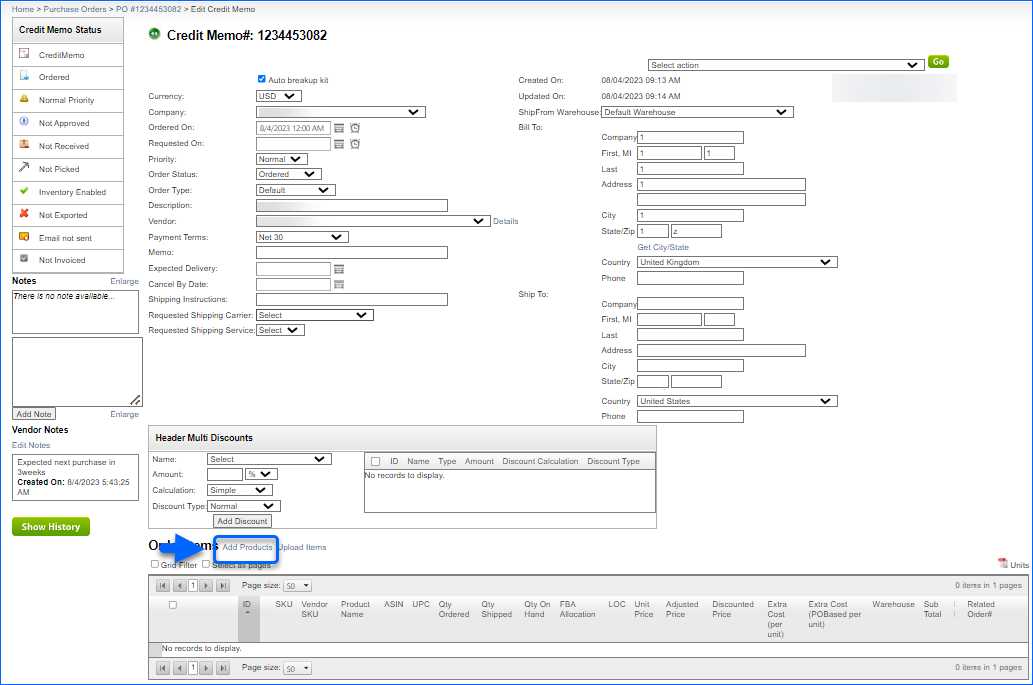
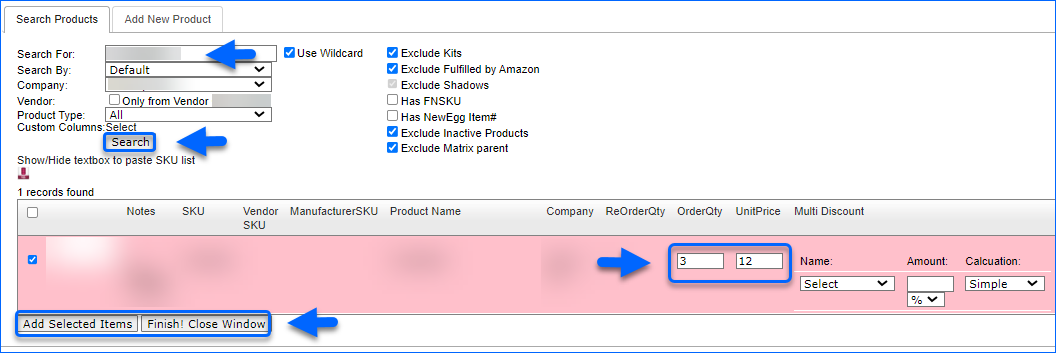
- In the following pop-up, define filters and Search For the desired product.
- Once found, check the product and define return Qty and Unit Price.
- Click Add Selected Items and repeat, if required.
- You can also Add New Product and Show/Hide textbox to paste SKU list.
- Once done, click Finish! Close Window.
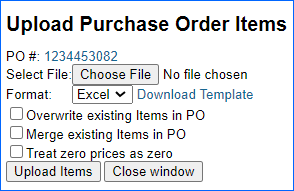
- Alternatively, you can also Upload products in bulk with an import file.

- Verify Bill To and Ship To addresses.
- Click Save.
Create Credit Memo from PO
To issue a Credit Memo from an existing approved and received PO:
- Go to Inventory > Purchasing > Search for the necessary PO and open it
- From the Select action dropdown, choose Create Credit Memo.
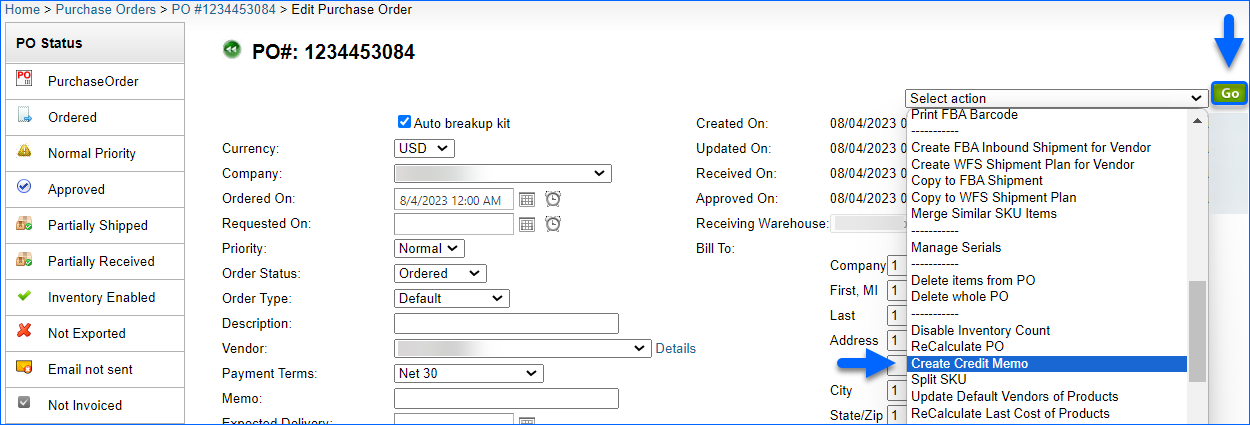
- A successful generation message with a Credit Memo ID link appears on your screen.

- The created Credit Memo is for all products covered by the respective PO. If required, open the Memo and adjust the Qty Ordered and Unit Price of the returned items.
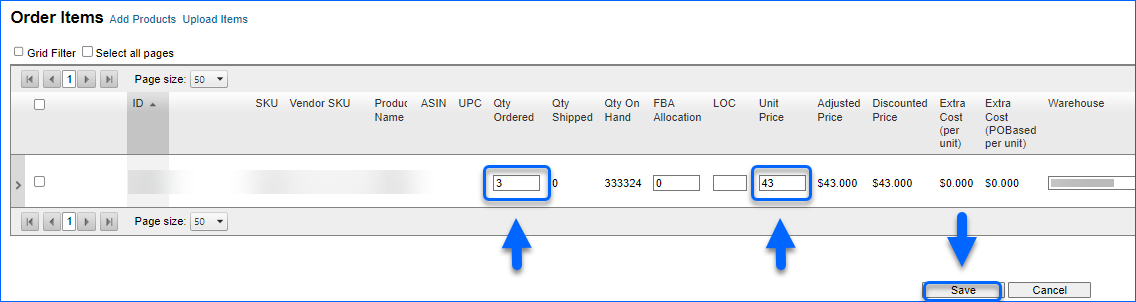
- Click Save. Products Inventory will be updated shortly.
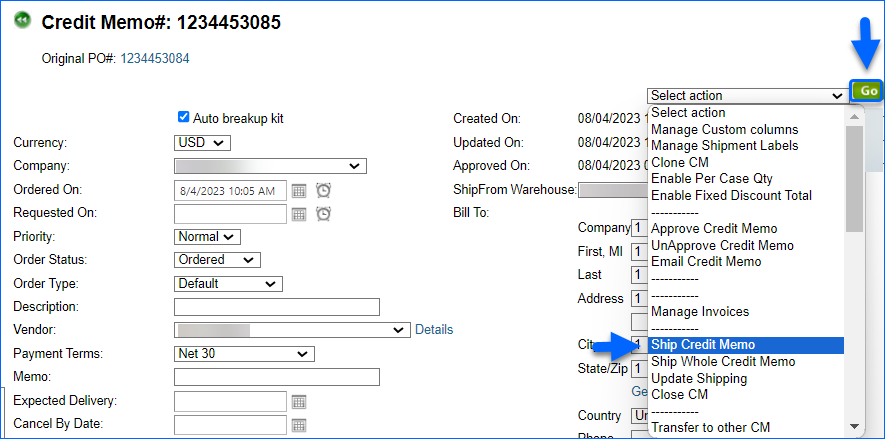
Ship Credit Memo
With Sellercloud’s Ship Credit Memo action, you can send a Vendor a custom Credit Memo:
- Go to Inventory > Purchasing > Filter the PO Type by the Credit Memo to limit the list.
- Select the appropriate memo.
- From the Select action dropdown, choose Ship Credit Memo, to define the memo’s scope. Alternatively, select action Ship Whole Credit Memo to send a memo for the whole PO.
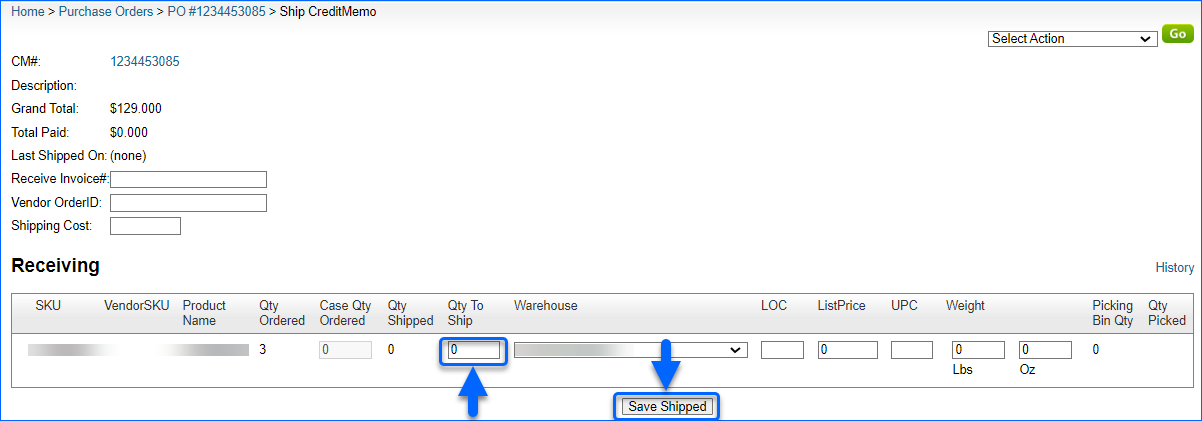
- Fill in Qty to Ship to determine the number of products to return. Populate all necessary fields, and click Saved Shipped.
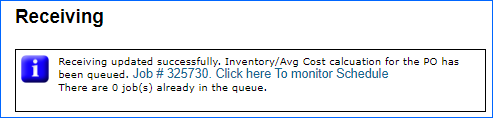
- You generated:
- A Queued job, which can be reviewed on your Manage Queued Job page. Once its status is Completed, product’s Inventory and PO’s Average Cost calculations will be updated.
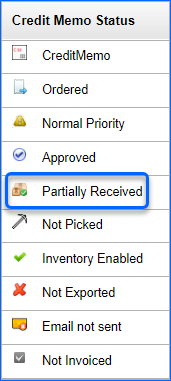
- A Receiving session, which contains shipped memo details. From the Credit Memo Status panel click on Partially Received/Fully Received, to find a list of memo’s Receivings.
- A Queued job, which can be reviewed on your Manage Queued Job page. Once its status is Completed, product’s Inventory and PO’s Average Cost calculations will be updated.
Manage Shipment Labels
Sellercloud allows you to Manage Shipment Labels for received/picked Credit Memo Products without a Shibridge order, so they can be labeled and shipped back to their respective Vendor.
Create Shipment Labels
To create a Credit Memo Shipment Label:
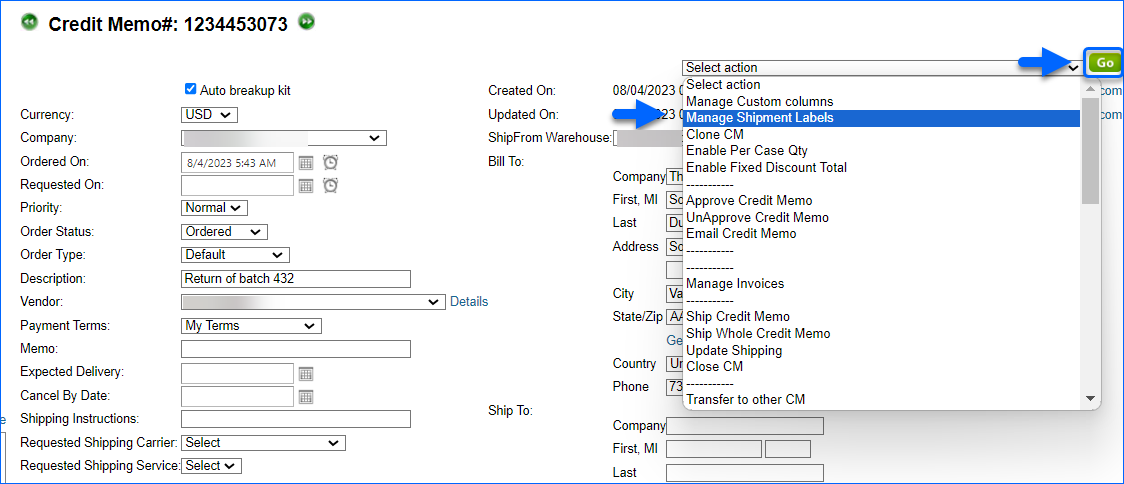
- Navigate to Inventory > Purchasing > Search and open the required Credit Memo.
- From the Select actions dropdown, pick Manage Shipment Labels and click Go.
- Click Create New Label.

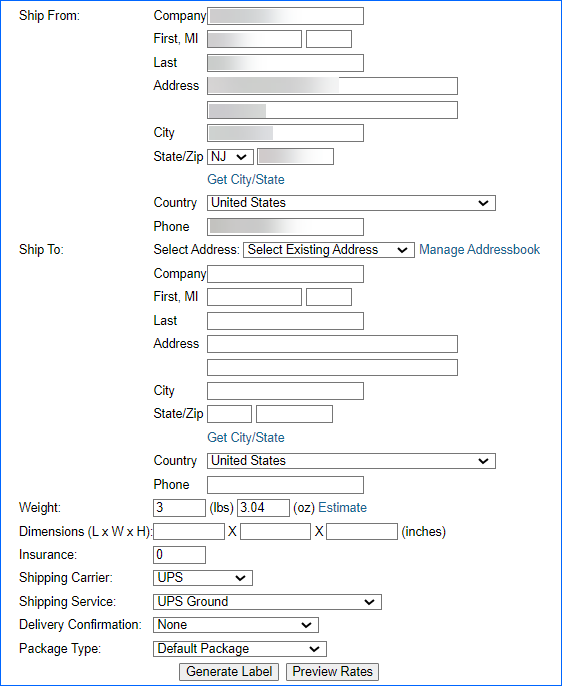
- Fill in the Ship From information to define the location from which the Credit Memo Products will be collected.
- Populate the Ship To details to indicate the Vendor location to which you are intending to return the Credit Memo Products. Alternatively, click on the Manage Addressbook hyperlink to choose, or create an Address Book entry for the Vendor.
- Complete the following shipping specifics:
- Weight (lbs) (oz) of the returned products package. Click Estimate to automatically calculate the total weight of the package.
- Dimensions (L x W x H) of the shipped package.
- Insurance – Determine shipping insurance.
- Shipping Carrier – Select a shipping provider.
- Shipping Service – Choose a Shipping Carrier service from the dropdown menu.
- Delivery Confirmation – Pick a method of delivery verification (None, Signature Required, or Adult Signature Required).
- Package Type – Select a shipping package type from the dropdown menu.
- Select Preview Rates to inspect the drafted shipping label details.
To successfully Preview Rates when generating a shipping label, you must have valid carrier credentials configured on the Shipping API page of your company.
- Click Generate Label to complete the label creation.
- Shipping label(s) generated successfully message should appear on the top of the page. In case of unsuccessful label generation, you will receive a fail message with error details.

- Select Click here to download hyperlink to review the created label in your Existing Labels. You can choose a label file type to download – pdf, JPG, for thermal printer. You also have the options to Download API Requests and Responses, sent to and received from the shipping carrier for troubleshooting purposes.

Void Shipment Labels
If deemed necessary, you can annul a Credit Memo’s Shipment Label:
- Navigate to the Credit Memo Existing Labels list and check the required label box.
- Pick Action Void Label and click Go.
- Selected labels voided message appears, and the Status of the label is Void.
