Overview
Sellercloud’s Home Depot Account Integration enables you to manage your Home Depot orders directly from your Sellercloud account. It allows you to download orders, update their fulfillment status, customize shipping methods, and more.
To explore other related topics, refer to our Home Depot Category.
Automate Order Download and Tracking Upload
You can automate the process of order download and tracking upload by following the steps below:
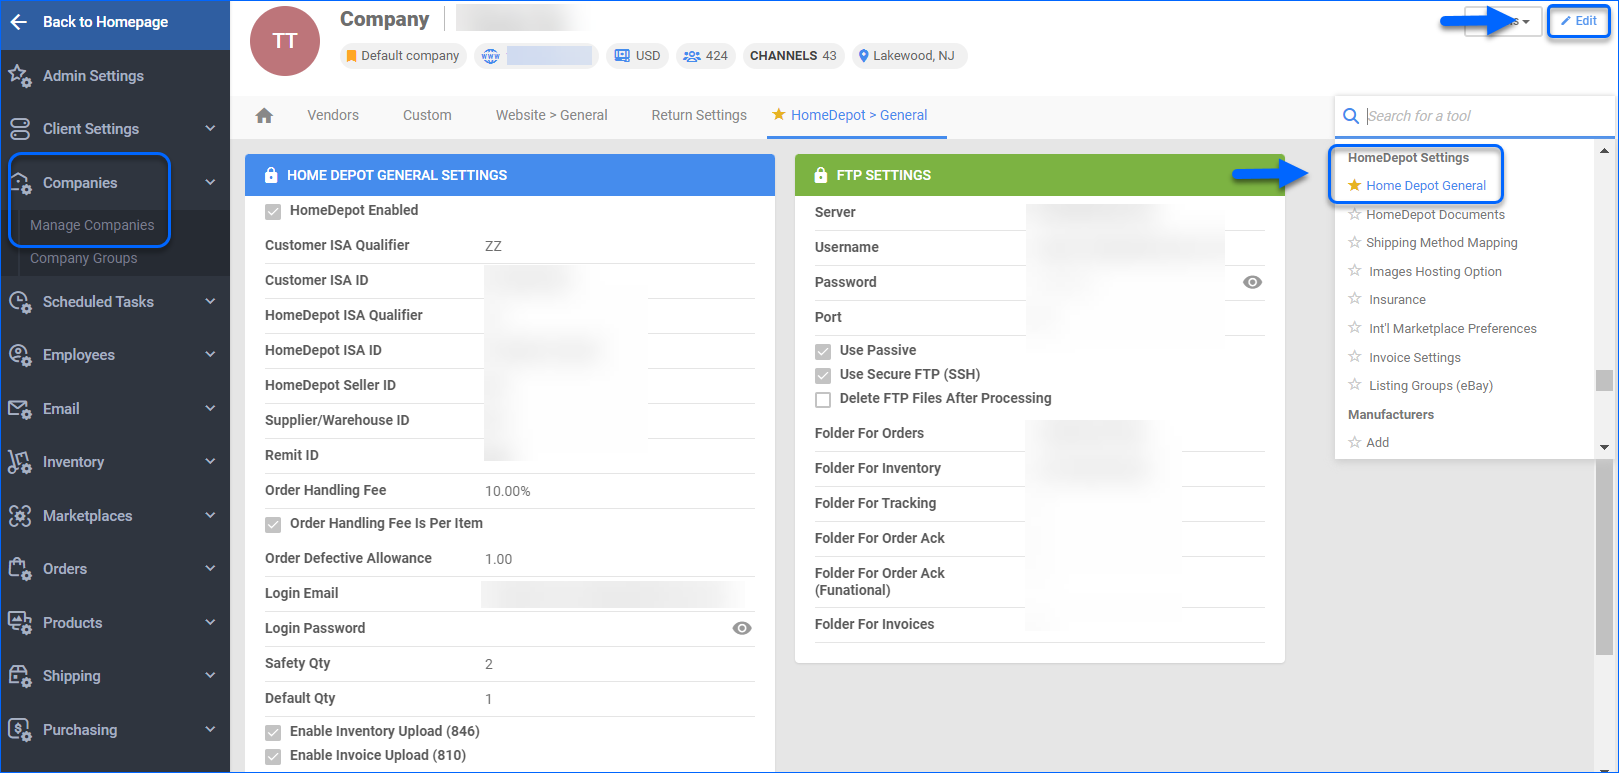
- Navigate to Settings > Companies > Manage Companies and select a company.
- From the Toolbox, choose Home Depot > Home Depot General.
- Click Edit.
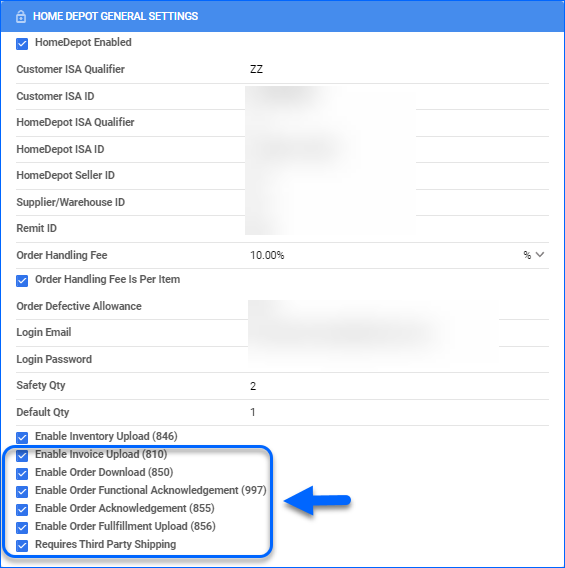
- Select the Enable Order Download and the Enable Order Fulfillment Upload checkboxes. Orders will be imported into Sellercloud approximately every 30 minutes.
- The tracking information and ship dates will automatically be sent to update the orders’ status on the channel in the next feed.
 You can apply state-specific taxes to your Home Depot Canada orders. To do this, the Enable Origin based State Tax (For Homedepot Canada Only) setting in the Home Depot General Settings page must be enabled, and your company’s Tax Rates Per Channel settings for Home Depot Canada must also be configured.
Additional Settings
- Enable Order Functional Acknowledgement (997) – Informs Home Depot that the order file has been received.
- Enable Order Acknowledgement (855) – Informs Home Depot that the orders have been accepted and are being processed.
- Requires Third Party Shipping – Enforces the use of a 3rd party account for Home Depot orders.
- Enable Invoice Upload (810) – Enables automatic invoice upload for each shipped order from your Sellercloud account to Home Depot.
Shipping Method Mapping
Sellercloud’s Shipping Method Mapping tool enables you to easily customize and map shipping methods for each channel you are integrated with. When orders are downloaded into Sellercloud, the shipping method chosen by the customer will also be imported.
To adjust a shipping method for Home Depot orders:
- Navigate to Settings > Companies > Manage Companies and select the required company.
- From the Toolbox, choose Home Depot > Shipping Method Mapping.
- Click Edit.
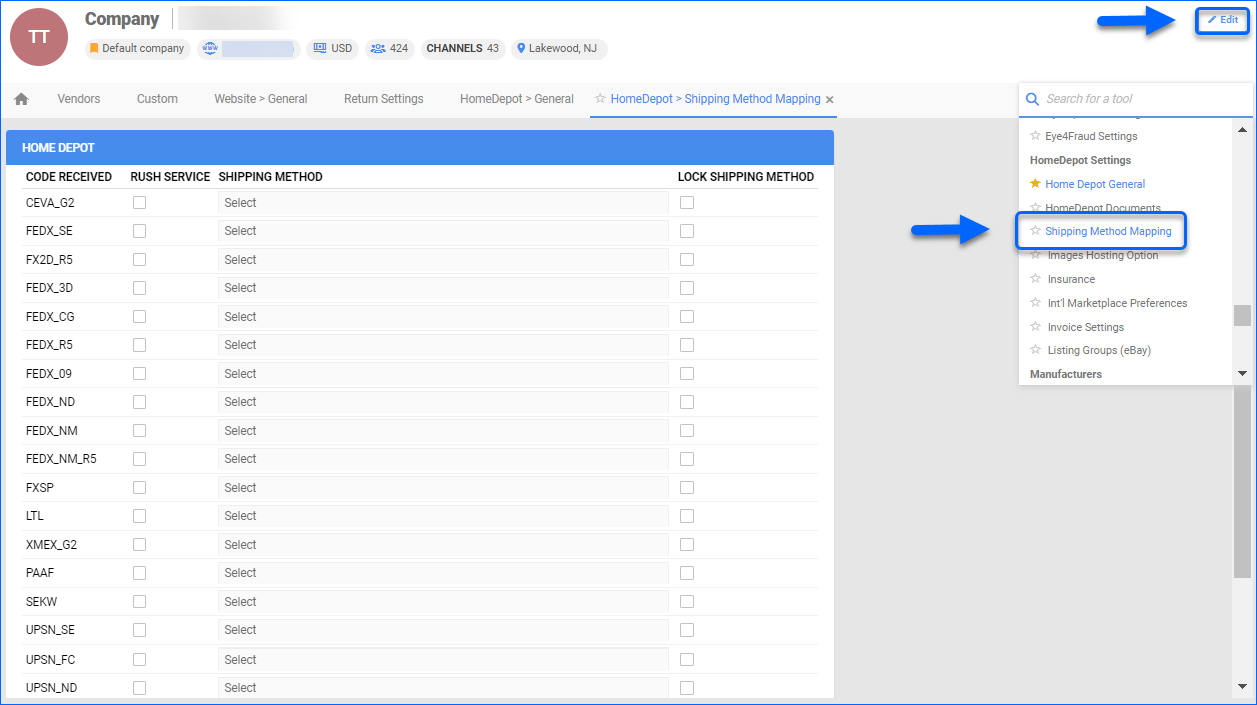
- Select the requested shipping method for each Home Depot method line. Enable Lock Shipping Method to map it to the service selected on the order.
- Alternatively, indicate if the selected method is intended for Rush Orders.
- Click Save.
Manage Home Depot Orders
You can cancel a Home Depot order before it is Ship Confirmed. If the order status is already Ship Confirmed, you must issue a refund. If the item is being returned to your warehouse, use the RMA process to manage the order return correctly.
Cancel a Home Depot Order
To cancel a Home Depot order:
- Navigate to Orders > Manage Orders and select the desired order.
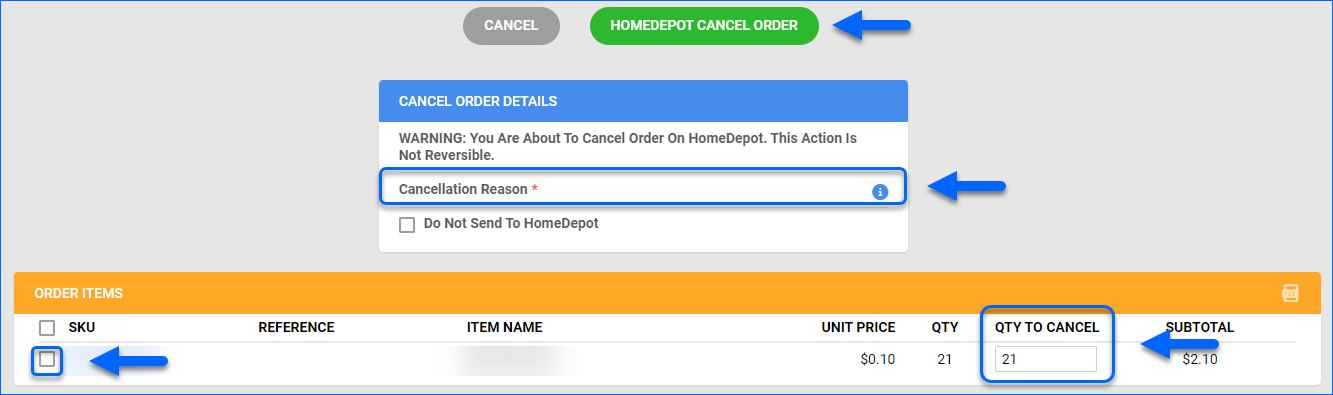
- Click Actions and select Cancel Order.

- Add a Cancellation Reason. If you wish to cancel the order only in Sellercloud, mark the Do Not Send To HomeDepot checkbox.
- Check the desired SKU and the respective Qty to Cancel.
- Click HomeDepot Cancel Order button.
Alternatively, if you have already processed the cancellation directly through Home Depot and want to reflect that internally:
- Navigate to Orders > Manage Orders and select the desired order.
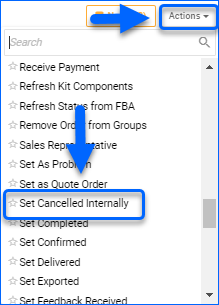
- Click Actions and select Set Cancelled Internally.
Refund a Home Depot Order
You can issue refunds locally in Sellercloud to keep your Order Profit & Loss information correct. If you wish to reflect the refund internally in Sellercloud, you have two possible scenarios:
- The order is Unshipped – in this case, you can issue a refund directly through the order.
- The order is Shipped and will be returned – in this case, the correct workflow would be to use the RMA process.
To issue a refund in Sellercloud, follow the steps below.
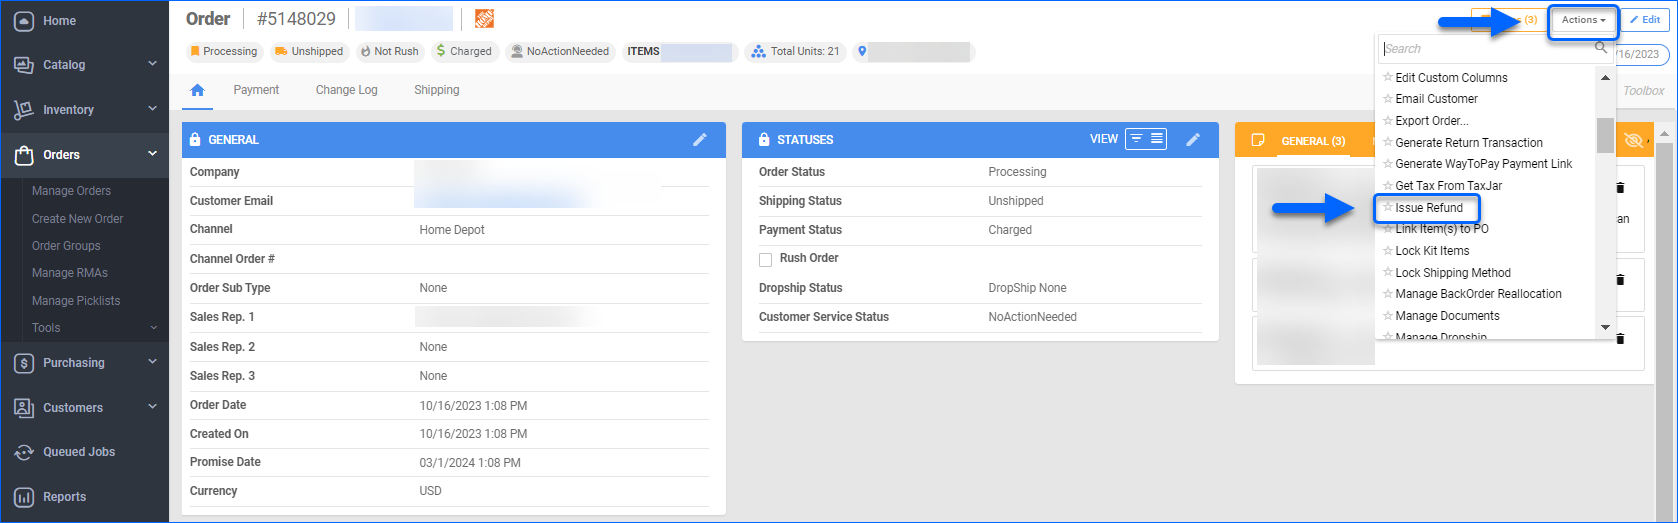
- Navigate to Orders > Manage Orders and open an order.
- Click Actions and select Issue a Refund.
- Fill out the Refund details:
- Amount to Refund – Total amount to be reimbursed in USD.
- Refund Date – Transaction date.
- Refund Method – Means of the refund.
- Notes – Additional information to be recorded for the refund.
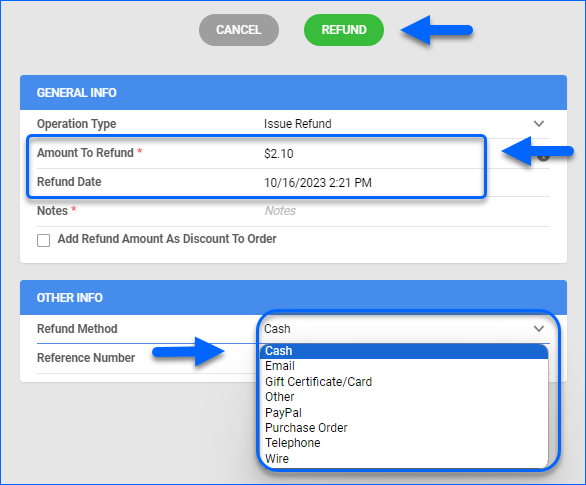
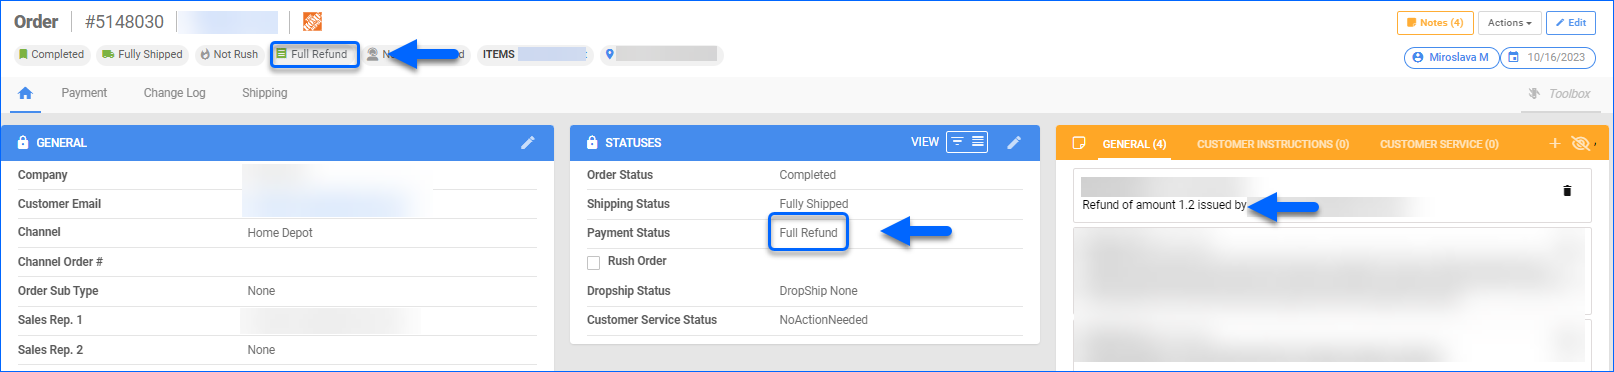
- Click the Refund button to proceed.
- Once processed, the relevant note will appear on the Order under the Notes panel, and the order status will be changed to Full Refund in Sellercloud.
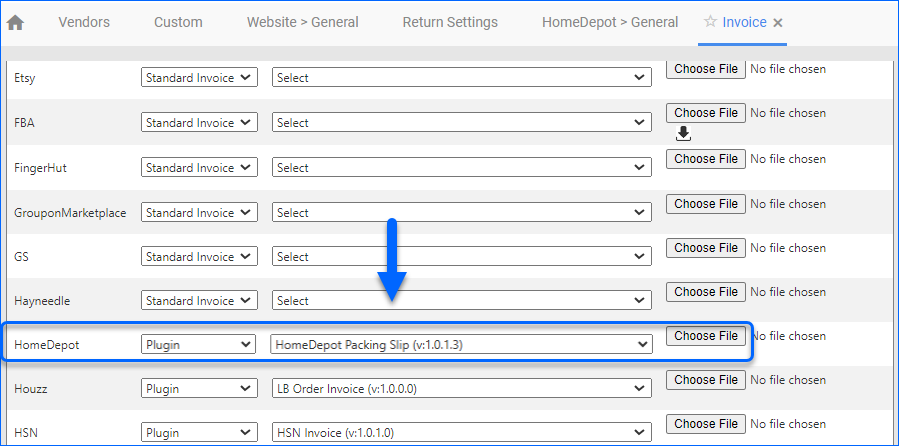
Configure PDF Invoices
With the HomeDepot Packing Slip plugin set up under your designated company, you can print PDF Invoices with information about your Home Depot orders and the products they include through Sellercloud or Shipbridge.
To set up the invoice plugin:
- Go to the Company Settings of the company you created for the integration.
- Click Toolbox and select Invoice Settings.
- Click Per Channel Preferences.
- For Home Depot, select Plugin > HomeDepot Packing Slip.
- Click Save.