Overview
OpenSky is an online marketplace that connects consumers with a wide range of products and sellers. You sell under your own name through virtual storefronts, complete with a branded banner and company description. The platform offers a diverse selection of items, including clothing, electronics, home decor, jewelry, beauty products, and more.
Integrating your Sellercloud account with OpenSky allows you to update the inventory levels of your listings, manage your OpenSky orders, and more. The document exchange goes through MoreCommerce and works through EDI documents, transmitting information between the two services. The integration supports:
- Exporting product inventory and pricing to OpenSky
- Importing orders from OpenSky
- Exporting tracking information to OpenSky
If necessary, you can contact Sellercloud Support to request additional customizations or other plugins for this integration. Any such modification will be billable.
Prerequisites
Before you can integrate OpenSky with Sellercloud, complete the following requirements.
You must contact OpenSky to become an approved seller and obtain your FTP details: Server Name, Username, and Password. You will need them when setting up the scheduled tasks to automate the plugins.
You must also contact Sellercloud Support and request:
- To install the OpenSky plugins on your server.
- The following Custom Product Columns:
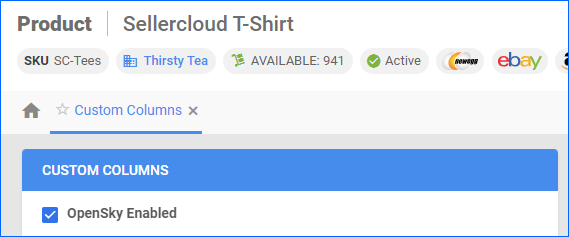
- OpenSky_Enabled – Optional column used to enable only specific products for OpenSky. Set to True for any products you want to send with the Inventory Export plugin.
- OPENSKY_SAFETYQTY – Used for the OpenSky Safety Quantity.
- GROUPITEMID
Order Import
This plugin imports OpenSky order data from a .csv file to Sellercloud via FTP. On import, the orders in Sellercloud will be processed as follows:
- The Payment Status is set to Charged
- The Channel is set to Local Store
- The Customer Email is set to [email protected]
Automate Order Import
To create a Scheduled Task that imports orders:
- Navigate to Settings > Scheduled Tasks > Manage Scheduled Tasks.
- Click the green + icon: Create New Scheduled Task.
- Complete as follows:
- Click Task Type and select Import Orders.
- Set the Task Name.
- Select the Company.
- Select the Start Time.
- Click CREATE.
- The following message appears at the bottom of your screen: “Scheduled task created successfully. Click Here to configure the task details.” – click the link.
- Click the Edit button on the top right.
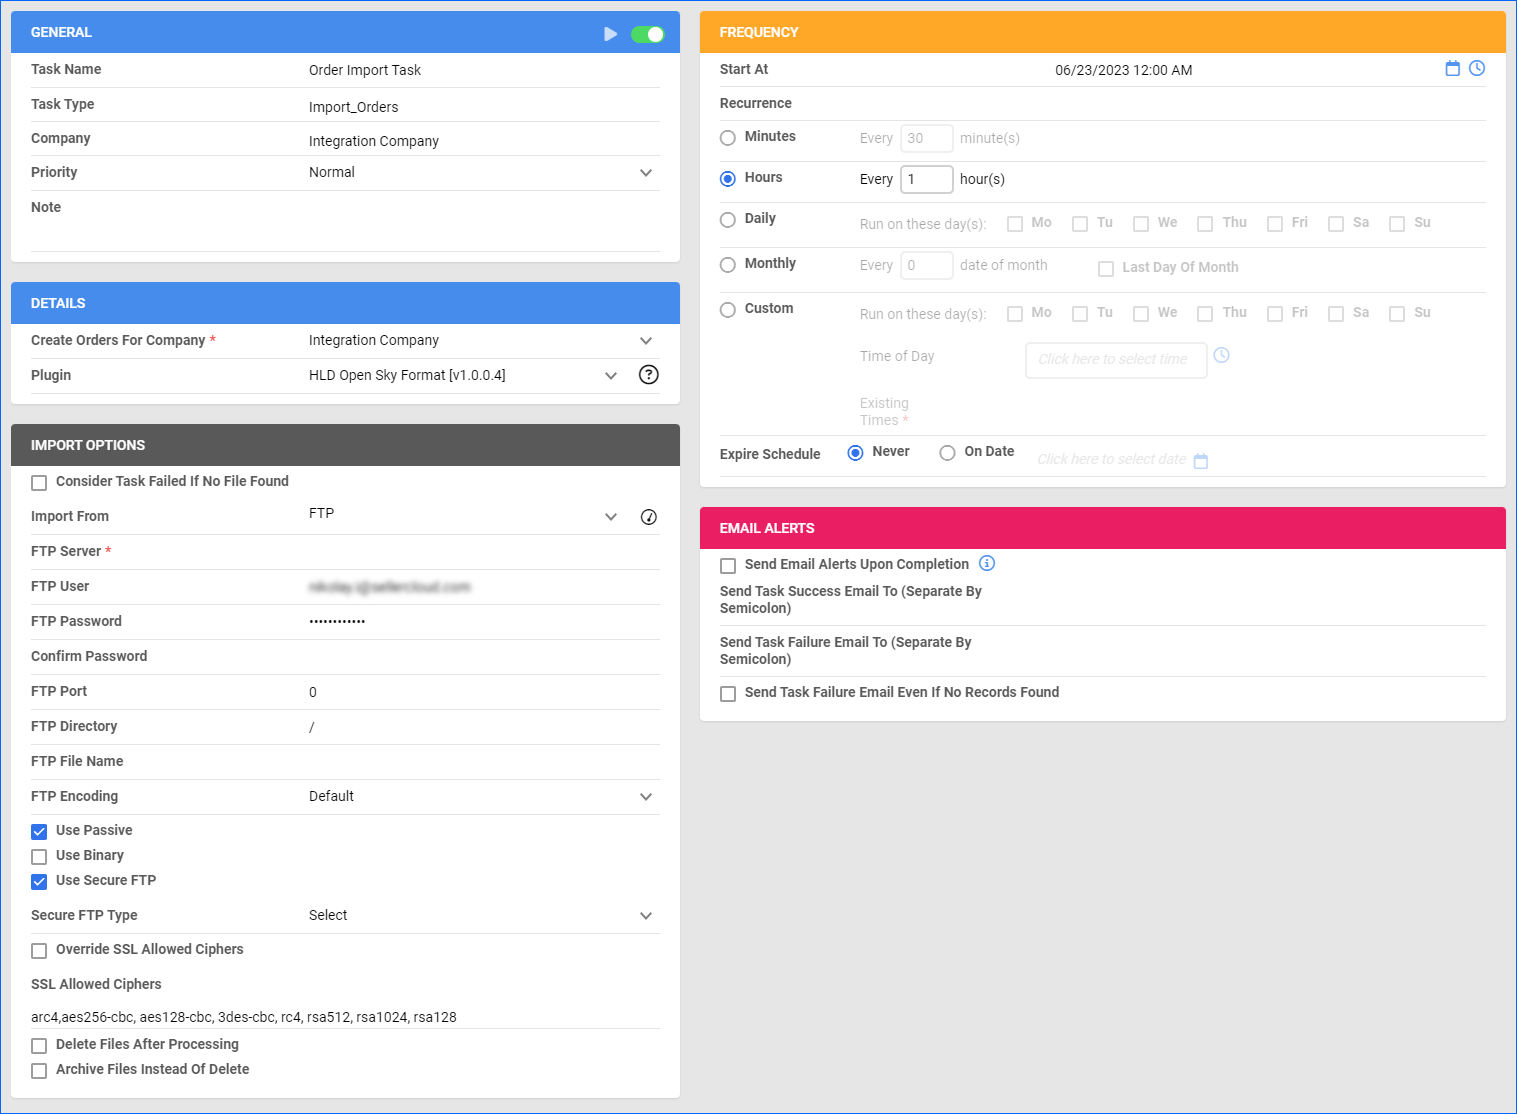
- In the Details section:
- Click Create Orders For Company and select the company designated for this integration.
- Click the Plugin menu and select Open Sky Format.
- In the Import Options section, set Import From to FTP and fill out the FTP fields. Make sure to check Use Passive and Use Secure FTP.
- In the Frequency section, specify the task frequency. For optimal performance, select a range between thirty minutes and one hour.
- In the General section, click the Enable button.
- Click Save on the top right.
Tracking Export
This plugin exports tracking from Sellercloud to OpenSky.
Before you move on, create a Saved Search for orders filtered by:
- Company – The company you created for the integration
- Shipping Status – FullyShipped
- Exported – Not Exported
Automate Tracking Export
To create a Scheduled Task that exports order tracking:
- Navigate to Settings > Scheduled Tasks > Manage Scheduled Tasks.
- Click the green + icon: Create New Scheduled Task.
- Complete as follows:
- Click Task Type and select Export Orders.
- Set the Task Name.
- Select the Company.
- Select the Start Time.
- Click CREATE.
- The following message appears at the bottom of your screen: “Scheduled task created successfully. Click Here to configure the task details.” – click the link.
- Click the Edit button on the top right.
- In the Details section:
- Click the User ID menu and select your ID.
- Click the Saved Search menu and select the saved search you created earlier.
- Click the Export Via menu and select Open Sky Tracking Export.
- Check Mark Orders As Exported.
- Check This Is Tracking Export.
- In the Export Options section, set Export To to FTP and fill out the FTP fields. Make sure to check Use Passive and Use Secure FTP.
- In the Frequency section, specify the task frequency. For optimal performance, select a range between thirty minutes and one hour.
- In the General section, click the Enable toggle button.
- Click Save on the top right.
Inventory Export
This plugin exports inventory from Sellercloud to OpenSky in a .csv file via FTP. The plugin exports the following information:
- ItemID – The Sellercloud SKU
- GroupItemId – The value of the custom product column
- Product/Configuration Title – The product name
- Quantity – The product Aggregate Qty – Safety Qty (from the custom product column)
- Price – The product site price
The GroupItemID and Safety Qty use custom product columns named OYGROUPITEMID and OPENSKY_SAFETYQTY, respectively.
Optionally, you can enable only specific products for OpenSky by setting their OpenSky_Enabled Custom Column for Products to True:
- For one product at a time: go to the Product Details Page > click Toolbox and select Custom Columns > click Edit, update the OpenSky_Enabled column, and Save.
- For multiple products in bulk: follow the steps to Bulk Update Products and use the OpenSky_Enabled column – set it to True for all products you want to enable.
Unlike core integrations, plugin integrations don’t require products to be in the company with the scheduled tasks. The export will include the products you select with your Saved Search.
Next, create a Saved Search for products filtered by OpenSky_Enabled – True. Optionally, you can add more filters to the search to narrow down the export further.
Automate Inventory Export
To create a Scheduled Task that exports inventory:
- Navigate to Settings > Scheduled Tasks > Manage Scheduled Tasks.
- Click the green + icon: Create New Scheduled Task.
- Complete as follows:
- Click Task Type and select Export Products.
- Set the Task Name.
- Select the Company.
- Select the Start Time.
- Click CREATE.
- The following message appears at the bottom of your screen: “Scheduled task created successfully. Click Here to configure the task details.” – click the link.
- Click the Edit button on the top right.
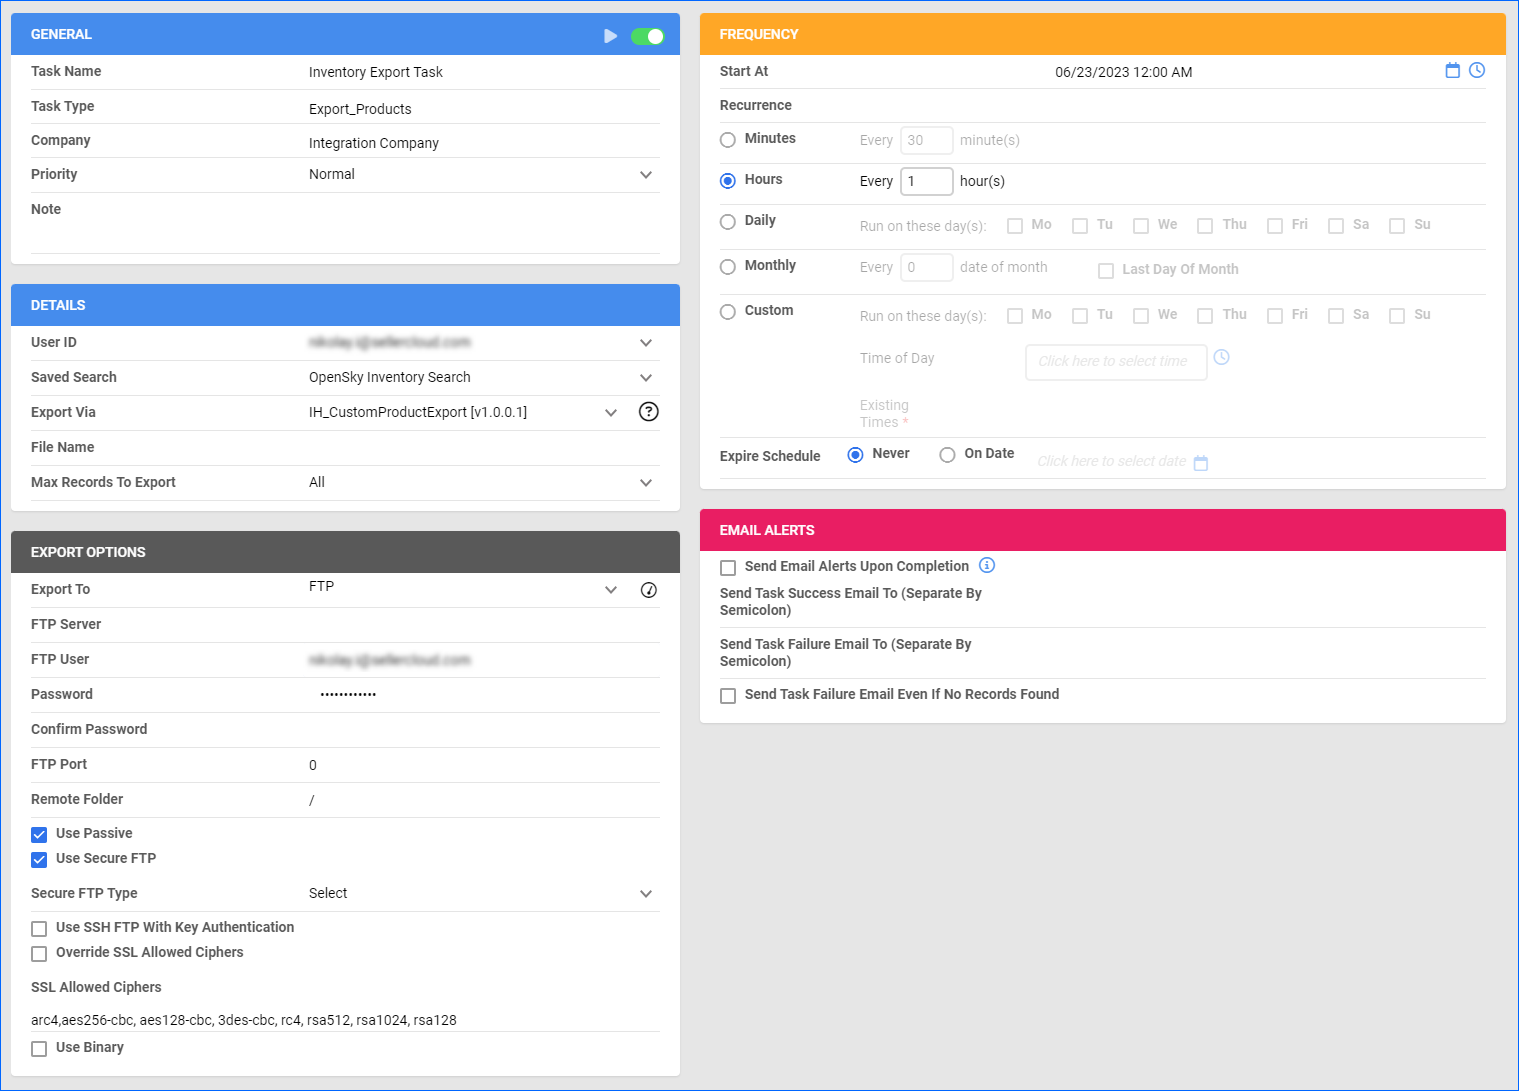
- In the Details section:
- Click the User ID menu and select your ID.
- Click the Saved Search menu and select the saved search you created earlier.
- Click the Export Via menu and select CustomProductExport.
- In the Export Options section, set Export To to FTP and fill out the FTP fields. Make sure to check Use Passive and Use Secure FTP.
- In the Frequency section, specify the task frequency. For optimal performance, select a range between thirty minutes and one hour.
- In the General section, click the Enable toggle button.
- Click Save on the top right.


