Overview
Shein is a global fashion and lifestyle e-commerce platform known for its wide reach, trend-driven inventory, and strong appeal among younger consumers. With millions of active users worldwide, Shein offers a powerful opportunity for sellers to tap into a fast-paced marketplace focused on affordable products.
Integrating Shein with Sellercloud allows you to manage your orders and listings through a core-integrated website cart plugin that transmits information via API between the two platforms.
Prerequisites
Before you can integrate Shein with Sellercloud, you must complete the following requirements:
- Obtain your API Credentials from Shein.
- Open a ticket with Sellercloud Support to install the latest version of the Shein – Website Cart Plugin on your server.
- Create Custom Product Column:
- SheinSkcName – the data type should be String. This is one of Shein’s product IDs. The custom column in Sellercloud is populated by the Active Listings Import.
To establish the connection correctly, you must perform the steps in the following order:
- Configure your API Credentials in the designated company and click Test Settings.
- Map your Sellercloud SKUs to existing listings.
- Then, you can proceed with enabling the integration settings and updating listings.
Shein Account Integration
To Integrate Shein with Sellercloud:
- Go to Company Settings.
- From the Toolbox > click Website > General.
- Click Edit and select:
- Store Type: Custom
- Store Plugin: Shein – Website Cart Plugin.
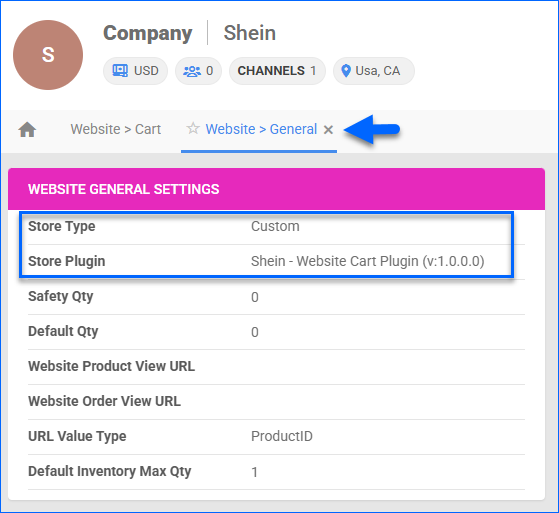
- Click Save and refresh the page to ensure the changes have been applied.
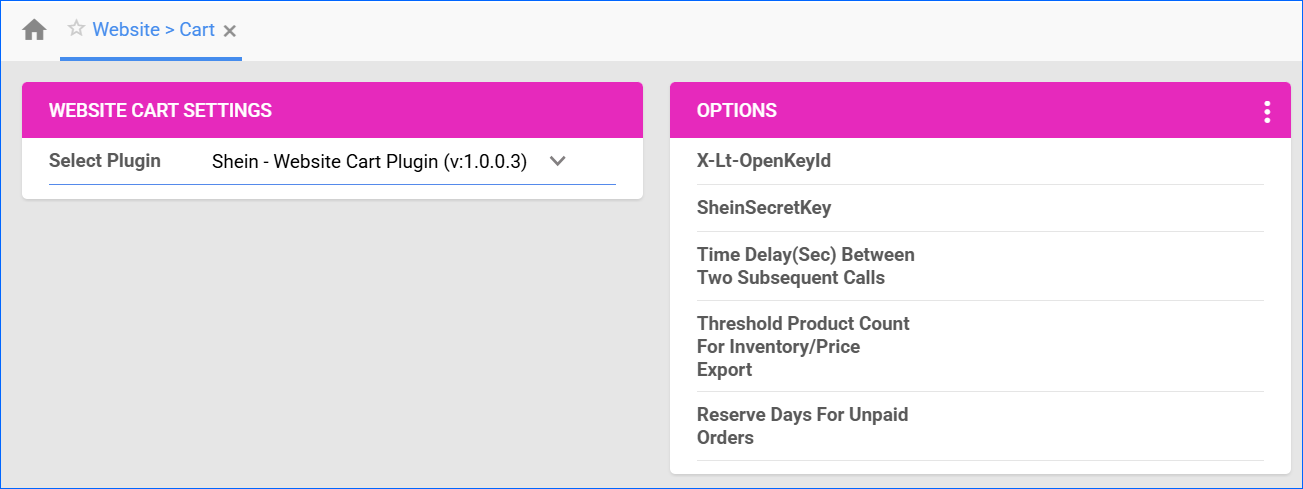
- Then, open the Toolbox and navigate to Website Cart > General settings.
- The Shein plugin should be pre-selected in the Website Cart Settings panel.
- Then, go to https://connect.sellercloud.com/shein. Fill in your team name and the ID of the company you are using for the integration. On the next page, log in to your Shein account to generate your API credentials.
- Back on the Website Cart Settings page in Sellercloud, click Edit and fill in the x-lt-openKeyId and SheinSecretKey you generated in the previous step.
- Click Save.
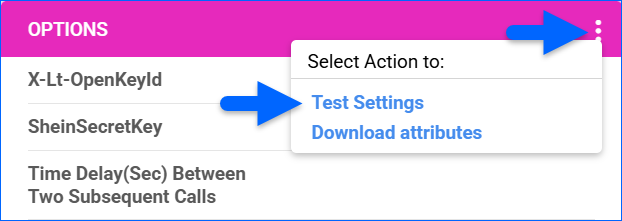
- In the Options panel, click the three-dots menu > Test Settings.
Webhooks
Webhooks are a tool for retrieving data based on certain events and are commonly used to retrieve order and product data. There are 3 webhooks you used by this integration:
- Product Audit Status – Allows Sellercloud to retrieve the product status from Shein and set it in the SheinAuditStatus custom column of your SKUs.
- Order Push Notice – Allows Sellercloud to retrieve new orders from Shein. Only Unshipped orders will be imported.
- Return Order Push Notice – Allows Sellercloud to retrieve Returns (RMAs) from Shein for shipped orders.
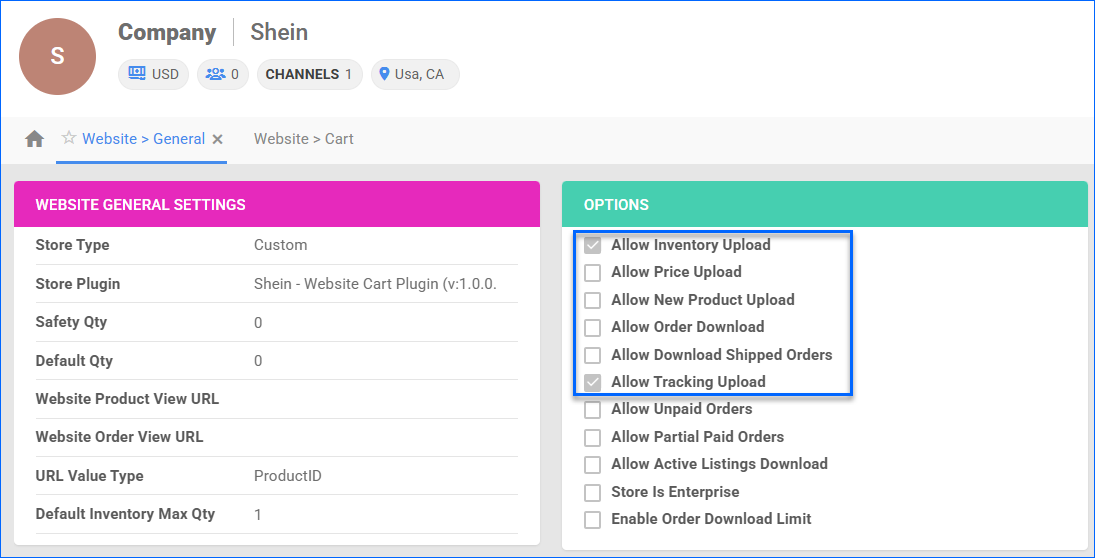
Configure Integration Options
By automating key processes and customizing your workflow, you can not only save valuable time but also enhance overall efficiency. To open the Shein General Settings:
- Go to Company Settings.
- Open the Toolbox and select Website > General.
- Click Edit and enable:
- Allow Inventory Upload – enables Sellercloud to send automatic updates for the inventory of Shein products regularly.
- Allow Price Upload – enabled Sellercloud to send automatic updates for the pricing of Shein-enabled products.
- Allow Tracking Upload – enables Sellercloud to automatically upload shipping and tracking for orders on Shein.
Orders Overview
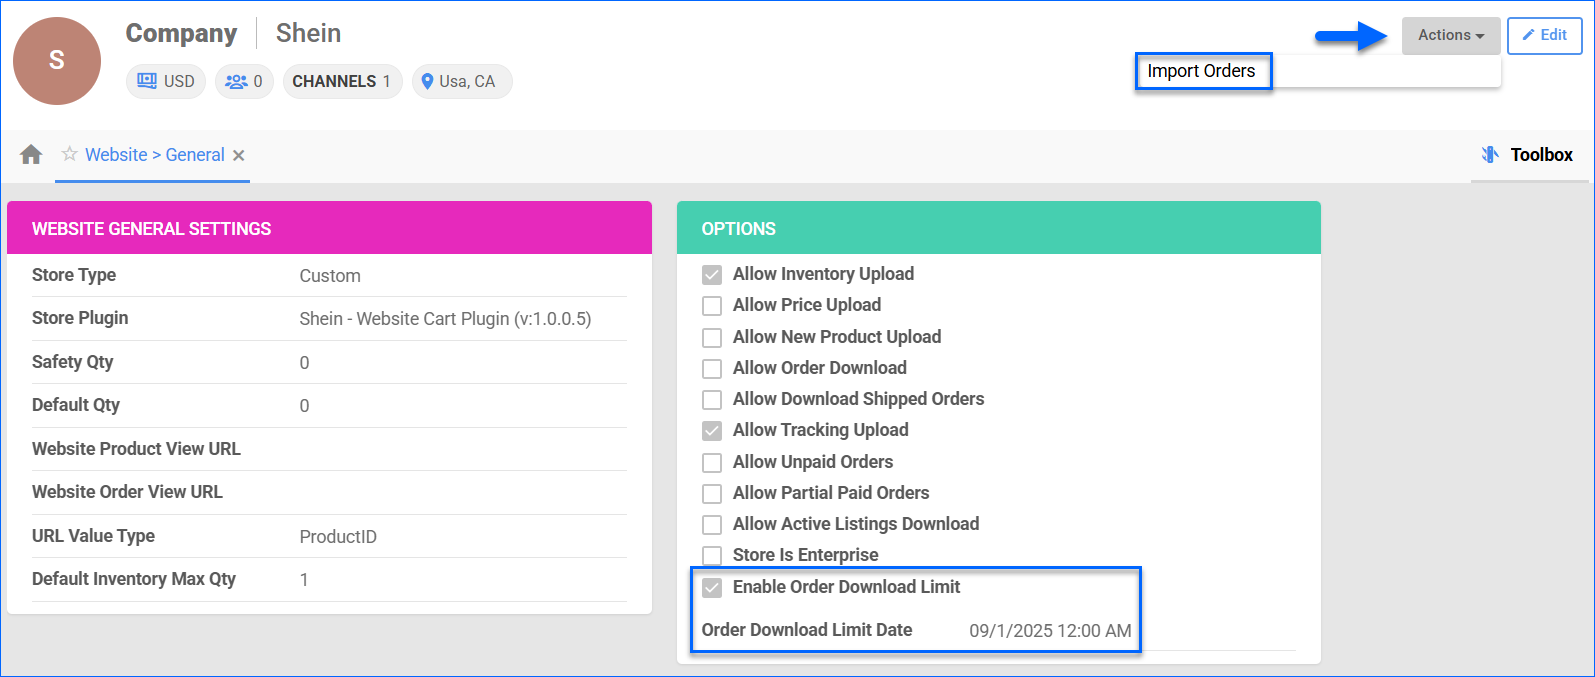
The Shein – Website Cart Plugin imports recent orders via the Order Push Notice webhook. When you are initially setting up the integration, we recommend manually importing all of your open orders to ensure none are missed. To do that:
- Go to Company Settings.
- From the Toolbox, click Website > General.
- Click Actions > Import Orders. This will generate a queued job, and we will import all your open orders going back 2 days.
 With the Shein Integration, each unit within a sales order is imported as a separate line item because Shein assigns a unique Goods ID to each one. For example, if the customer has purchased 3 units of SKU A, the order will contain three separate line items for the same product with a quantity of 1 for each.
When a new order comes in from Shein, the plugin tries to match the order items by their Website Product Variant ID. You can find this field on the Website Properties page in Sellercloud. Before you start importing orders, you must ensure you have mapped all your Shein listings to local Sellercloud SKUs either manually or via a Bulk Product Update. If the plugin cannot find a match for the order item in your catalog, the order will be created with an Unknown Product.
Tracking Export
The Shein integration supports sending multiple tracking numbers per order. However, you cannot create a Shipping Method Mapping. The plugin will automatically match the received carrier and set it on the order.
RMA Import
The Shein – Website Cart Plugin uses the Return Order Push Notice webhook to import RMAs into Sellercloud. The plugin automatically queries orders that are Fully Shipped on Shein and looks for changes in their status. If the order is returned, it creates an open RMA.
Listings Management
The Shein Account Integration supports automatic inventory and price updates. For this integration, we send the combined inventory of all local sellable warehouses to your default location in Shein.
Map Products
The Shein integration uses several different identifiers for processes, such as tracking export and inventory updates. To ensure everything matches up correctly, you must map your Sellercloud SKUs to your existing Shein listings. To do that:
- Go to the Product Details page.
- From the Toolbox, open the Website Properties page.
- Click Edit.
- In the Website Merchant SKU field, fill in the corresponding sellerSKU from Shein.
- Click Save.
To Bulk Update multiple products, use the column header WebsiteMerchantSKU.
Once you have the sellerSKU mapped, the plugin will automatically import the rest of the necessary identifiers, such as the SkcName.
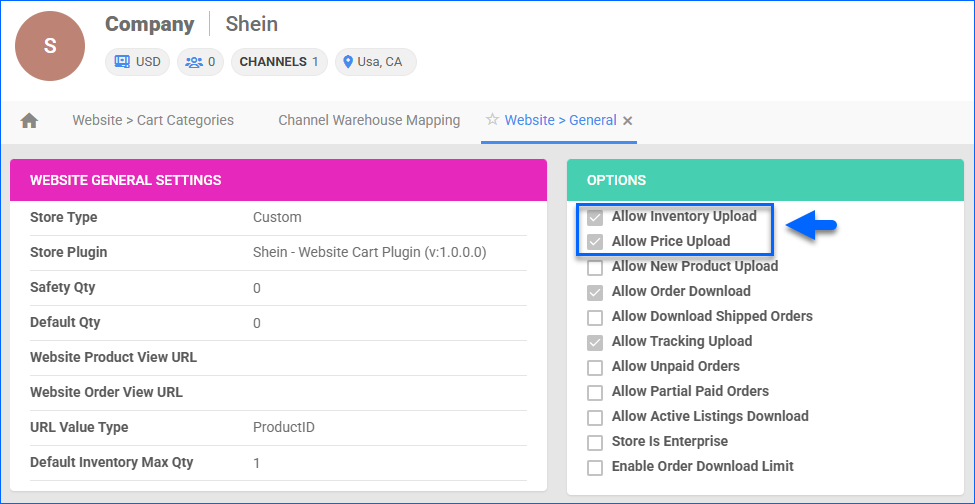
Update Listings
To initiate regular automatic Shein listing updates:
- Go to Company Settings.
- Click Toolbox and select Website General Settings.
- Click Edit.
- In the Options panel, check Allow Inventory Upload and Allow Price Upload.
- Click Save.
To manually update a single Shein listing:
- Go to the Product Details Page.
- Click Toolbox and select Website Properties.
- Click Actions and select:
- Update Inventory to Website
- Update Price to Website

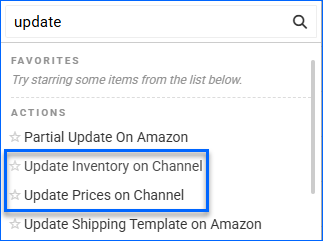
To update Shein listings in bulk:
- Go to Catalog > Manage Catalog.
- Select the products you want to update.
- Click the Actions icon in the bottom-right corner, and select:
- Update Inventory on Channel – Adjust the product’s stock levels on Shein based on the inventory available in Sellercloud.
- Update Prices on Channel – Update the product’s prices on Shein based on the prices set in Sellercloud.