Overview
After you Enable the Walmart Fulfillment Service (WFS) in Sellercloud, your WFS inventory will be imported by regularly downloading a report called Product List WFS Inventory from Walmart. This article shows you how to set up your Sellercloud warehouses correctly, enable products for WFS, view inventory information about active listings, enable kit products, and more.
Warehouse Setup
To configure your Sellercloud warehouses to track WFS inventory:
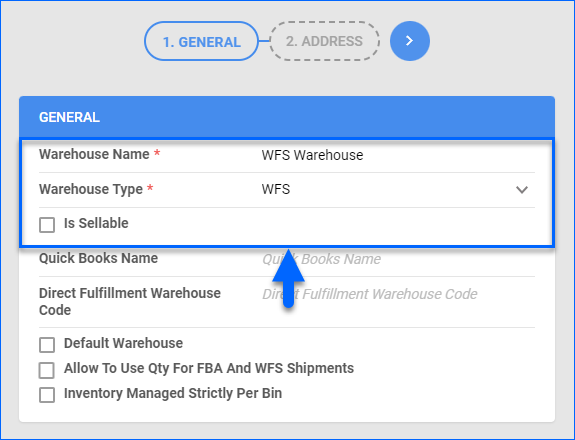
- First, Create a Warehouse in Sellercloud where your WFS inventory will be imported. While creating the warehouse:
- Next, go to the Company Settings of the company you are using to set up WFS, and set the warehouse as the Channel Warehouse for the WFS channel.
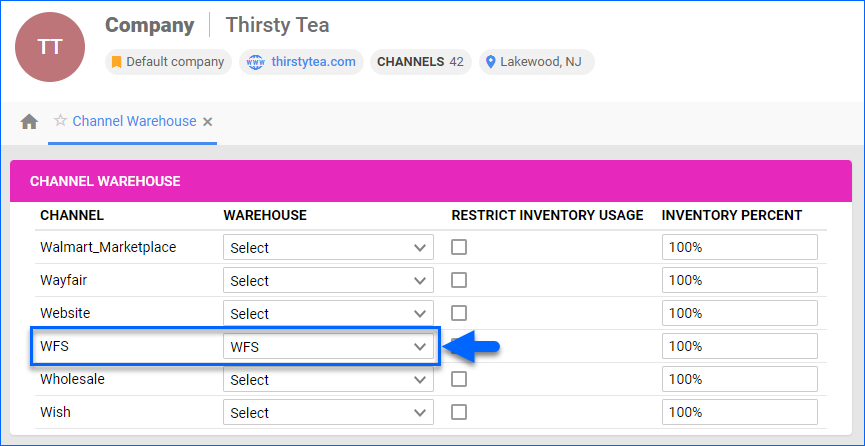 If you have more than one company that is integrated with WFS, create more WFS warehouses and select a Channel Warehouse for each company. Having two WFS integration companies set to the same WFS warehouse will cause the inventory imports to display incorrect data.
 - Finally, you should also set up a default interim warehouse. This is where your Sellercloud inventory will be while it’s physically on its way to the WFS warehouse. For this, go to Client Settings and update the Default WFS Shipment Interim Warehouse setting.

Enable Products for WFS
Now that your warehouse creation and mapping are complete, you can start enabling products for WFS from Sellercloud.
When you are ready, you can start enabling products for WFS individually or in bulk.
Individually
To enable a product on Walmart Marketplace, set it as fulfilled by WFS and update the information on Walmart’s side:
- Go to the Walmart Marketplace Product Properties page.
- Click Edit.
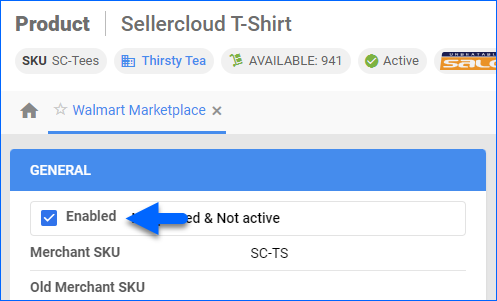
- Check the Enabled box in the General panel.
- Click Save.
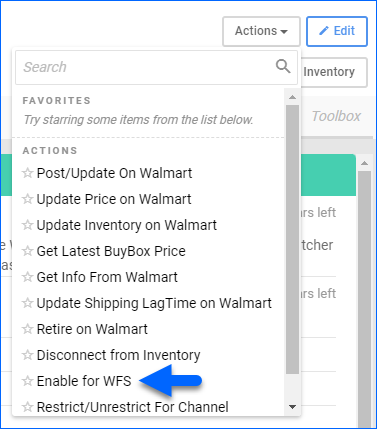
- Click Actions.
- Select Enable for WFS.
- Configure your preferences.
- Check Update On Walmart to push WFS data to Walmart and update the fulfillment status on their side.
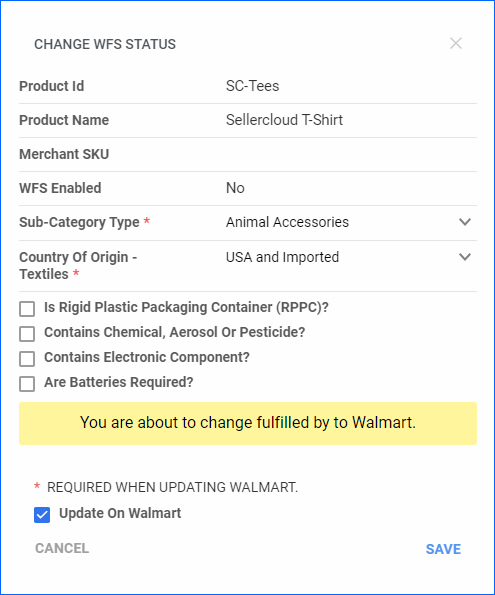
- Click Save.
In Bulk
To bulk-enable products for WFS:
- Go to Catalog > Manage Catalog.
- Click Add filter and add Walmart Marketplace Statuses.
- Find products. To find unenabled products, click the Walmart Marketplace Statuses and set it to Disabled and WFS Disabled.

- Click Search.
- Check the boxes on the left to select products.
- Click the blue Actions icon in the bottom right.
- Select Enable/Disable For Channel..
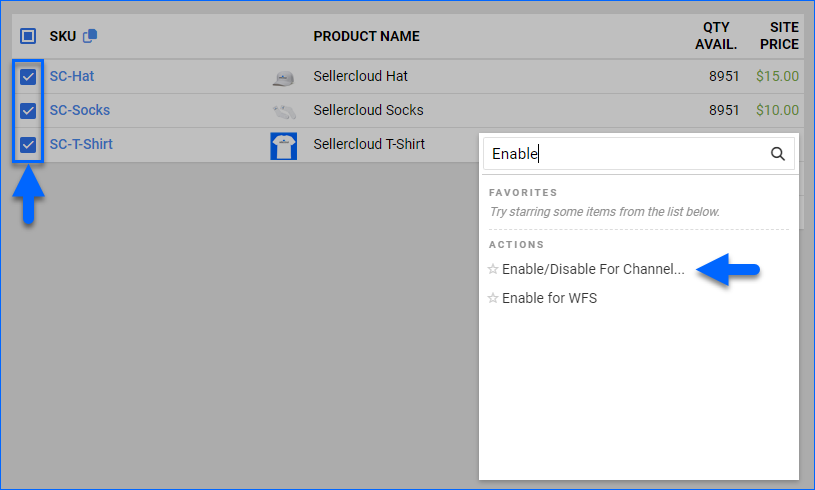
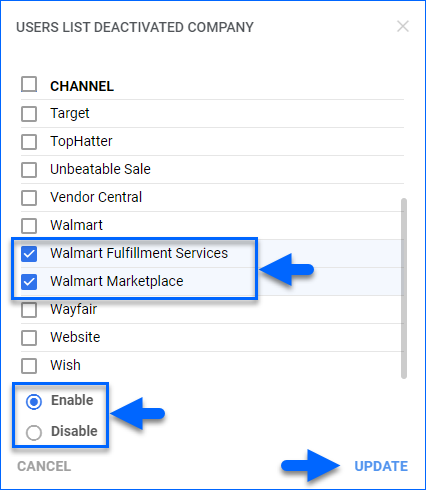
- Select Walmart Fulfillment Services and Walmart Marketplace and click Update.
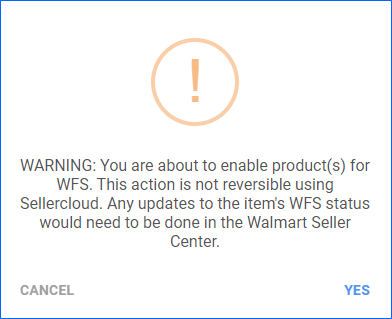
This action doesn’t push any information to Walmart. To update the products as fulfilled by WFS on Walmart’s side, use the Enable for WFS action. - A warning message appears, telling you that this action is not reversible from Sellercloud. To change this status again, you’ll have to use Walmart Seller Center. Click YES.
- A Queued Job will be created. When it finishes, your products’ status will be updated. Click the link on the notification at the bottom of the page to open it.
- Now, to update the products as fulfilled by WFS on Walmart’s side, with the same products selected, use the Enable for WFS action.
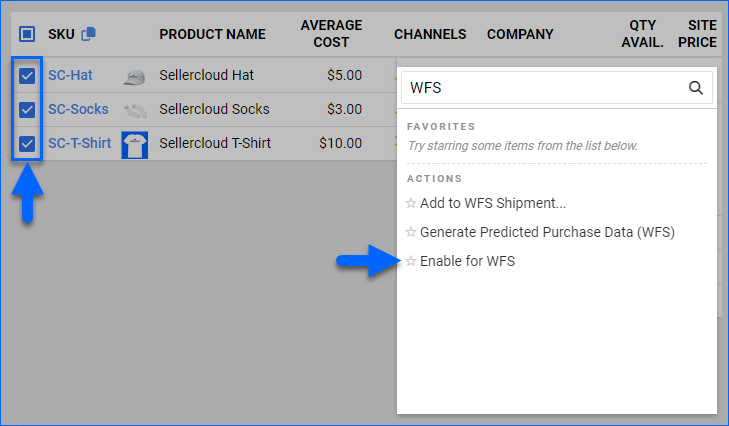
- A warning tells you that you cannot un-enroll an item from WFS, so after proceeding, you can only make any changes to the WFS status of the items on Walmart Seller Center. Click Yes.
- A Queued Job will be created. Click the link on the notification at the bottom of the page to open it.
Kit Products
You should only enable Independent Kit Products for WFS. WFS inventory will not be saved for All Components or Main Component kits.
For such cases, there’s the following workaround:
- Create two kits containing the same components: one Independent and one All Components kit.
- Perform the following actions in the order in which they are presented below. They all take place on the Walmart Marketplace Product Properties page of each kit:
- Add the same Merchant SKU to both kits.
- Enable the Independent Kit for Walmart marketplace – check Enabled and save.
- Enable the Independent Kit for WFS – click Actions and select Enable for WFS. Then configure your preferences and click Save.
- Enable the All Components Kit for Walmart marketplace – check Enabled and save.
- Disconnect the Independent Kit from the Walmart Marketplace inventory – click Actions and select Disconnect from Inventory. If you don’t see this action on the Walmart Marketplace Product Properties page, ensure the Client Setting Allow Disconnect Inventory from Channels is enabled.
- Add the Independent Kit to WFS Shipments.
Because of the built-in WFS prioritization of Independent Kits, the WFS inventory will be imported to the Independent Kit, and WFS orders will select the Independent Kit. However, because the Independent Kit is disconnected from inventory, Sellercloud will not upload its quantities to Walmart Marketplace – it will only upload the All Component Kit quantities.
Discrepancies Report
Sellercloud provides a discrepancies report for WFS, also referred to as Fulfilled By Inconsistent, that shows which of your items are not consistently set up as WFS enabled in both Walmart and Sellercloud.
To view all items in Sellercloud with discrepancies in their Fulfilled By status:
- Go to Company Settings.
- Click Toolbox and select Walmart Marketplace > WFS/Seller-Fulfilled Discrepancies.
- The report shows the following information:
- Sellercloud Product ID – The product’s Sellercloud SKU.
- Amazon SKU – The product’s Amazon SKU.
- Product Name – The product’s name.
- Fulfilled By In Sellercloud – The product’s fulfillment preference on Sellercloud.
- Fulfilled By In Walmart – The product’s fulfillment preference on Walmart.
- You can click the Product ID links to open the Product Details Page or click the three dots on the right and select Export To Excel to download the report to a spreadsheet.
WFS Inventory Changes and Quantities
Inventory is added to WFS by creating and shipping WFS Shipment Plans. Walmart receives the shipments, counts the inventory, and enters it into the Product List WFS Inventory report. Sellercloud periodically downloads the report and sets the correct inventory.
When a WFS Warehouse is Unsellable, its inventory will only show as Available Qty for products that are set as WFS Enabled. When a WFS Warehouse is Sellable, its inventory will be included in the Available Qty for all channels the product is enabled for.
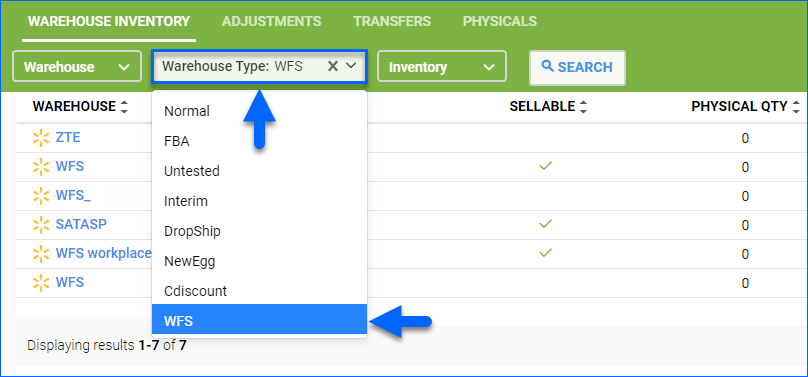
- You can see WFS inventory quantities by going to Product Details Page > Toolbox > Warehouse and setting the Warehouse Type to WFS.
- You can see inventory changes by going to Product Details Page > Toolbox > Inventory Movement. Click Movement Type and type WFS to see the WFS-related movement types. Here you can also check for reserved quantities that will not be included in the aggregate inventory.
WFS Removals
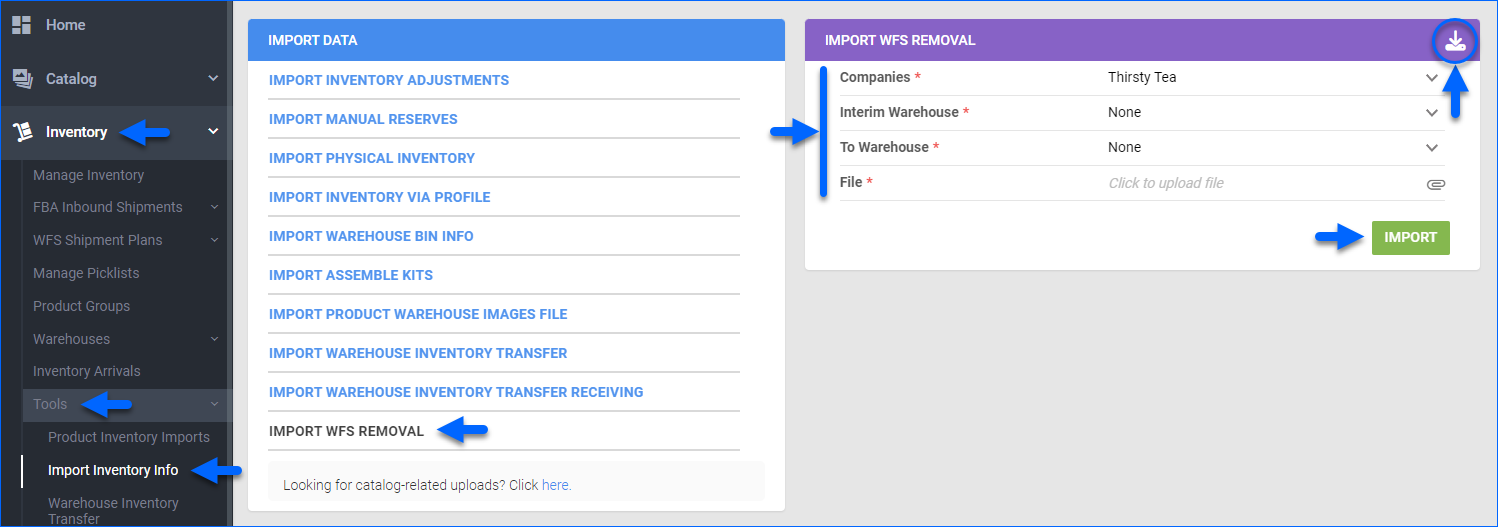
Sometimes, you may need WFS inventory sent back to your local warehouse due to various reasons, such as product recalls or quality issues. These cases are handled through WFS Removal Orders.
While the actual order must be placed on Walmart, you create a warehouse inventory transfer in Sellercloud, which can be marked as received when the shipment arrives at your warehouse. This workflow allows you to track the inventory’s movement history.
View Active Listings
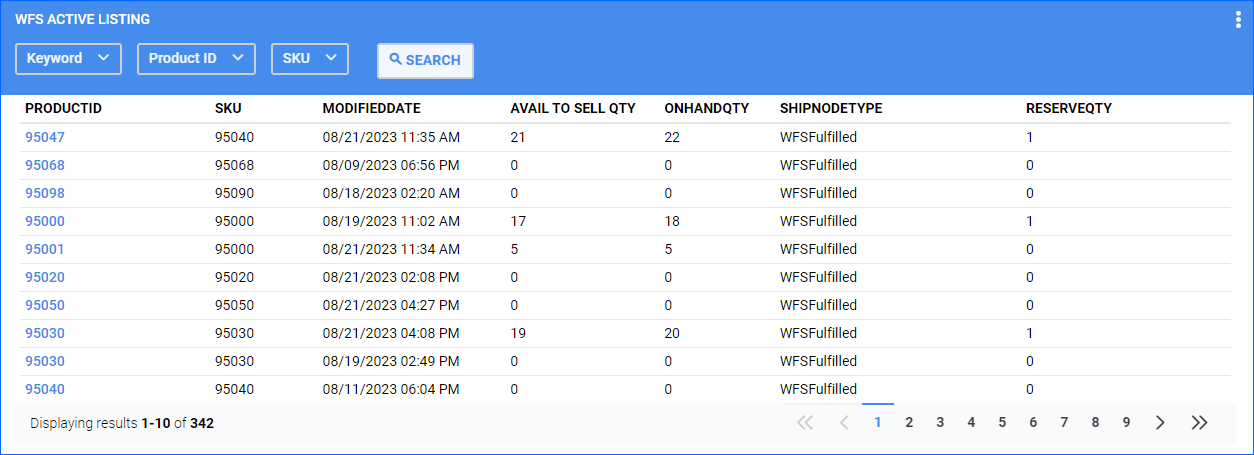
You can view all of your active listings and related information on the WFS Active Listing page. This page shows each item’s:
- Last modified date
- Reserved quantity
- Sellable quantity
- On-hand quantity
To access this page:
- Go to Company Settings.
- Click Toolbox and select Walmart Marketplace > WFS Active Listing.
- Use the Keyword, Product ID, or SKU search filters at the top to find a specific listing.
- To download the active listings data to a spreadsheet, click the three dots on the top right and select Export All to Excel.
