Overview
With the Magento API Integration, Sellercloud automatically downloads all Magento Attribute Sets you have created for different product types, allowing you to update any of your products’ Magento Attributes from Sellercloud.
To update a product’s attributes, you must first assign an attribute set to the product. You have two options for this:
- Select a default attribute set for all products by updating the Attribute Set on your company’s Magento Account Settings page.
- Select an attribute set for each individual product on its Product Details Page.
To ensure that you can thoroughly update your Magento listings from Sellercloud, you can create custom mappings between any Sellercloud product properties and your Magento Attributes. Sellercloud also lets you create Custom Columns and map those as well, guaranteeing that you will be able to update any Magento attribute you need to.
Map Attributes
To map Sellercloud product properties to Magento product attributes:
- Go to Company Settings
- Click Toolbox and select Magento > Attributes Mapping.
- At the top, Select an Attribute Set. You must create a unique mapping for each attribute set.
Any legacy attribute mappings configured prior to the Magento Attribute Sets have been saved and can be located under the Default attribute set option. - Select the Table where the requested Sellercloud field is located:
- Most standard product properties are located under the bvc_Product table
- Magento Properties are in the bvc_Product_Properties_Magento table.
- Custom Columns are in the User_Defined table.
- To map images, select the Image table.
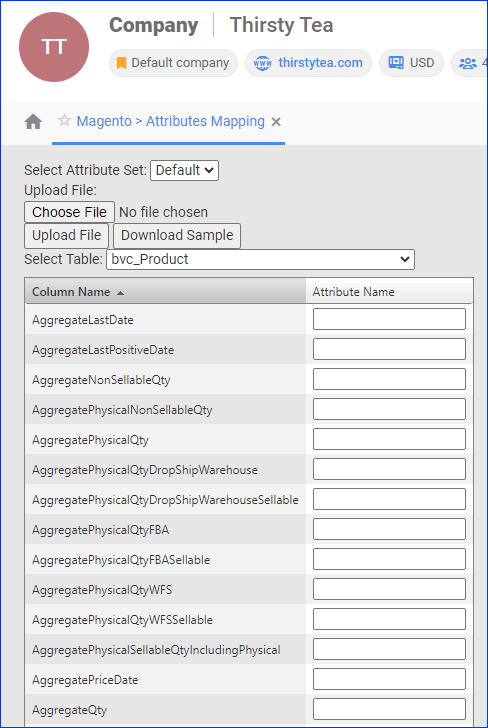
- Next to each Sellercloud field you will use to update attributes, enter the Attribute ID of the respective Magento attribute in the Attribute Name text field.
You can get the Attribute ID by Exporting Magento Attributes from a product that has been assigned the attribute set containing the attribute. - Click Save Mapping.
Update Magento Attributes
You can update Magento attributes individually or in bulk.
Individually
To update a single product’s Magento attributes:
- Go to the Product Details Page.
- Click Toolbox and select Magento Properties.
- In the Listing Details panel, click the View icon to the right of the Attribute Set.
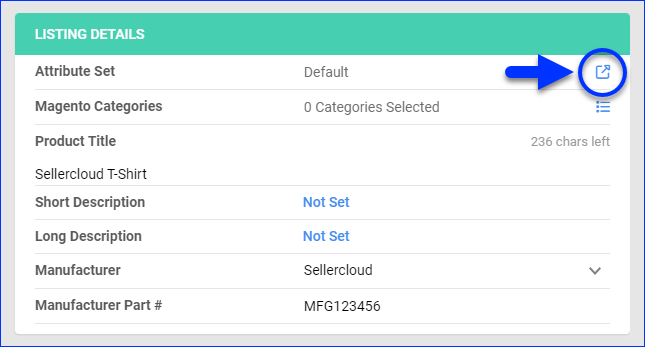
- Select an Attribute Set and populate the Field Value of any fields in that set.
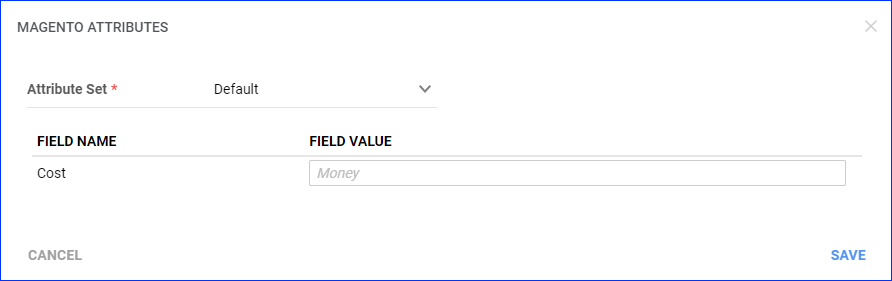
- Click Save.
In Bulk
To bulk-import Magento attributes:
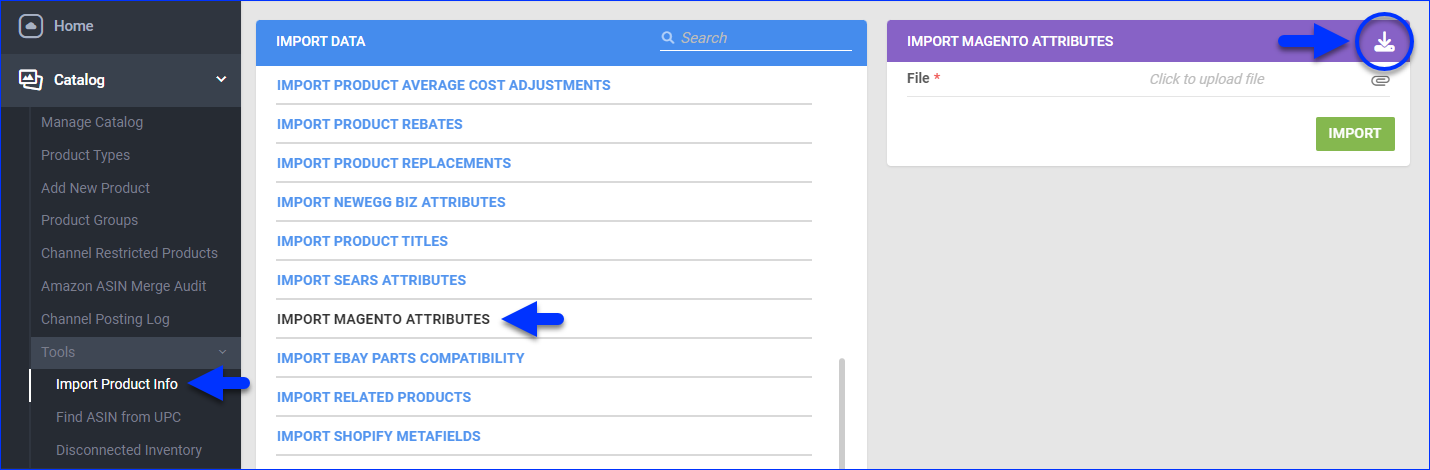
- Go to Catalog > Tools > Import Product Info.
- Select Import Product Magento Attributes.
- Click the Download icon to download the template.
- Fill out the template:
- ProductID (required) – The product’s SKU.
- AttributeSetName (required) – The product’s assigned Magento attribute set.
- AttributeName (required) – The name of an attribute assigned to the product through the attribute set.
- AttributeID (required) – The ID of an attribute assigned to the product through the attribute set.
You can get the Attribute ID by Exporting Magento Attributes from a product that has been assigned the attribute set containing the attribute. - AttributeValue (required) – The current value of an attribute assigned to the product through the attribute set.
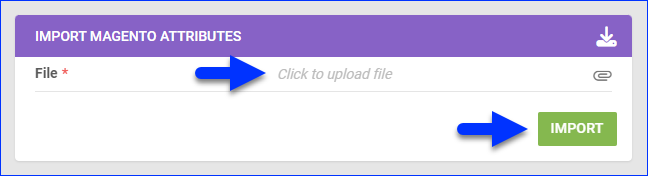
- Click File and select the updated template file.
- Click Import.
- A Queued Job will be created. Once it finishes, your products will be updated.
Export Magento Attributes
You can export a spreadsheet containing information about Magento attributes for selected products. The spreadsheet contains the same column headers required to import Magento attributes.
To export Magento attributes:
- Go to Catalog > Manage Catalog.
- Find and select the products whose information you want to export.
- Click the blue Actions icon in the bottom right.
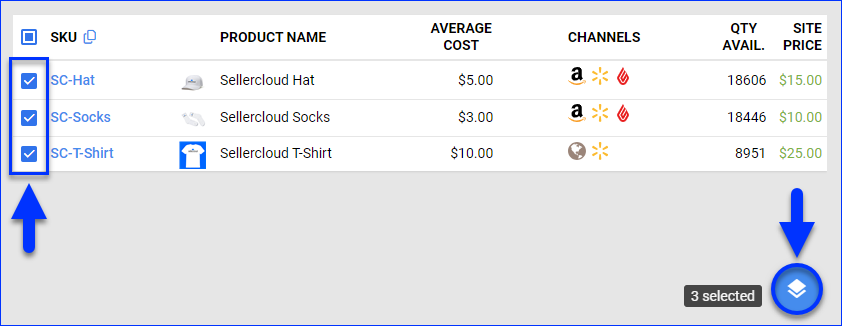
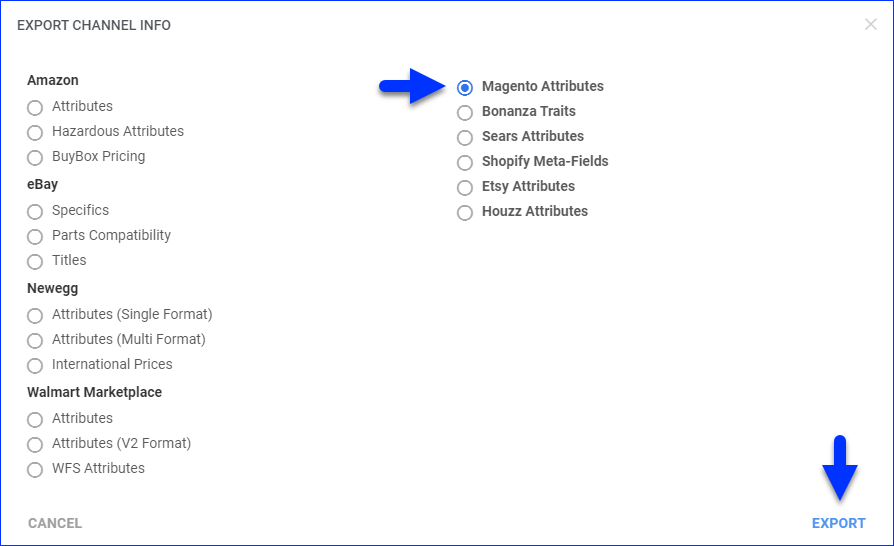
- Select Export Channel Info.
- Select Magento Attributes and click Export.
- A Queued Job will be created. Click the link at the bottom of the page to open it.
- Once it completes, you will receive a notification, and you’ll see a Download icon to the right of the Output File field on the queued job’s page – click it to download the spreadsheet.