Overview
Sears is a department store chain well-known for a wide range of products, including appliances, electronics, tools, clothing, home furnishings, garden equipment, automotive products, fitness equipment, toys, jewelry, and personal care items.
Integrating your Sears account with Sellercloud allows you to manage listings, monitor the status of your orders, and configure various product attributes, including descriptions, images, and categories.
If you do not have an account yet, sign up to Sell on Sears.
Integrate with Sears
Sellercloud integrates with Sears via API. To enable this account integration, you need your Sears Seller ID, Sears Credentials, and Authorization Key.
To configure your API settings in Sellercloud:
- Navigate to Settings > Companies > Manage Companies > Select a company.
- In the Toolbox, select Sears > General Settings > Edit.
- Obtain your account’s Password and Seller ID from the Sears Seller Portal. The Seller ID is located on the Account Profile tab.
- On your Sears Seller Portal homepage, open the dropdown menu > Select Account Info.
- Scroll to the bottom and click Generate New Key.
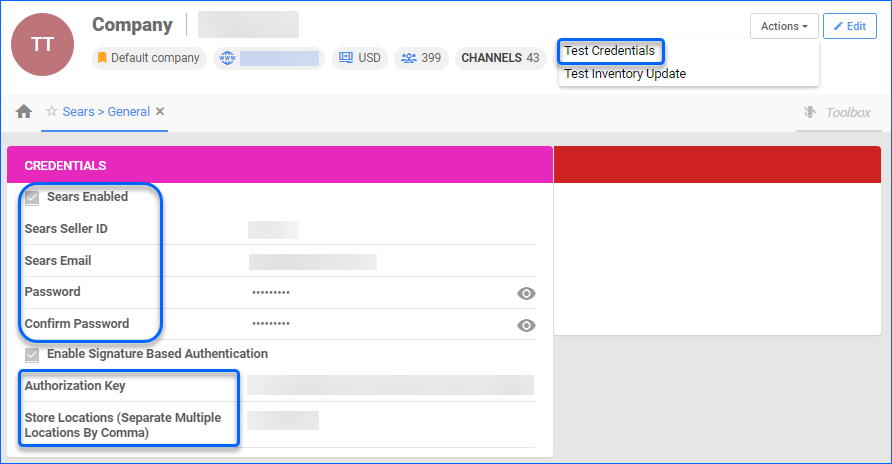
- In the Credentials panel, enter the following:
- Sears Seller ID
- Sears Email
- Password > Confirm Password
- Authorization Key
- Check Sears Enabled
- Check the Enable Signature-Based Authentication option.
- Set the Store Location:
- In your Sears marketplace account, open the dropdown menu > Select Fulfillment Locations.
- Locate the number related to your location and paste that into the Store Location field.
- Verify your API connection and settings by accessing the Actions menu > Test Credentials.
- Click Save.
Sears General Settings
By automating key processes and customizing your workflow, you can not only save valuable time but also enhance overall efficiency. To open the Sears General Settings:
- Go to Company Settings.
- Click Toolbox > Sears > General.
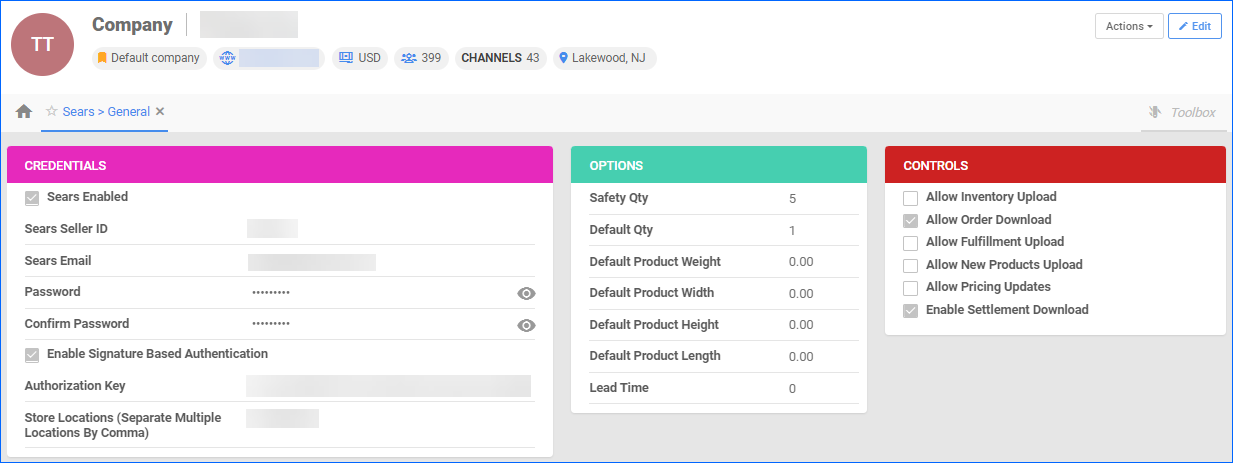
Credentials Panel
| Setting | Description |
| Sears Enabled | Indicates a company is live on Sears. When enabled, Sellercloud will start sending and receiving automatic updates from Sears. |
| Sears Seller ID | Unique ID Number provided by Sears. |
| Sears Email | Your Sears Email address and username. |
| Password / Confirm Password | This is the password for your Sears Seller Account |
| Enable Signature Based Authentication | This allows customers to use their digital signatures as a form of authentication during the checkout or payment process. |
| Authorization Key | A unique combination of letters and numbers obtained from Sears. |
| Store Locations ( Separate Multiple Locations by Comma) | The number that is related to your location. You can find it in your Sears marketplace account. |
Options Panel
| Setting | Description |
| Safety Qty | A buffer between the amount of inventory you have and the amount Sellercloud is sending to the channel to prevent overselling of items in high demand. This will be the Safety Quantity used for your products where Use Default is checked on their Sears Properties page. |
|---|---|
| Default Qty | This only applies to Replenishable products. For these products, the Default quantity is the number that will always be sent to the channel in inventory updates regardless of the actual available inventory. |
| Default Product Weight
Default Product Width Default Product Height Default Product Lenght |
These are your product’s default dimensions. |
| Lead Time | The time it takes for an order to be shipped out. |
Controls Panel
| Setting | Description |
| Allow Order Download | Check to download Sears orders to Sellercloud automatically. |
| Allow Fulfillment Upload | By enabling this option, you allow Sellercloud to send fulfillment information to Sears once an order is processed and shipped. |
| Allow Inventory Upload | Allow Sears to upload inventory information from Sellercloud. Select when you are ready to have Sellercloud control your inventory on Sears. Note that products that are not Sears-enabled will be updated with a quantity of zero. |
| Allow Pricing Updates | Allow Sears to upload price information from Sellercloud. |
| Allow New Products Upload | Allow Sears to upload New product information to Sellercloud. |
| Enable Settlement Download | Refer to Settlements for more information on the Settlement Download. |
Actions
The following actions are available:
| Action | Description |
| Test Credentials | Do a quick verification test to ensure that your credentials still work. |
| Test Inventory Update | Do a quick verification test to ensure that inventory updates are being sent correctly. |