Overview
In this article, you will learn about the various WooCommerce product features that Sellercloud supports. Once you integrate WooCommerce, you will be able to control these features via Sellercloud using the settings below.
Supported Fields and Features
The table below lists the fields and features you can update with Sellercloud:
| Feature | Source | How to Update |
| sku, name, brand, mpn, upc, ean, short_description, description, regular_price, msrp_price, featured, downloadable, virtual, width, length, height, weight, backorders, manage_stock, stock, stock_status, categories, images, product warranty | WooCommerce | Via standard Sellercloud fields and custom product columns |
| Yikes Tab, additional_info, specs, freight_shipping_cost, other custom fields | WordPress Plugins | Via custom product columns in Sellercloud after enabling specific settings |
| Attributes | WooCommerce or WordPress Plugins | Via custom product columns in Sellercloud after enabling specific settings |
Product Variations
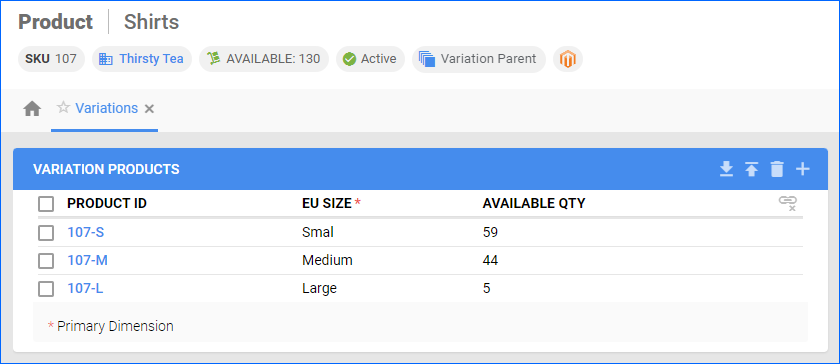
WooCommerce supports Variation Products, and Sellercloud enables you to create and manage them:
- Add Global Attributes to WooCommerce and specify their Values/Terms. You will use these attributes for your product variations.
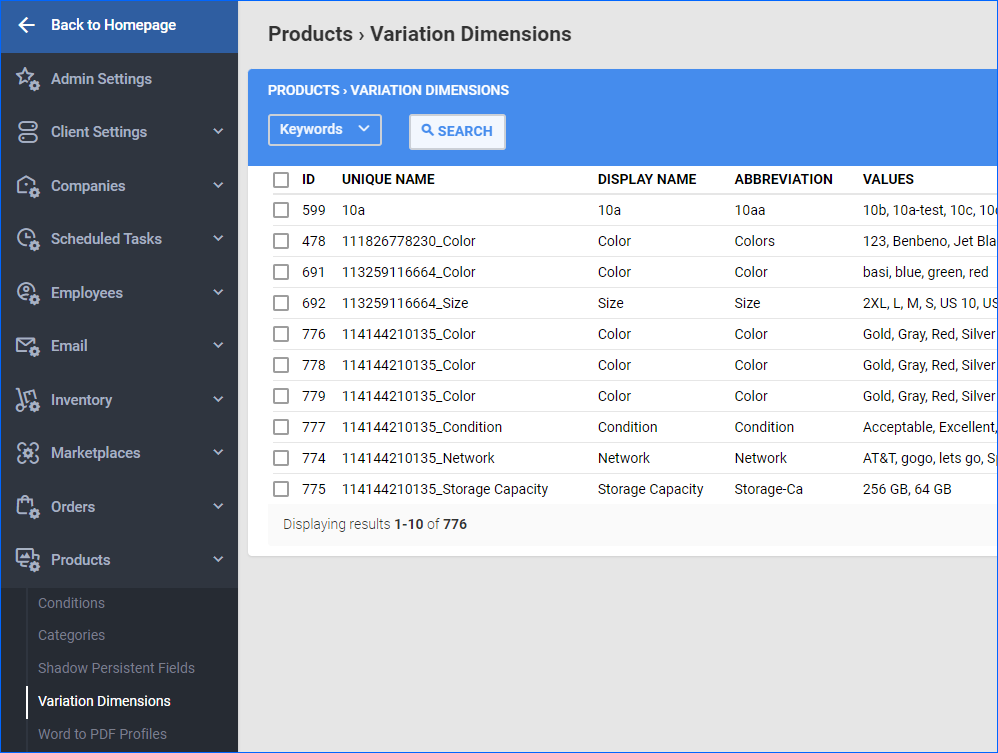
- Add Variation Dimensions to Sellercloud, matching your setup in WooCommerce.
- Create your Variation Products in Sellercloud.
- Post the Parent variation products:
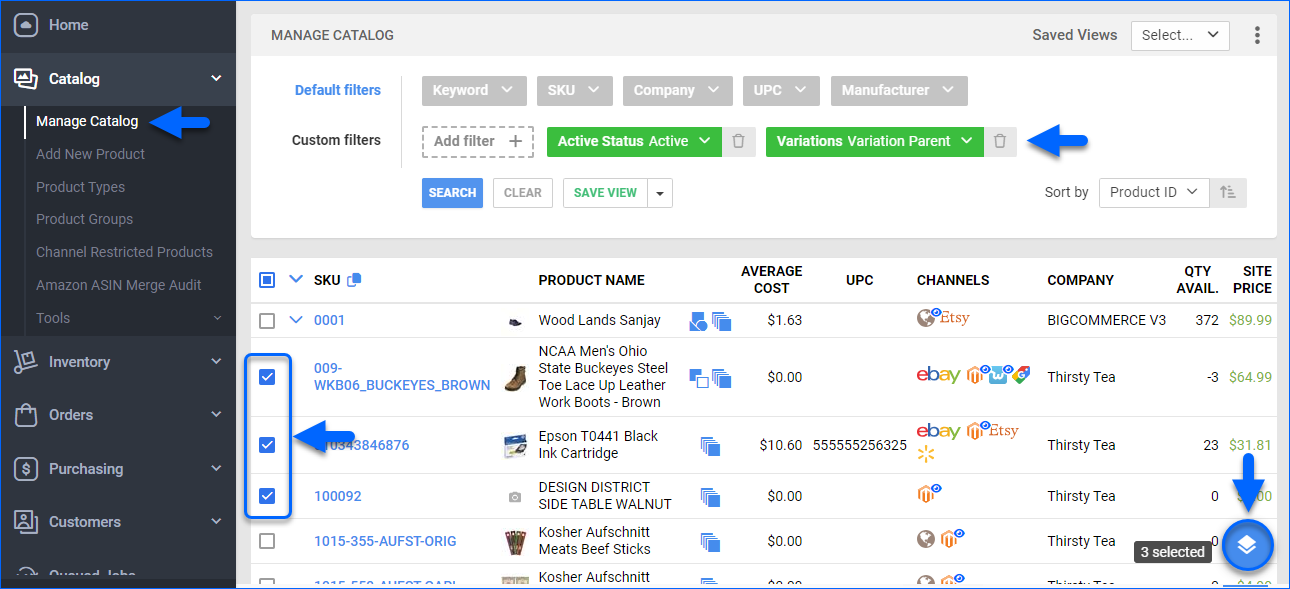
- Go to Catalog > Manage Catalog.
- Click Add filter and select Variations.
- Click the Variations filter and select Variation Parent, then click Search.
- Check the box next to each SKU.
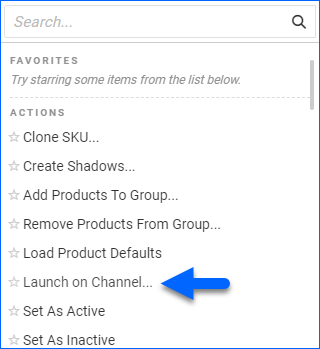
- Click Actions and select Launch on Channel…
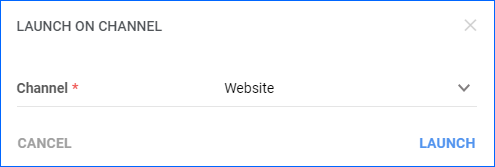
- Select Website and click Launch.
Attributes Mapping
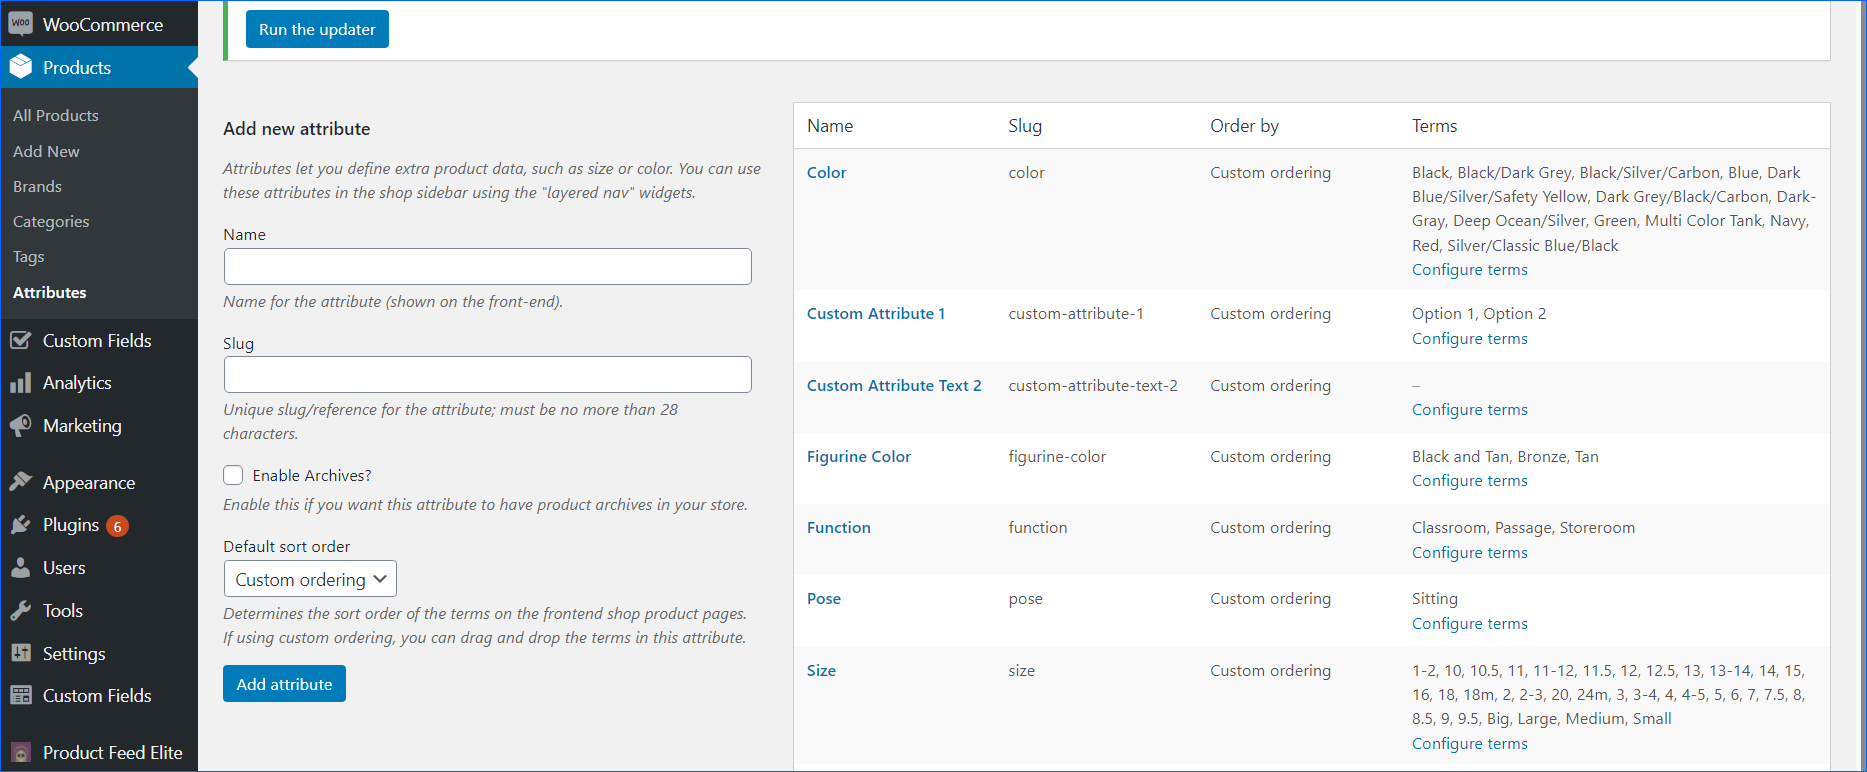
The following options allow you to add custom product attributes on WooCommerce:
- WooCommerce’s Native Attributes Functionality
- Product Condition for WooCommerce by Amplify Plugins
- Advanced Custom Fields by Delicious Brains
- WooCommerce Product Condition Plugin by Extendons
After you add custom product attributes on WooCommerce, you can download and map them to custom columns in Sellercloud:
- First, create custom product attributes in WordPress.
- Assign the attributes to WooCommerce products.
- If you want to map the attributes to Custom Product Columns in Sellercloud, contact Sellercloud Support and ask to create them. You can also map attributes to default product fields.
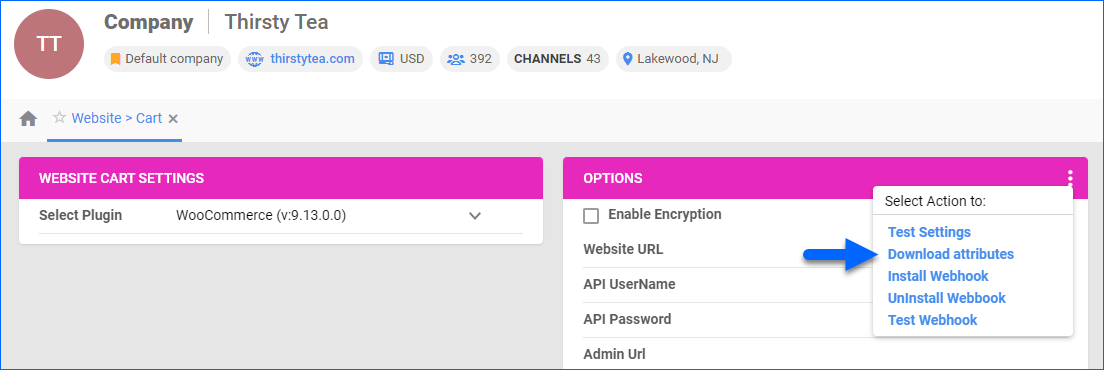
- In Sellercloud, go to Company Settings > Toolbox > Website > Sellercloud Plug-in Website > Cart General > In the Options panel, click the three dots icon and select Download attributes.
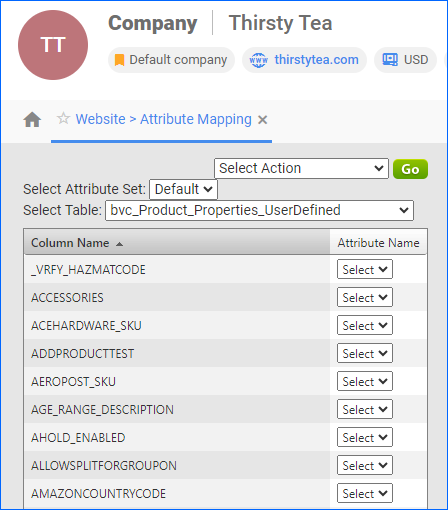
- Then go to Company Settings > Toolbox > Website > Sellercloud Plug-in Website > Cart General > Cart Attribute Mapping:
- Select the Attribute Set.
- Select the Table, e.g. bvc_Product_Properties_UserDefined or any table name of your choice.
- Map the attributes and click Save Mapping.
Next, to update a product’s attributes:
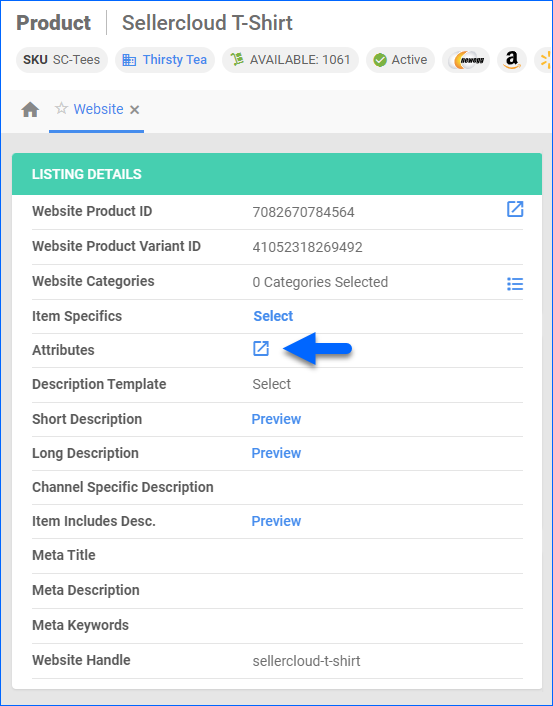
- Go to the Product Details page.
- Click Toolbox and select Website Properties.
- In the Listing Details panel, click the Attributes link.
Advanced Custom Fields
With the Advanced Custom Fields (ACF) WordPress plugin, you can send the following information from Sellercloud to WooCommerce:
- Additional Product Information – The Field Name in ACF should be additional_info
- Product Specifications – The Field Name in ACF should be specs
- Freight Shipping Cost – The Field Name in ACF should be freight_shipping_cost
To set this up:
-
- Contact Sellercloud Support and ask them to create the following Custom Product Columns:
- ADDITIONAL_INFO
- SPECS
- FREIGHT_SHIPPING_COST
- Follow the steps in this link’s Product Custom Columns section to enable each custom column’s Unnamed and Dashboard checkboxes.
- Go to Company Settings.
- Click Toolbox and select Website > Sellercloud Plug-in Website > Cart General.
- In the Options panel, update the following:
- In the Product Addl Info Custom-Column/Plugin/Target-Field setting, enter this value: ADDITIONAL_INFO, advanced custom fields, additional_info
- In the Product Specs Custom-Column/Plugin/Target-Field setting, enter this value: SPECS, advanced custom fields, specs
- In the ProdExp: SC-Custom-Column1/Plugin/Target-Field setting, enter this value: FREIGHT_SHIPPING_COST, advanced custom fields, freight_shipping_cost
- Contact Sellercloud Support and ask them to create the following Custom Product Columns:
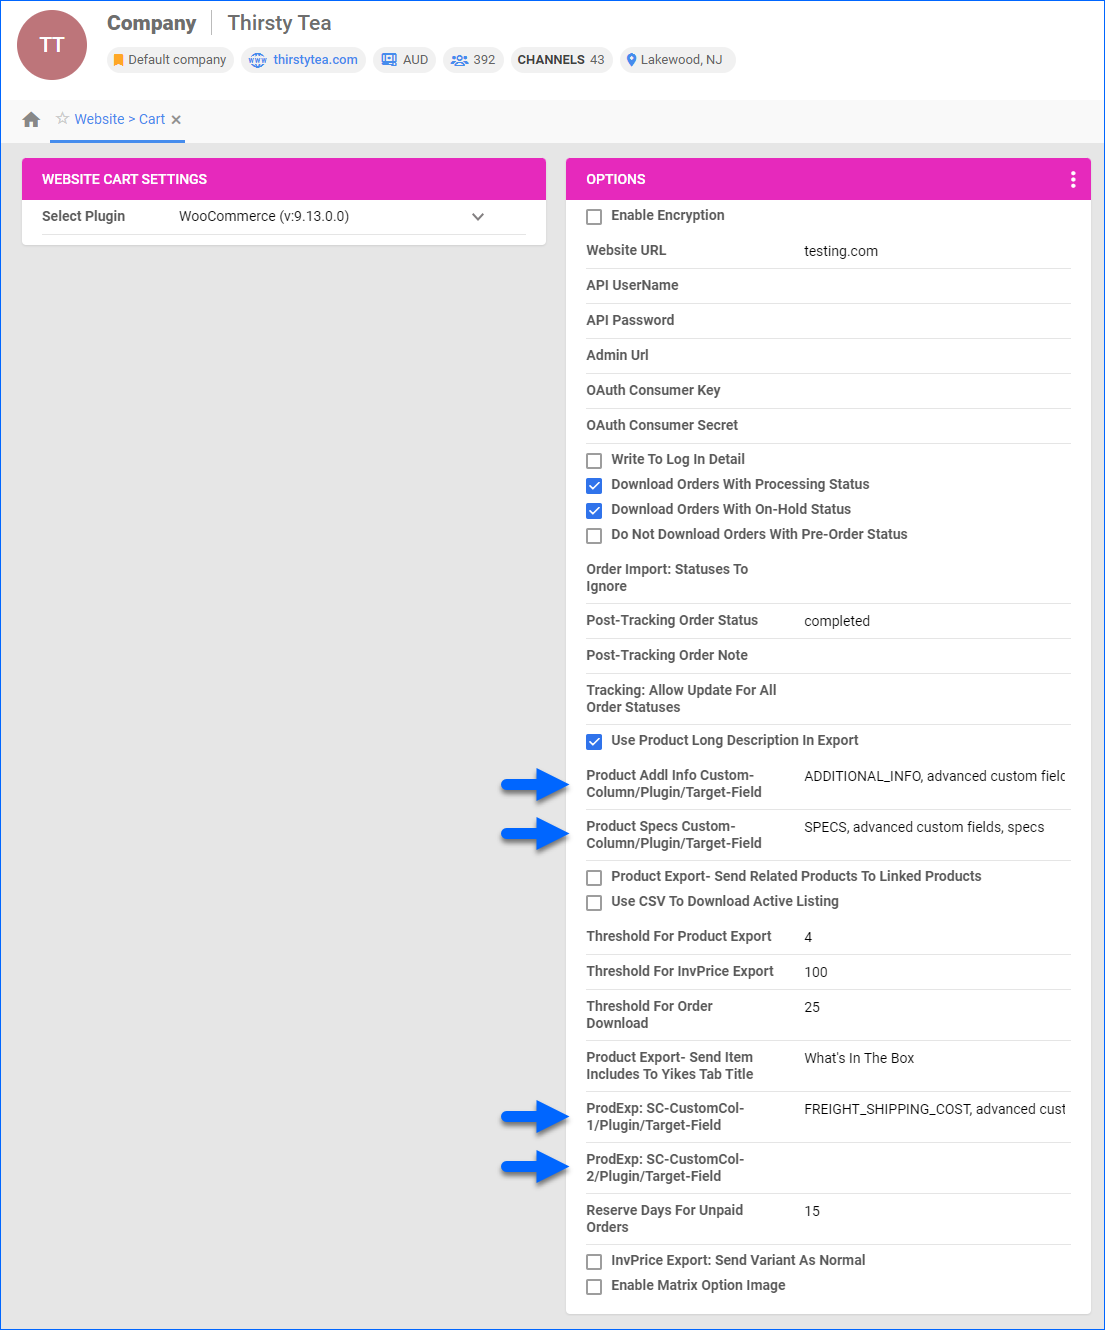
You can also use the ProdExp: SC-Custom-Column2/Plugin/Target-Field setting to map one more custom product column to a custom WordPress field. Follow the same format the other three settings use. For example, CUSTOM_FIELD, advanced custom fields, custom_field, where:
- CUSTOM_FIELD is the name of the Sellercloud custom product column.
- advanced custom fields is the plugin’s name.
- custom_field is the Field Name of the ACF target field where the value from Sellercloud’s custom column will be exported.
To update your products’ information:
- Individually: Go to the Product Details page and update the settings in the Custom Columns panel.
- In Bulk: Use the Bulk Update Products feature.
Long Description
You can export your products’ Long Description, Description Templates, or Description Template IDs to WooCommerce. It is up to your WooCommerce template or additional customization to determine where this information will go.
To export products’ Long Description:
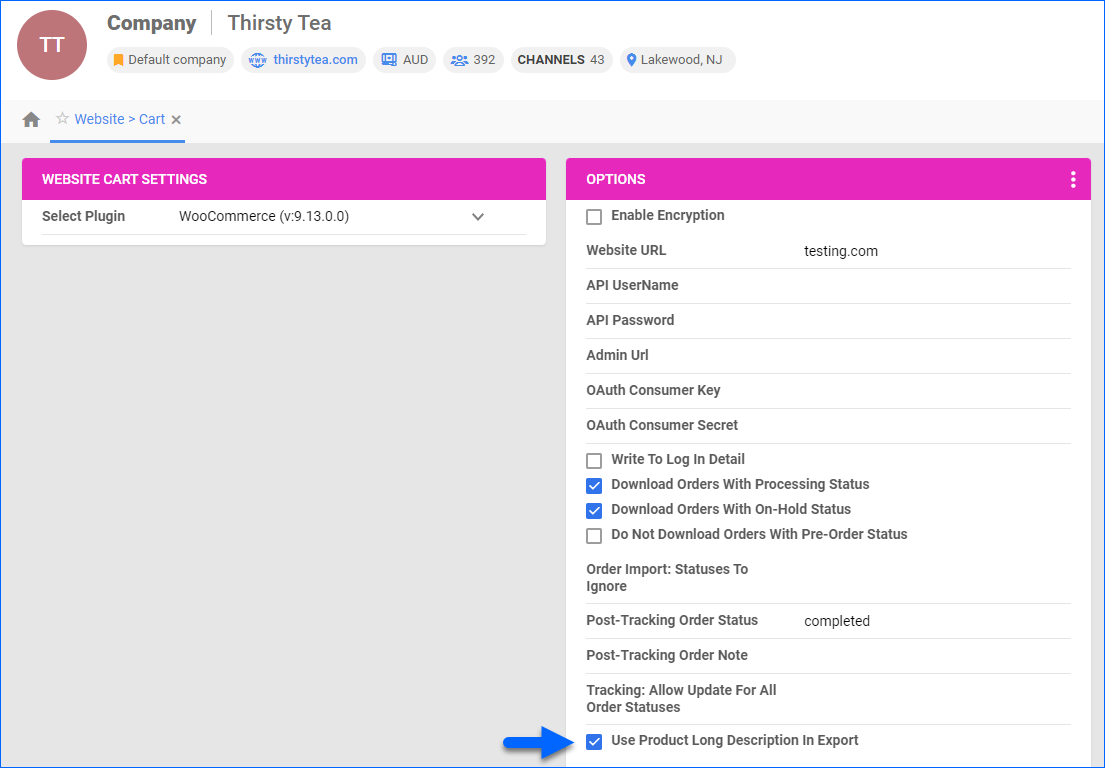
- Go to Company Settings.
- Click Toolbox and select Website > Sellercloud Plug-in Website > Cart General.
- In the Options panel, check Use Product Long Description In Export.
- If the Use Product Long Description In Export setting is disabled, but the products have a Description Template, it will be sent instead.
- If a Description Template is not available, but the product has a Description Template ID, the Description Template ID will be sent.
- If none are available, the products’ Long Descriptions will be sent.
To update your products’ Long Description:
- Individually: Go to the Product Details page > Toolbox > Website Properties and update the Long Description field.
- In Bulk: Use the Bulk Update Products feature. Add the LongDescription header to your spreadsheet.
Yikes Tab
The Custom Product Tabs for WooCommerce WordPress plugin by Yikes lets you add custom tabs to your products on WooCommerce. Custom tabs appear to the right of the default Description tab. You can show your products’ Item Includes descriptions in Sellercloud under a specific custom tab.
For example:
- You create a tab called What’s In The Box on WooCommerce.
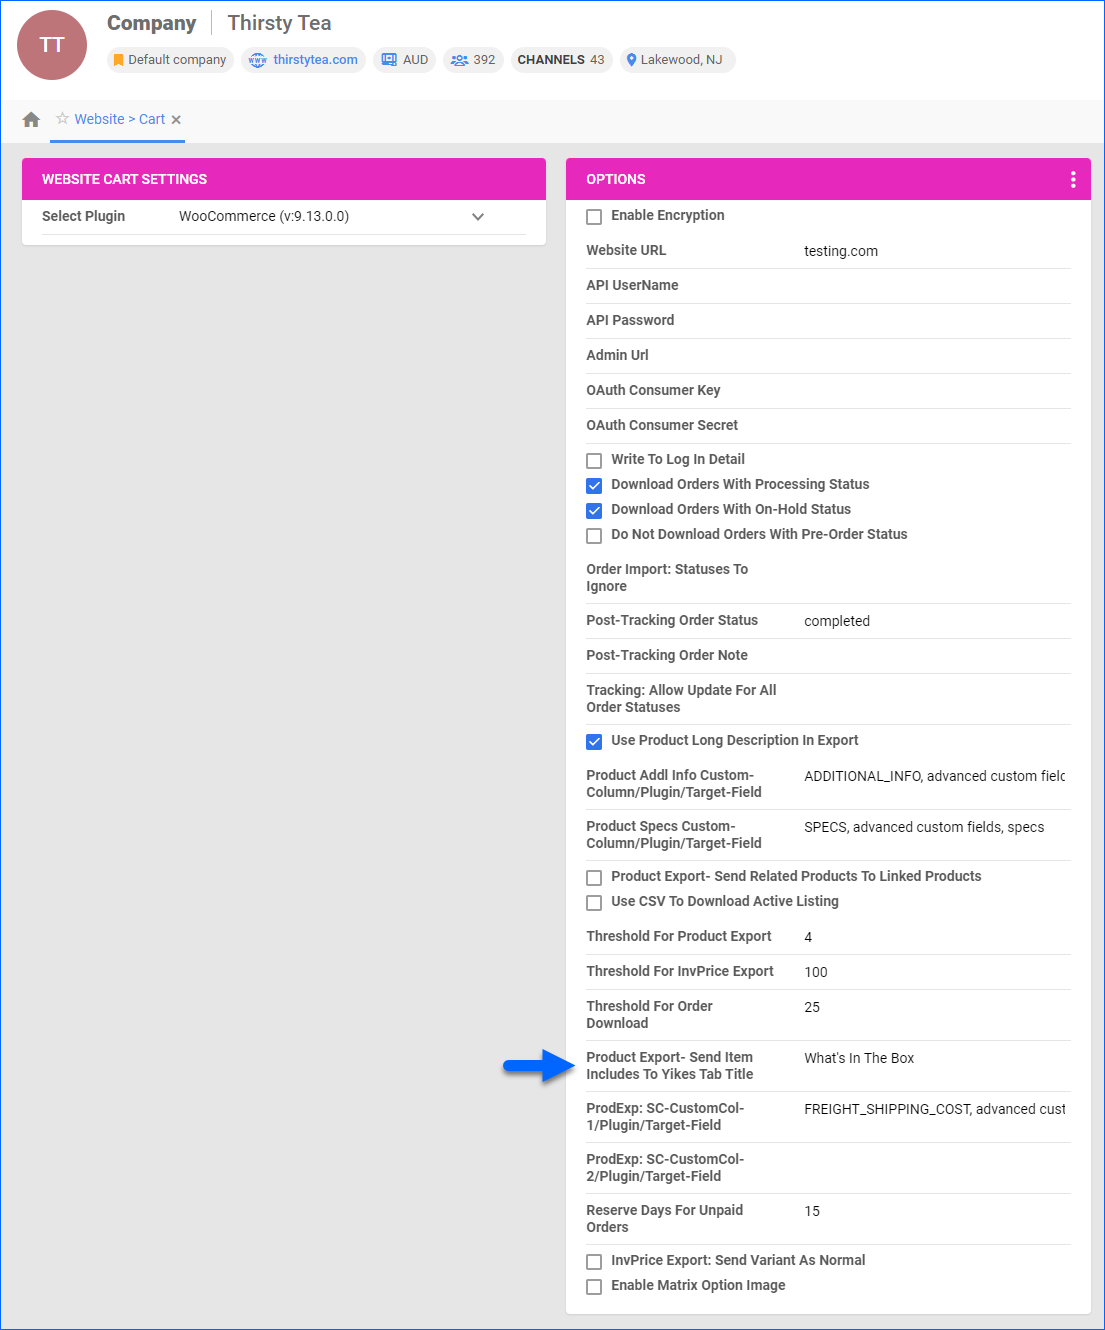
- You enter What’s In The Box as a value in the Product Export- Send Item Includes To Yikes Tab Title setting in Sellercloud.
- The Item Includes description in Sellercloud now appears under the What’s In The Box tab on WooCommerce.
To enable this functionality:
- Create a custom tab for WooCommerce products using the plugin.
- In Sellercloud, go to Company Settings.
- Click Toolbox and select Website > Sellercloud Plug-in Website > Cart General.
- In the Options panel, update the Product Export- Send Item Includes To Yikes Tab Title setting with the exact name of the custom WooCommerce tab.
To update your products’ Item Includes field:
- Individually: Go to the Product Details page, and in the Details panel, update the Item Includes field.
- In Bulk: Use the Bulk Update Products feature. Add the ItemIncludesDescription header to your spreadsheet.
Product Warranty
You can set up product warranty information in Sellercloud and send it to your WooCommerce website.
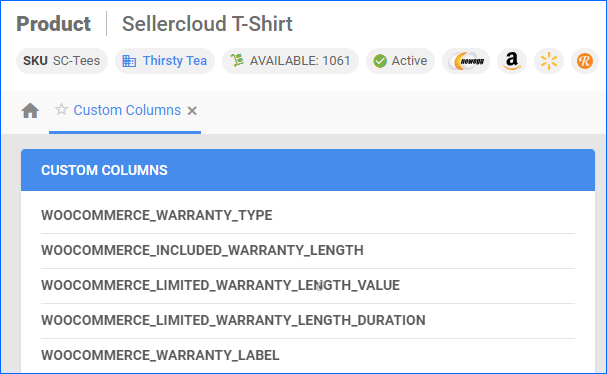
- Contact Sellercloud Support and ask for the following Custom Product Columns:
- WOOCOMMERCE_WARRANTY_TYPE – You can enter no_warranty or included_warranty as the setting’s value.
- WOOCOMMERCE_INCLUDED_WARRANTY_LENGTH – You can enter lifetime or limited as the setting’s value.
- WOOCOMMERCE_LIMITED_WARRANTY_LENGTH_VALUE – You can enter any numeric value.
- WOOCOMMERCE_LIMITED_WARRANTY_LENGTH_DURATION – You can enter days, weeks, months, or years as the setting’s value.
- WOOCOMMERCE_WARRANTY_LABEL – Sets the warranty label. You can enter any text as the setting’s value.
- Follow the steps in this link’s Product Custom Columns section to enable each custom column’s Unnamed and Dashboard checkboxes.
Next, to update your products’ settings:
- Individually: Go to the Product Details page and update the settings in the Custom Columns panel.
- In Bulk: Use the Bulk Update Products feature.