Overview
The Import Warehouse Bin Info tool allows you to make Product Inventory Adjustments in warehouse bins for multiple SKUs simultaneously. Rather than manually updating each item and bin, you can make the necessary adjustments in a spreadsheet and import it into Sellercloud to apply the changes.
Adjustment Types
There are two types of bin inventory adjustments:
- Initial Product Bin Adjustment – Use this option only when importing bin quantities for the first time.
It will set the quantity of any SKU not included in the file to 0 across all bins, so ensure your file accurately represents the complete inventory in your warehouse bins. Contact your onboarding representative or Sellercloud Support for assistance. - Basic Product Bin Adjustment – Use this option for all bin quantity updates following the initial adjustment option.
Import Bin Adjustments
You can import warehouse bin adjustments manually or automatically.
Manually
To adjust product quantities in bins manually:
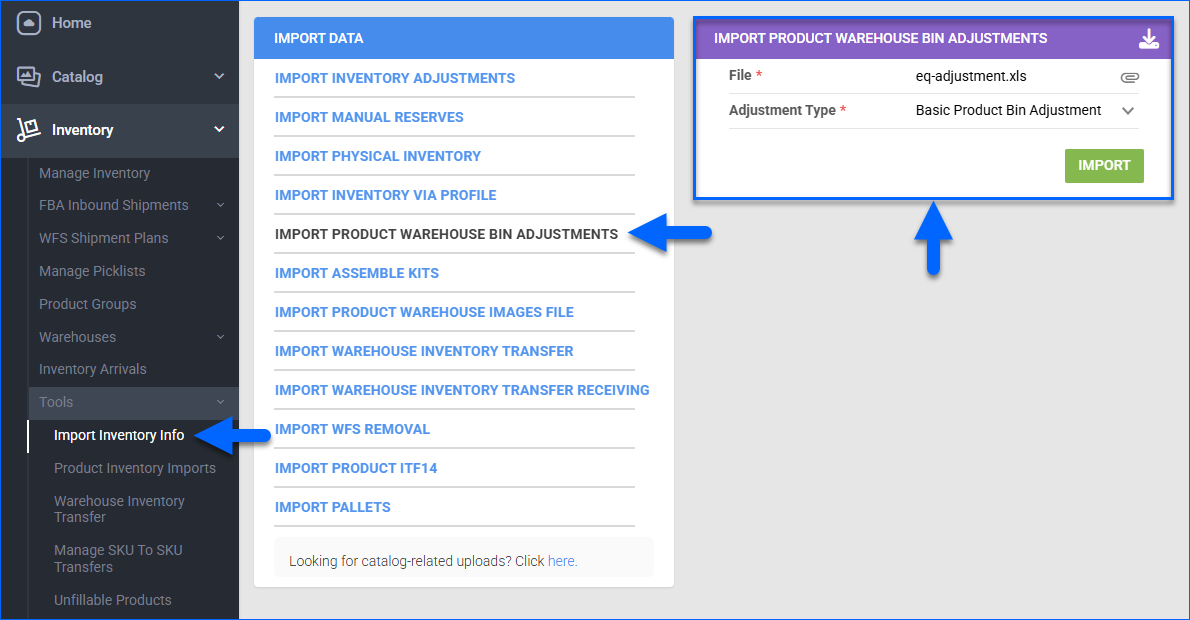
- Go to Inventory > Tools > Import Inventory Info > Import Product Warehouse Bin Adjustments.
- To download a template file, click the Download icon and select your preferred format: Excel, CSV, or Tab-delimited.
- Populate the template file with the relevant data:
- WarehouseName – The name of the warehouse where the SKU is stored.
- BinName – The bin where the SKU is being adjusted.
- ProductID – The SKU of the product being adjusted.
- QtyToAdjust – The adjustment quantity you want to increase or decrease the inventory by. To reduce inventory, enter a negative number with a minus. For example, if you have 5 units in the bin and want to reduce it to 3, enter -2 as the adjustment.
- Reason – The adjustment reason.
- LotNumber – The unique code you assign to a product lot for tracking purposes.
- ExpiryDate – The date on which that product lot expires.
If the Lot Number workflow is enabled for your company and the product/s are set as Expirable, you must include a Lot Number and Expiry Date.

- Select the populated File.
- Select the Adjustment Type you want to perform:
- Initial Product Bin Adjustment – Use this option only the first time you import bin quantities.
Ensure that your file accurately represents the complete inventory in your warehouse bins. The import process will set the quantity of any SKU not included in the file to 0 across all bins. Contact your onboarding representative or Sellercloud Support for assistance. - Basic Product Bin Adjustment – Use this option for all bin quantity updates after the initial adjustment.
- Initial Product Bin Adjustment – Use this option only the first time you import bin quantities.
- Click Import. A Queued Job will be scheduled. Click the link to view it, then refresh the page to update the Status. You will receive a Notification once it is Completed.
Automatically
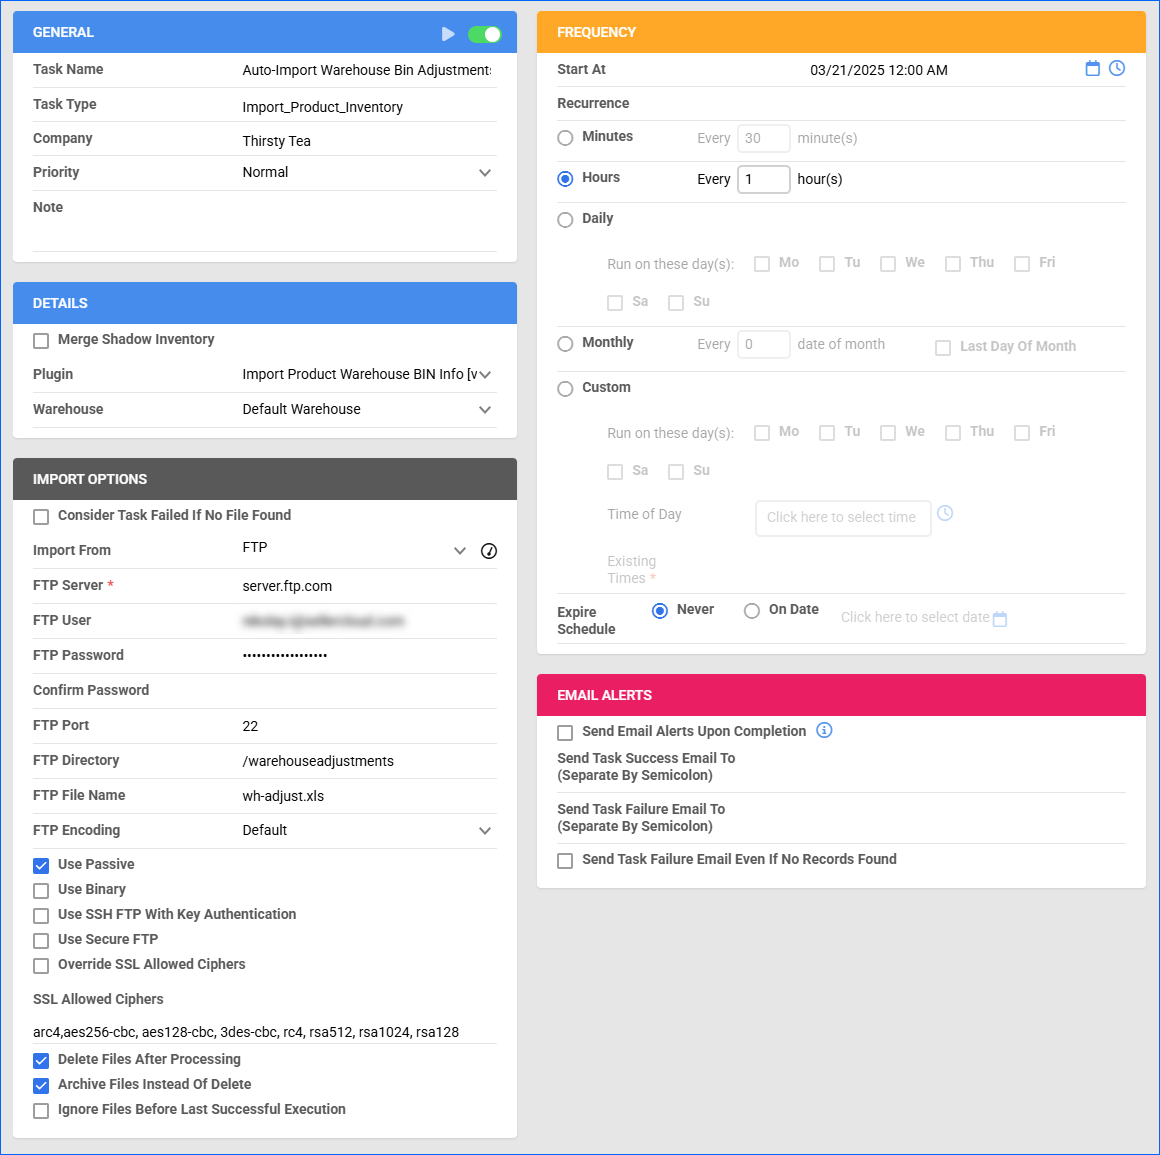
If your workflow requires you to adjust bin inventory regularly, you can streamline this process by setting up a Scheduled Task to execute the generic Import Product Warehouse BIN Info plugin. This allows spreadsheets to be automatically imported from a designated location, such as an FTP server or email account. The plugin operates using the Basic Product Bin Adjustment type.
To create the Scheduled Task:
- Navigate to Settings > Scheduled Tasks > Manage Scheduled Tasks.
- Click the green + icon: Create New Scheduled Task.
- Complete as follows:
- Click Task Type and select Import Product Inventory.
- Set the Task Name.
- Select the Company.
- Select the Start Time.
- Click CREATE.
- On the Scheduled Task page, click the Edit button at the top right corner.
- In the Details panel:
- Click the Plugin menu and select Import Product Warehouse BIN Info.
- Click the Warehouse menu and select the warehouse to update.
- In the Import Options panel, set Import From per your configuration preference and fill out the fields below. See the Scheduled Tasks and Scheduled Task Types articles for more information.
Avoid uploading the same adjustment spreadsheet more than once, as this can result in inaccurate inventory levels.- If importing from an FTP, you can enable Delete Files After Processing to automatically remove the file once it has been processed. Alternatively, enable Archive Files Instead of Delete and specify a subdirectory within the designated folder to store processed files.
- If importing from Email, you can enable Delete Email After Processing to prevent duplicate imports.
- In the Frequency panel, specify the task frequency. For optimal performance, select a range between thirty minutes and one hour.
- In the General panel, click the Enable toggle button.
- Click Save.
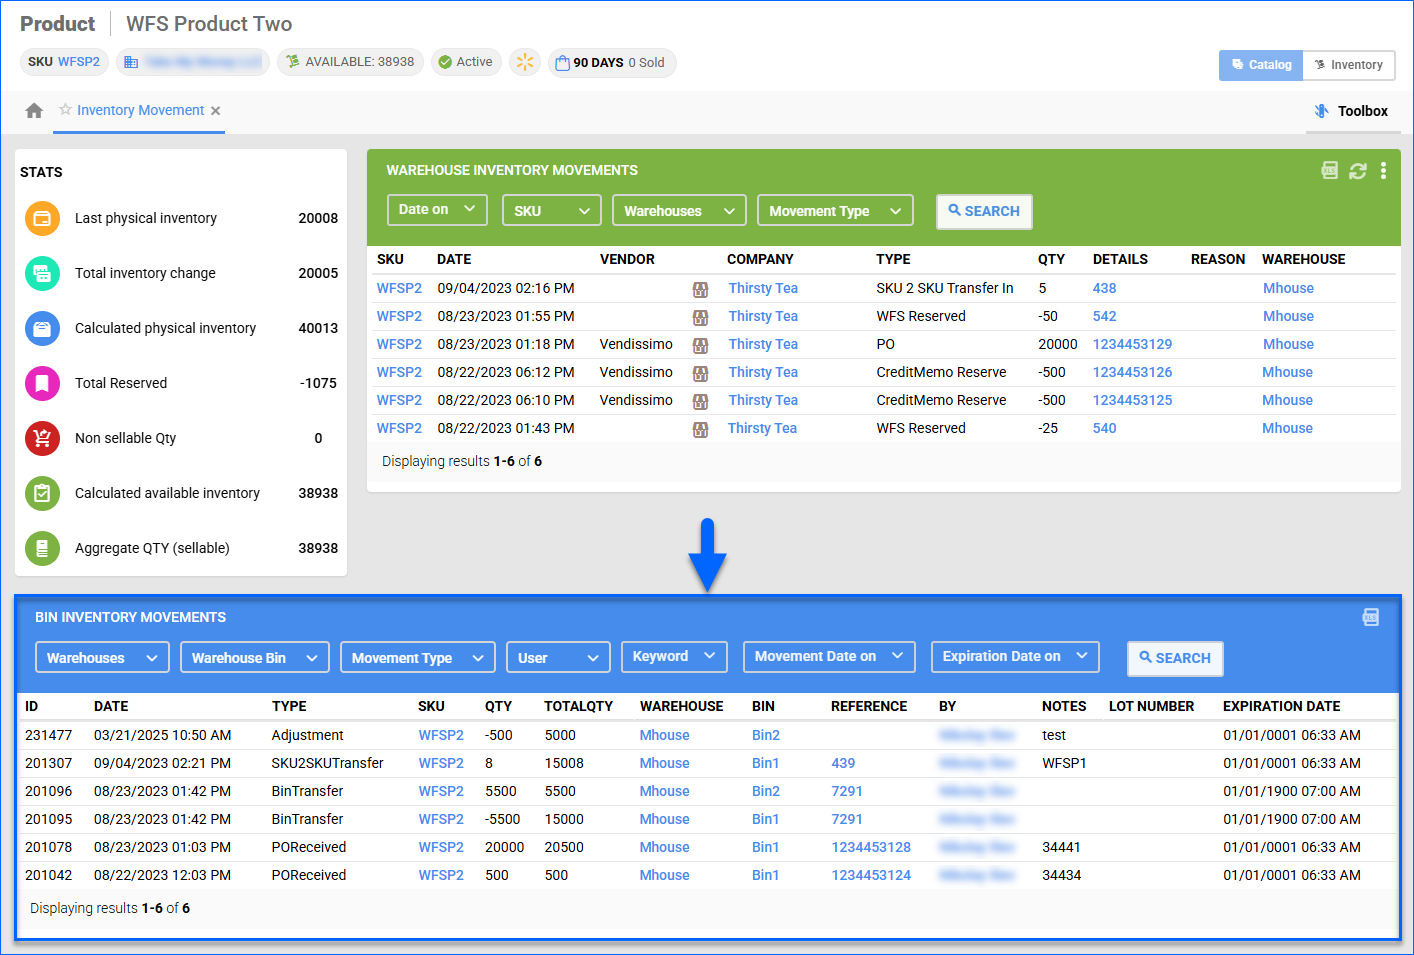
View Bin Movements
You can see a history of past warehouse bin movements per item or per warehouse bin. This includes not only adjustments but also other Inventory Movements such as those related to order fulfillment, transfers, receiving, and more.
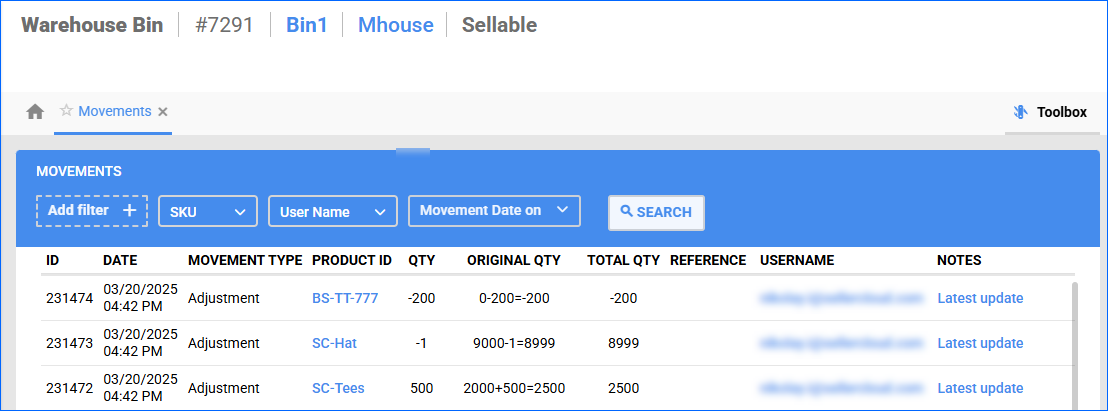
Per Bin
To view inventory adjustments made to the various products in a specific bin:
- Go to Inventory > Warehouses > Manage Warehouse Bins.
- Search and then click the bin.
- Click Toolbox and select Movements.
- Click Add filter and select Movement Type.
- Set the Movement Type filter to Adjustment.
- Optionally, configure other filters to narrow down the search results.
- Click Search.
Per Item
To view a specific product’s bin inventory adjustments across multiple warehouses:
- Go to the Inventory Details Page.
- Click Toolbox and select Inventory Movement History.
- In the Bin Inventory Movements panel, set the Movement Type filter to Adjustment.
- Optionally, configure other filters to narrow down the search results.
- Click Search.