Overview
Aeropost is an eCommerce platform that connects buyers and sellers around Latin America and the Caribbean. It provides end-to-end services facilitating cross-border purchases, payments, and deliveries in 38 countries. Aeropost is popular among international shoppers who want access to products from U.S. retailers that may not directly ship to their countries.
Integrating Aeropost allows you to seamlessly import orders, upload tracking information, and ensure your listings are always updated with the latest inventory data. This integration works through API, transmitting information between the two services via plugins and Scheduled Tasks.
If necessary, you can open a ticket with Sellercloud Support to request additional customizations or other plugins for this integration. Any such modifications will be billable.
Prerequisites
Before you can integrate Aeropost into Sellercloud, complete the following requirements.
- Create an Aeropost Seller Account.
- Access the Seller Dashboard and generate authorization credentials:
- Seller ID – Available on the API Integration Details tab of your Aeropost Profile page.
- Seller Token – Also available on the API Integration Details tab.
- Whitelist your Sellercloud server’s IP address on Aeropost:
- To obtain the IP address, open a ticket with Sellercloud Support.
- Add it to Aeropost’s IP Whitelist to prevent request rejection.
Sellercloud Support
Open a ticket with Sellercloud Support and request that the following plugins be installed on your server:
- Aeropost Order Import – Imports orders from Aeropost to Sellercloud.
- Aeropost Tracking Export – Exports tracking information from Sellercloud to Aeropost.
- AeropostAPI Inventory Product Export – Exports inventory from Sellercloud to Aeropost.
Custom Company Settings
Create the following Custom Company Settings on the company created for the integration:
- Aeropost Seller ID – Enter your Aeropost Seller ID.
- Aeropost Seller Token – Enter your Aeropost API Token.
- (Optional) Aeropost Use Test URL – Set to True to use a test URL. Defaults to False.
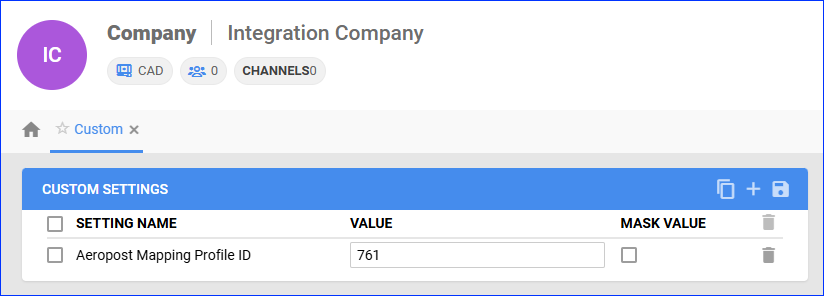
- (Optional) Aeropost Mapping Profile ID – Enter a Mapping Profile ID to automatically set your preferred shipping carriers on Aeropost orders based on the originally Requested Shipping Method. See Shipping Method Mapping for instructions.
- (Optional) AeropostDefaultReplenishableQty – This setting applies to Replenishable Products. Enter the default amount that will always be sent to Aeropost in inventory updates, regardless of the product’s available inventory. This setting only applies to products if you set the Custom Product Column AeropostReplenishableQtyUseDefault to True.
Custom Product Columns
Create the following Custom Product Columns:
- AeropostMerchantSKU – The product’s SKU at Aeropost. Set the Data Type to String.
The plugins match product IDs on Aeropost to the AeropostMerchantSKU column. If there is no match, they use the ProductID (SKU). - (Optional) Aeropost_Enabled – Enable only specific products for Aeropost. Set to True for any products you want to send with the Inventory Export plugin. Set the Data Type to Boolean.
- (Optional) AeropostReplenishableQtyUseDefault – For Replenishable Products, set to True to send the default replenishable quantity from the Custom Company Setting AeropostDefaultReplenishableQty. If you set this setting to False, you will send the AeropostReplenishableQty. If these settings are not configured, you will send a quantity of 0. Set the Data Type to Boolean. Defaults to False.
- (Optional) AeropostReplenishableQty – For Replenishable Products, enter an amount that will always be sent to Aeropost in inventory updates instead of the available inventory. This setting allows you to set a product-specific replenishable quantity instead of using the default from AeropostDefaultReplenishableQty. Set the Data Type to Integer. Defaults to 0.
Order Import
The Aeropost Order Import plugin imports order data from Aeropost to Sellercloud.
Automate Order Import
To create a Scheduled Task that imports orders:
- Navigate to Settings > Scheduled Tasks > Manage Scheduled Tasks.
- Click the green + icon: Create New Scheduled Task.
- Complete as follows:
- Click Task Type and select Import Orders.
- Set the Task Name.
- Select the Company.
- Select the Start Time.
- Click CREATE.
- On the Scheduled Task page, click the Edit button at the top right corner.
- In the Details panel:
- Click Create Orders For Company and select the company designated for this integration.
- Click the Plugin menu and select Aeropost Order Import.
- In the Import Options panel, set Import From to None.
- In the Frequency panel, specify the task frequency. For optimal performance, select a range between thirty minutes and one hour.
- In the General panel, click the Enable button.
- Click Save.

Shipping Method Mapping
Optionally, you can create an Import Mapping Configuration to automatically set a custom Shipping Carrier and Shipping Service on your orders based on the carrier details received from Aeropost.
To set this up:
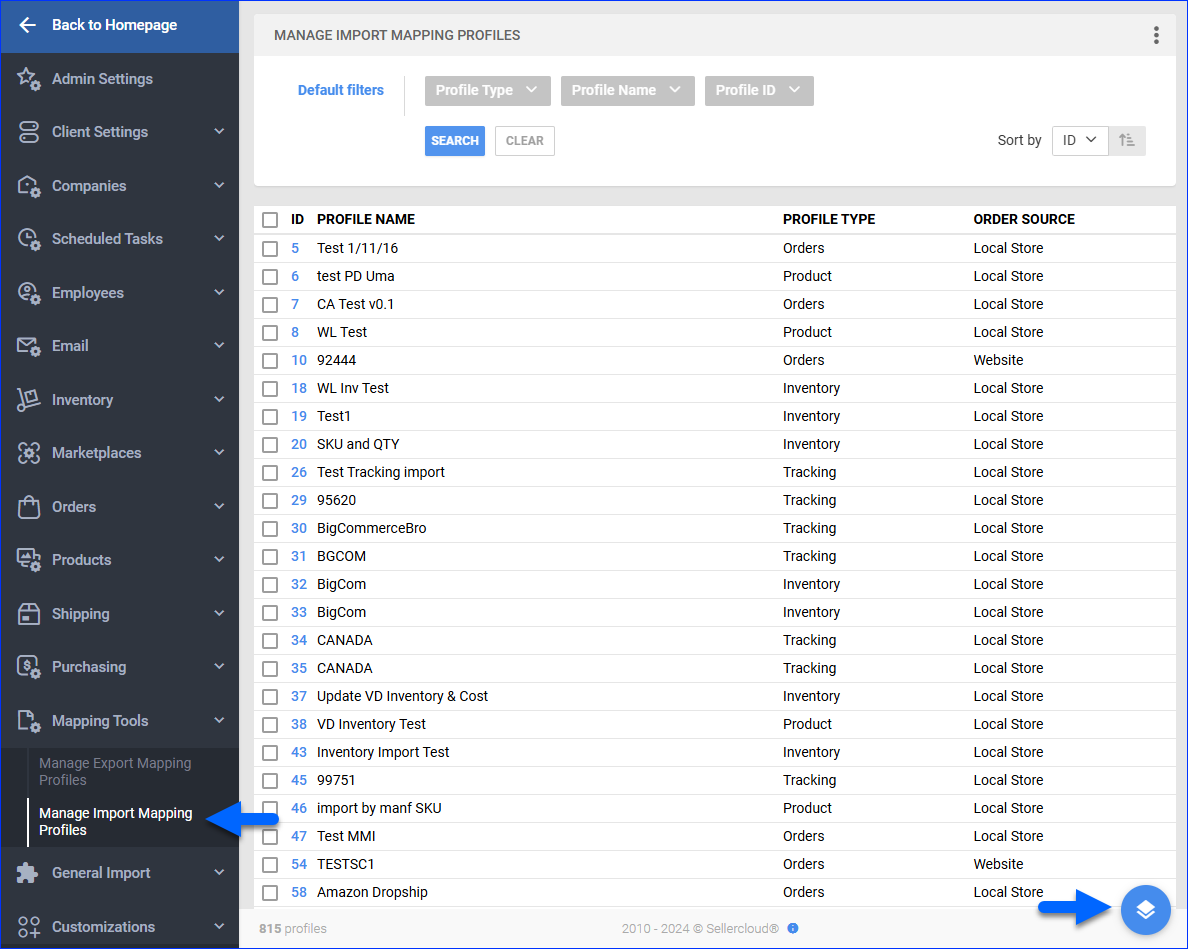
- Go to Settings.
- Select Mapping Tools > Manage Import Mapping Profiles.
- Click the blue Actions icon at the bottom right and select Create.
- Set the Profile Name to Aeropost Shipping Method Mapping.
- Create a spreadsheet file, type OrderID in the first cell, and save it. Then upload the spreadsheet into the Template File field.
- Skip all other settings, as they won’t be applied. Click Create.

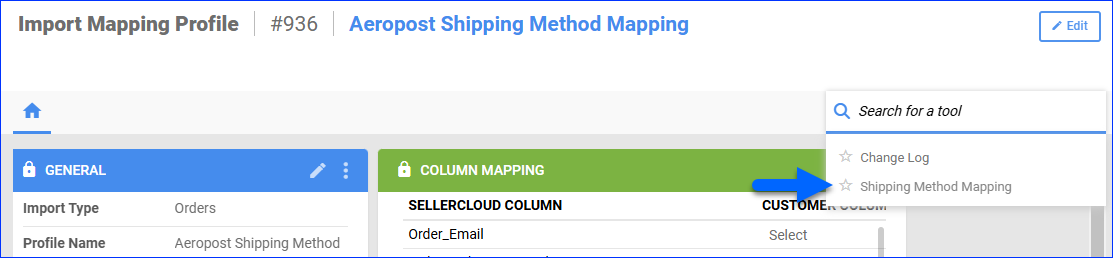
- Do not configure the order columns on the Import Mapping Profile page. Instead, click Toolbox and select Shipping Method Mapping.
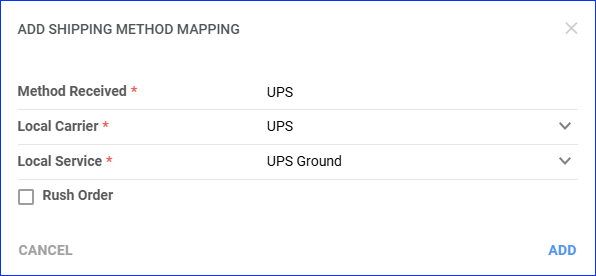
- Click the Edit icon and then click the + Add Shipping Method Mapping button to add a mapping:
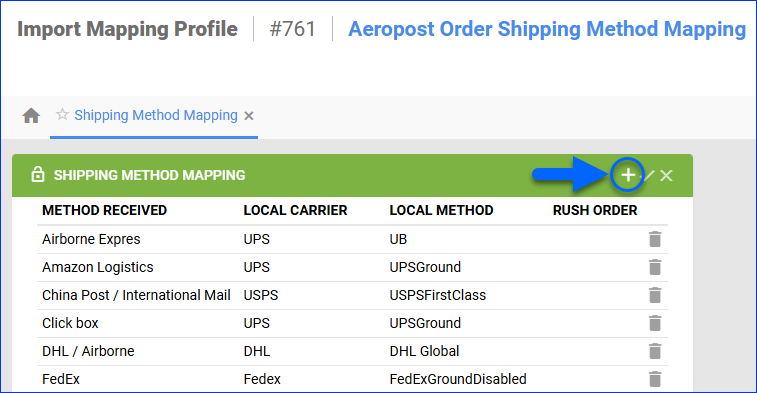
- Add the Requested Shipping Method (the initially received carrier value from Aeropost) into the Method Received field.
Contact Aeropost for a list of all expected Requested Shipping Method values. - Select the shipping carrier to set in Sellercloud from the Local Carrier dropdown.
- Select the shipping method to set in Sellercloud from the Local Service dropdown.
- Check Rush Order to set such orders as Rush.
- Click Add. Repeat the process to add more mappings.
- Add the Requested Shipping Method (the initially received carrier value from Aeropost) into the Method Received field.
- Once you add all individual mappings, click the Save icon at the top right of the Shipping Method Mapping panel.
- Copy the numerical ID to the left of the mapping profile name at the top of the page.
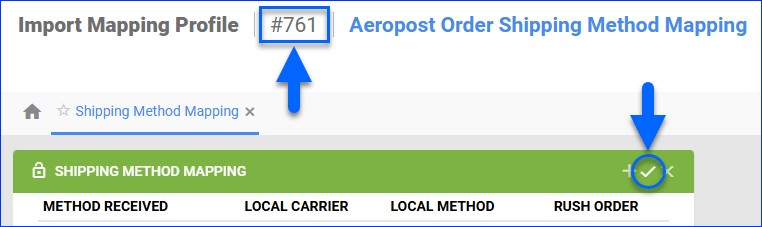
- Paste the ID into the Custom Company Setting Aeropost Mapping Profile ID.
Tracking Export
The Aeropost Tracking Export plugin exports tracking from Sellercloud to Aeropost.
Before you move on, create a Saved Search for orders filtered by:
- Company – The company you created for the integration
- Order Status – InProcess Or Completed
- Shipping Status – FullyShipped
- Payment Status – Charged
- Tracking Uploaded – No
![]()
Automate Tracking Export
To create a Scheduled Task that exports order tracking:
- Navigate to Settings > Scheduled Tasks > Manage Scheduled Tasks.
- Click the green + icon: Create New Scheduled Task.
- Complete as follows:
- Click Task Type and select Export Orders.
- Set the Task Name.
- Select the Company.
- Select the Start Time.
- Click CREATE.
- On the Scheduled Task page, click the Edit button at the top right corner.
- In the Details panel:
- Click the User ID menu and select your email.
- Click the Saved Search menu and select the saved search you created earlier.
- Click the Export Via menu and select Aeropost Tracking Export.
- Check This Is Tracking Export.
- In the Export Options panel, set Export To to None.
- In the Frequency panel, specify the task frequency. For optimal performance, select a range between thirty minutes and one hour.
- In the General panel, click the Enable toggle button.
- Click Save.
![]()
Inventory Export
The AeropostAPI Inventory Product Export plugin exports inventory from Sellercloud to Aeropost, sending the combined sellable quantity from all warehouses for each product. The export does not include pricing.
For products you have Marked as Replenishable, the plugin will send the available inventory quantity to Aeropost as follows:
- If the Custom Product Column AeropostReplenishableQtyUseDefault is True, the plugin will send the default replenishable quantity you enter into the Custom Company Setting AeropostDefaultReplenishableQty.
- If AeropostReplenishableQtyUseDefault is False, it will send the product-specific amount from the Custom Product Column AeropostReplenishableQty.
- If you don’t configure these settings, the plugin will send an inventory quantity of 0.
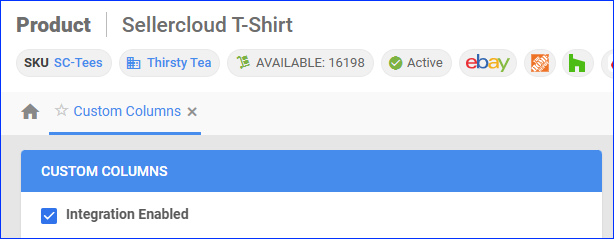
Optionally, you can enable only specific products for Aeropost by setting their Custom Product Column Aeropost_Enabled to True:
- For one product at a time: go to the Product Details Page > click Toolbox and select Custom Columns > click Edit, update the Aeropost_Enabled column, and Save.
- For multiple products in bulk: follow the steps to Bulk Update Products and use the Aeropost_Enabled column – set it to True for all products you want to enable.
Unlike core integrations, plugin integrations don’t require products to be in the company with the scheduled tasks. The export will include the products you select with your Saved Search.
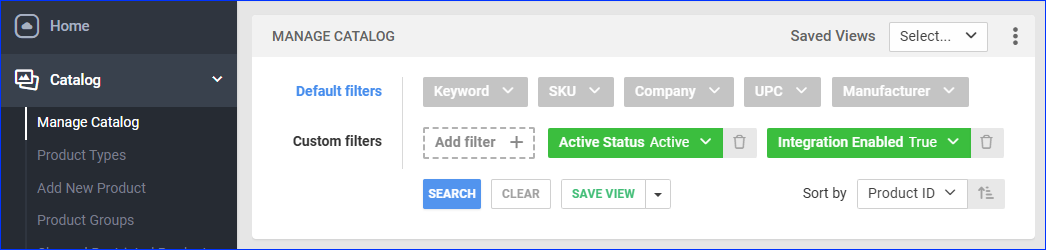
Next, create a Saved Search for products filtered by Aeropost_Enabled – True. Optionally, you can add more filters to the search to narrow down the export further.
Automate Inventory Export
To create a Scheduled Task that exports inventory:
- Navigate to Settings > Scheduled Tasks > Manage Scheduled Tasks.
- Click the green + icon: Create New Scheduled Task.
- Complete as follows:
- Click Task Type and select Export Products.
- Set the Task Name.
- Select the Company.
- Select the Start Time.
- Click CREATE.
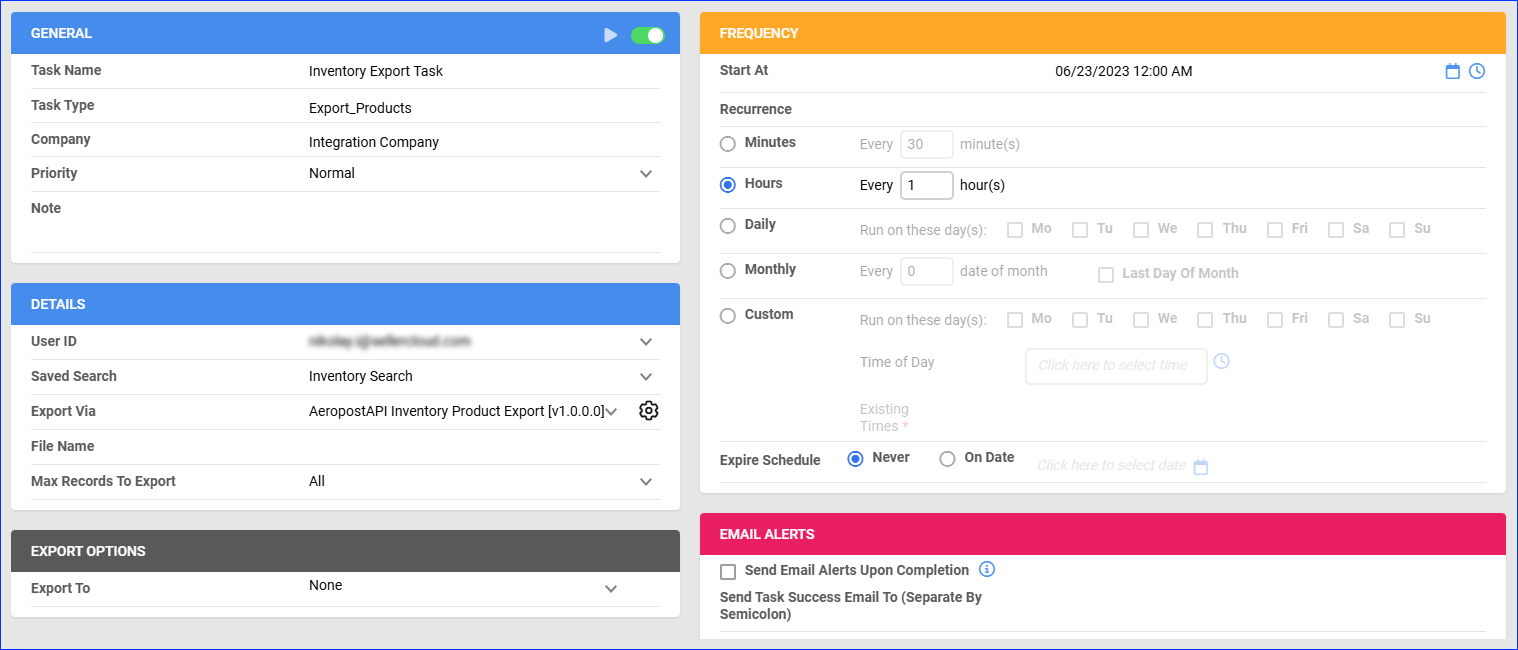
- On the Scheduled Task page, click the Edit button at the top right corner.
- In the Details panel:
- Click the User ID menu and select your email.
- Click the Saved Search menu and select the saved search you created earlier.
- Click the Export Via menu and select AeropostAPI Inventory Product Export.
- In the Export Options panel, set Export To to None.
- In the Frequency panel, specify the task frequency. For optimal performance, select a range between thirty minutes and one hour.
- In the General panel, click the Enable toggle button.
- Click Save.