Overview
Sellercloud provides you with a structured process to Create Vendors and manage their properties, ensuring effortless control over your inventory supply. The Vendor Properties page gives you easy access to a list of products for which the vendor is the Default supplier, and allows you to configure specific preferences, such as fees, payment terms, lead time to ship, and more. Additionally, you can review the history of all emails sent to the vendor, manage Vendor Invoices, apply discounts or promotions, and track all purchase orders and received shipments.
Manage Vendor Properties
To access the Vendor Properties, navigate to Purchasing > Vendors > Manage Vendors > Click Search > Select the desired Vendor.
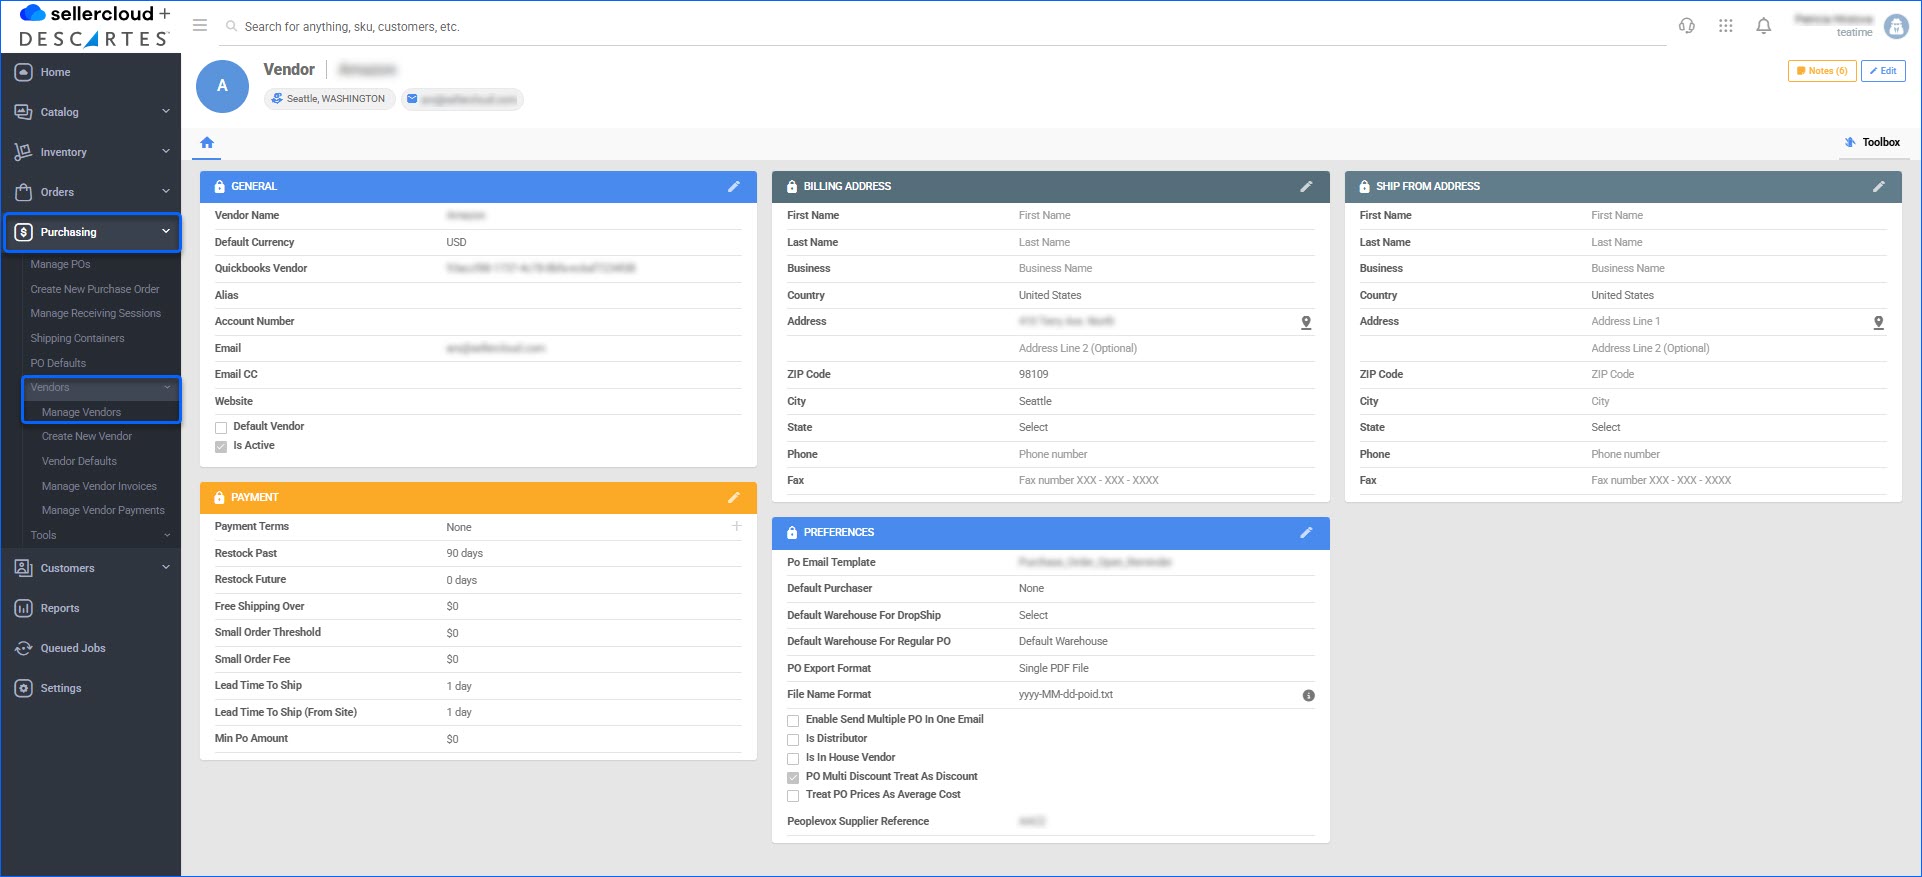
General
| Field | Description |
| Vendor Name | Enter the selected Vendor’s name. |
| Default Currency | Choose a default currency for your Purchase Orders from the dropdown menu. |
| Quickbooks Vendor | If applicable, specify the name of the Vendor in Quickbooks accounting software.
The QuickBook Vendor field will only display when the Client Setting Enable QuickBooks WorkFlow is enabled.
|
| Alias | Alternative Vendor Name. |
| Account Number | Vendor Account Number. |
| Enter a Vendor contact email to receive your POs. | |
| Email CC | Alternative contact email to be copied in PO emails. |
| Website | The website associated with the specific Vendor. |
| Default Vendor | Check Default Vendor to mark this Vendor as default. |
| Is Active | Check Is Active to indicate that the Vendor is functional. |
Payment
| Field | Description |
| Payment Terms | Click the plus sign to Add Payment Terms such as:
|
| Restock Past | Days past the last Vendor restock, used to calculate your Predictive Purchasing. |
| Restock Future | Days till next Vendor restock, used to calculate your Predictive Purchasing. |
| Free Shipping Over | Once this amount is reached, the shipping will be considered free, as agreed with the Vendor. |
| Small Order Threshold | Orders below the appointed dollar threshold are considered Small orders, and therefore Small Order Fee applies. |
| Small Order Fee | Applicable to Orders with a total value that is below the appointed Small Order Threshold. |
| Lead Time To Ship | Estimated Period before shipping. |
| Lead Time to Ship (From Site) | Estimated Period before shipping from Site. |
| Min Po Amount | The minimum dollar amount for a PO to be created. |
Billing Address
| Field | Description |
| First Name | Given name that appears in the billing details. |
| Last Name | Surname to appear in the billing details. |
| Business | Entity to be marked in the bill. |
| Country | The country of the entity to appear in the bill. |
| Address | The business address of the entity to appear in the bill. Address Line 2 (Optional) – alternative billing address. |
| ZIP Code | Entity’ ZIP Code |
| City | City of entity to appear in the bill. |
| State | State of entity to appear in the bill. |
| Phone | Contact phone of the business entity to appear in the bill. |
| Fax | Fax number of the business entity to appear in the bill. |
Preferences
| Field | Description |
| Po Email Template | An Email Template to which your PO will be attached and sent to your Vendor. |
| Default Purchaser | Predefined Buyer Name in your PO. |
| Default Warehouse For DropShip | Select the default warehouse for Dropship POs. This can only be a warehouse without Bins. |
| Default Warehouse For Regular PO | Select the default receiving warehouse for regular POs. This can be a warehouse with or without Bins. |
| PO Export Format | Select the desired export format of your PO. |
| File Name Format | Choose the default file name format of your PO. |
| Enable Send Multiple PO in One Email | Check to permit multiple POs in a single email. |
| Is Distributor | Check to mark the Vendor as a Distributor. |
| Is In House Vendor | Check to indicate that the Vendor is an in-house supplier. |
| PO Multi Discount Treat As Discount | Check to include applicable discounts in the PO total. |
| Treat PO Prices As Average Cost | Check to include PO prices in the Product’s Average cost calculation. |
| Peoplevox Supplier Reference | The vendor’s unique identifier (also referred to as Supplier Reference) in PeopleVox.
If this option is not available to you, open a ticket with Sellercloud Support.
|
Ship from Address
| Field | Description |
| First Name | Given name of the shipper. |
| Last Name | Surname of the shipper. |
| Business | Entity that processes the shipment. |
| Country | Country from which the shipment will be processed. |
| Address | The address from which the shipment will be processed. Address Line 2 (Optional) – alternative address. |
| ZIP Code | Zip Code from which the shipment will be processed. |
| City | City from which the shipment will be processed. |
| State | State from which the shipment will be processed. |
| Phone | Phone number of the shipping contact. |
| Fax | Fax number of the shipping contact. |
To edit multiple vendors in bulk, use the Import Vendors tool.
Import Vendor Prices
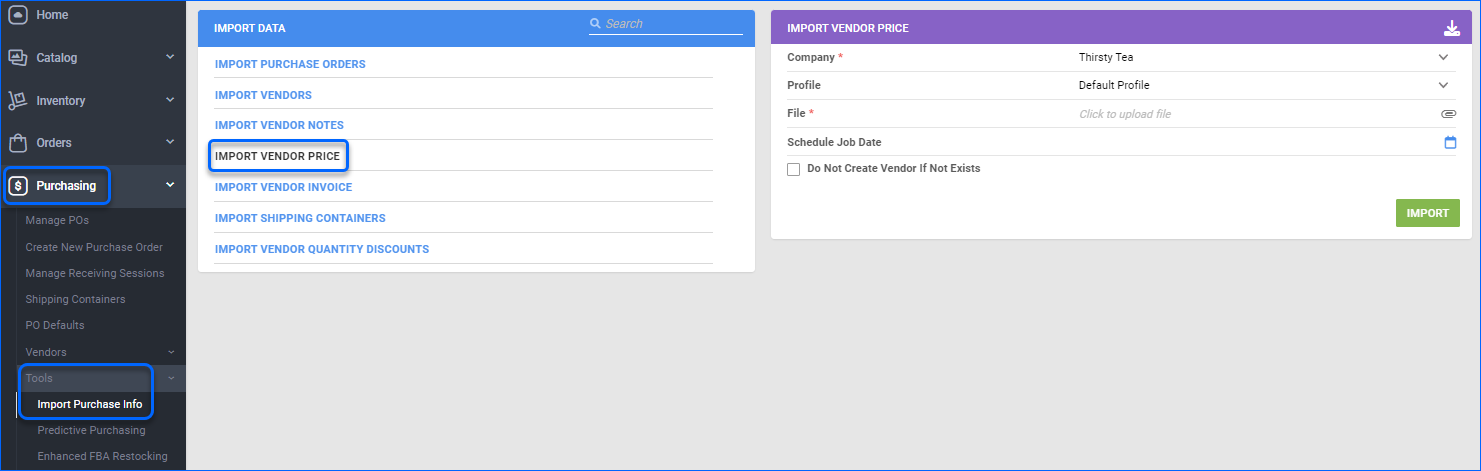
Sellercloud enables you to also import Vendor SKUs and Vendor Prices. To do that, go to Purchasing > Tools > Import Purchase Info > Import Vendor Price.
To add Vendor SKUs and Vendor Prices in bulk, use the VendorSKU.txt template. Purchase orders created with that vendor selected will auto-populate their Unit Cost field with the Vendor price. The file can also be created in Excel and saved as a .txt file.
Template columns are:
- Product ID — Product SKU used by Sellercloud as the unique identifier for an item.
- Vendor — Use the vendor name.
- VendorSKU — SKU the vendor wants people to use when submitting purchase orders
- Vendor Qty — required product quantity.
- Vendor Price — the price the vendor charges you for the product.
- Is Default Vendor For Product— if there are multiple vendors for a particular product, one can be associated as the main vendor (valid values: True, False).
- Is Available — states if the product is available from the vendor (valid values: True, False).
- PricePerCase — Vendor’s price per case.
- QtyPerCase — Product’s quantity per case.
- VendorPricesNotes — Purchasing notes for your Vendor on a product level.
- _ACTION_ — this column enables you to _ADD_ or _DELETE_ Vendor products.
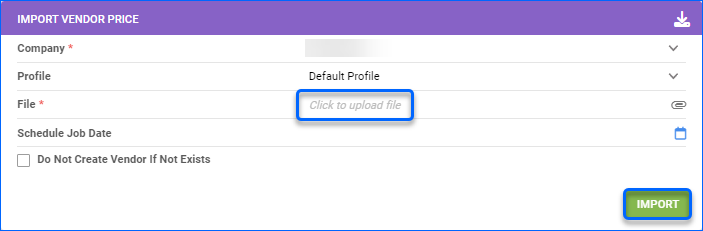
Once your Import document is ready, select your File and click Import. To ensure that no new Vendors are created by your import, check Do Not Create Vendor If Not Exists.
 A Queued job will be created and can be reviewed on your Manage Queued Job page.
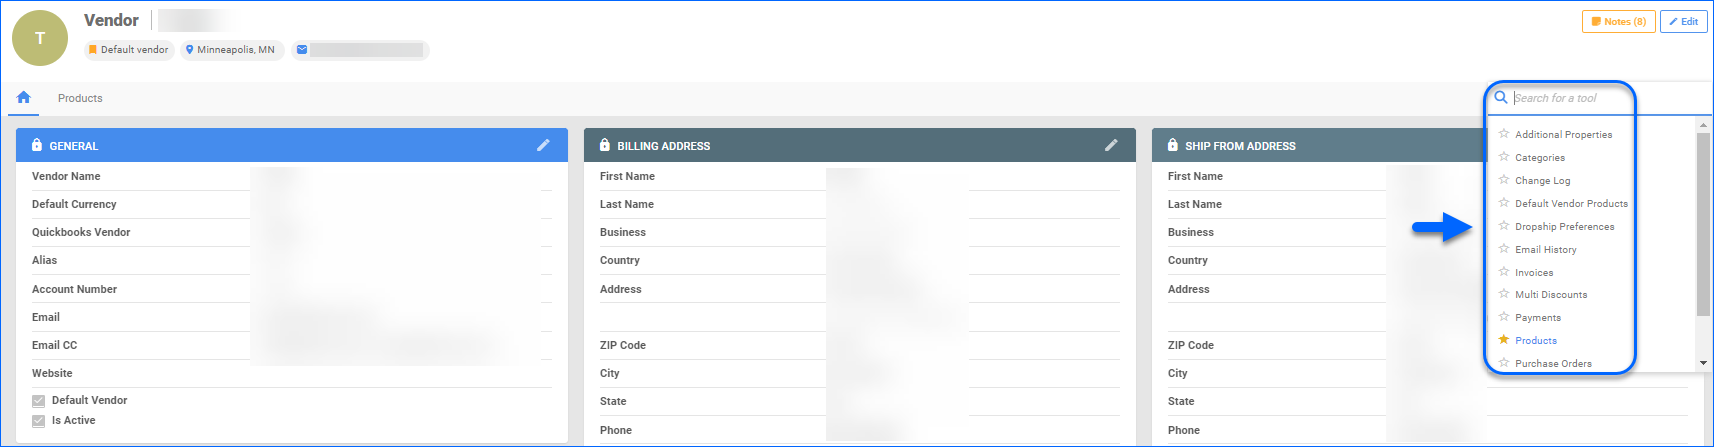
Toolbox Options
You can find and manage further properties in your Vendor’s Toolbox:
- Additional Properties – Insert additional Vendor information.
- Categories – In this section, you can assign and delete different Vendor categories.
- Change Log – Here you can find all Vendor changes and updates applied in Sellercloud.
- Default Vendor Products – Select to display a list of all products, for which the specific Vendor is Default.
- Dropship Preferences – You can define specific Dropship Preferences in this section.
- Email History – Use to find the history of all PO emails sent to the specific Vendor via Sellercloud.
- Invoices – Here you can search and manage your Vendor Invoices.
- Multi Discounts – The Enable Multi Discount For Purchase Orders Client Setting must be enabled in order to manage and apply multiple vendor discounts.
- Payments – In this tab, you can search and manage your Vendor Payments.
- Products – Select to display all products supplied by this Vendor, so you can manage them.
- Purchase Orders – A grid with all Vendor POs, which you can Mark Paid/Unpaid, Print to PDF, or Download Vendor Invoices.
- Rebates – Here you can set, edit, delete, and activate Vendor rebates.
- Receive Sessions – A search engine for all Vendor PO Received Shipments reflected in Sellercloud.
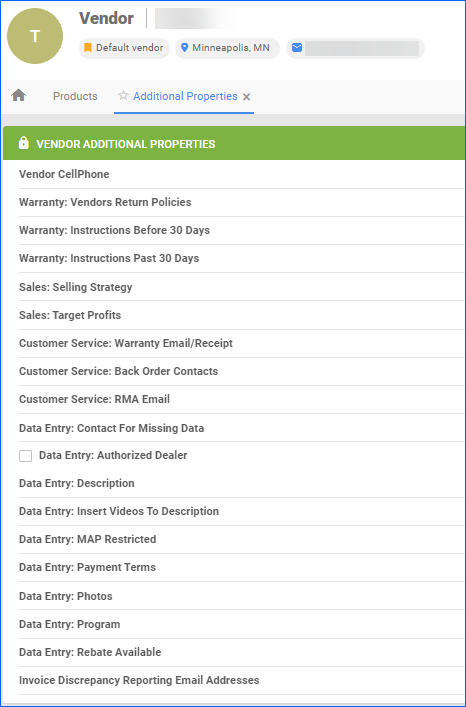
Additional Properties
You can insert additional Vendor Properties in this section, such as Vendor CellPhone and Warranty: Vendor Return Policies.
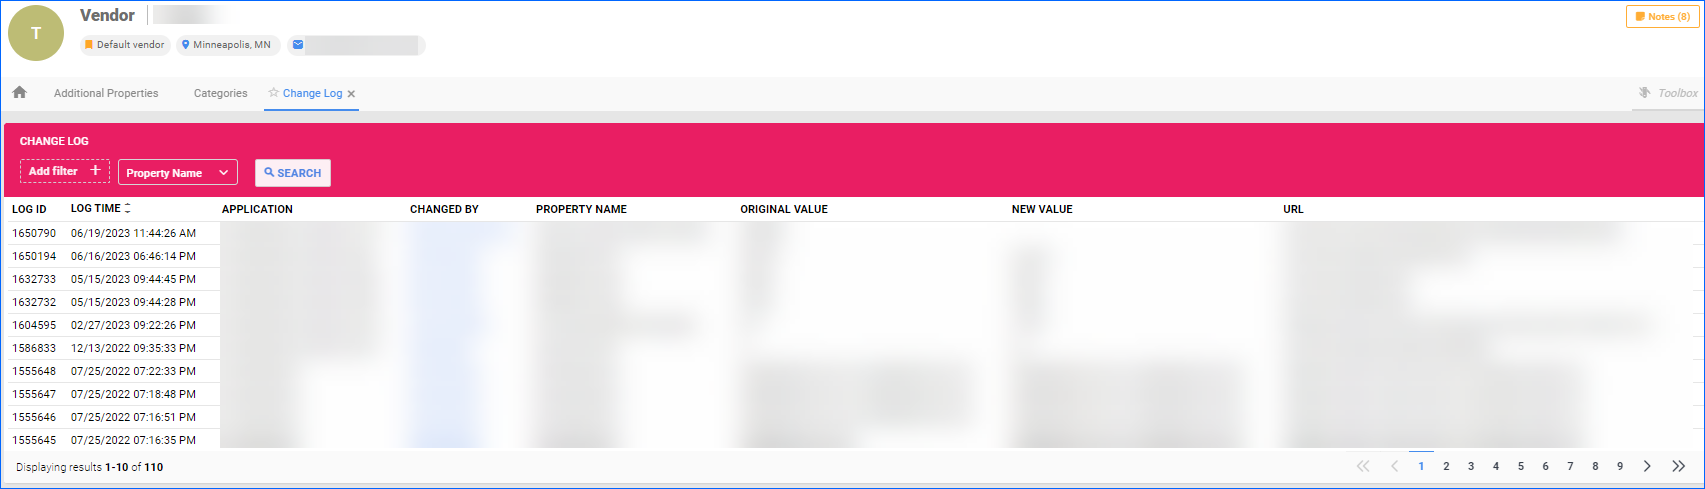
Change Log
Navigate to Change Log, to display Vendor’s settings changes. You can see who initiated the change and when.
Dropship Preferences
In this section, you can determine your Vendor Dropship Preferences.
| Field | Description |
| DropShip Email Template | First, create a dropshipping email template in your Company Settings > Toolbox > Email Settings > Email Templates > Add New Template.
Then, select the email template from the dropdown menu and Save. |
| Order # Prefix | Dedicated prefix to be added to each Vendor dropship order. |
| Shipping Method | Select Vendor’s default shipping method for orders you dropship. |
| Shipping Method (Rush) | Select Vendor’s default shipping method for Rush Orders. |
| DropShip Fee | Fee charged by the supplier for providing the dropshipping service. |
| General Shipping Instructions | Enter universal shipping instructions. |
| Do Not count Inventory for DropShip PO | Check to exclude product’s addition and deduction amounts associated with direct dropshipping from the product’s available inventory in Sellercloud. |
| Enable Reminder emails for Dropship Orders | Check to enable the use of dropshipping reminder emails and define:
|
| Send Export PO via FTP | Check for Vendors that can receive POs via FTP and enter their FTP details:
|
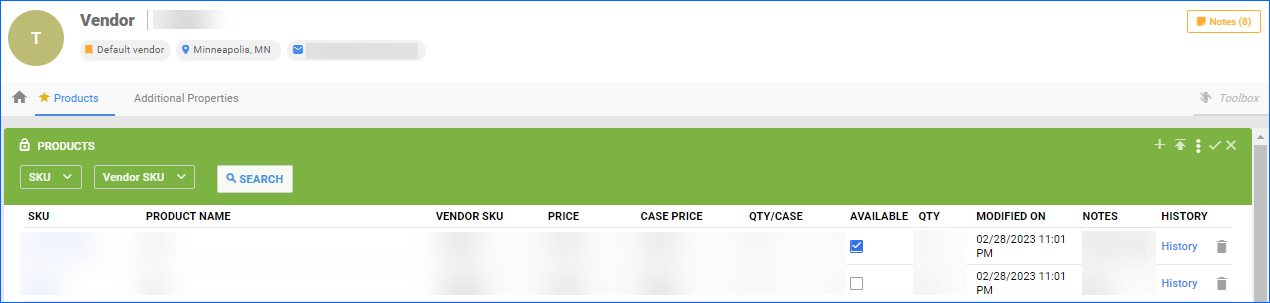
Products
In this tab you can Add Products and alter product’s Quantity, Availability, Vendor SKU, Price, Case price, and Vendor Notes. Here you can also Search and Export Vendor Products, and display History of Vendor product changes.
Based on your business needs, you can add and remove Vendor Products individually and in bulk:
- Individual product change:
- Click Edit and select the + sign.
- Search and check the desired products.
- Click Add Selected, or Add & Close if done.
- The newly added SKUs will appear on top. Click Save to finalize the change.
- To delete a Vendor Product, click on the Delete sign, next to the History hyperlink.
- Bulk product changes:
- Click Edit and select the Upload Vendor Products icon.
- The below pop-up will appear.
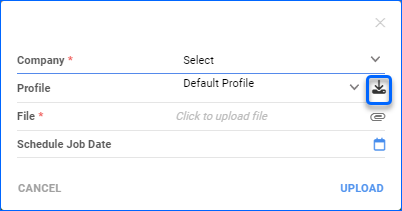
- Download the Vendor SKU file (available formats Tab Delimited, CSV and Excel).
- Populate the product IDs and their details and indicate the desired _ACTION_ – either _ADD_, _DELETE_, or _UPDATE_.
- If required, choose a Schedule Job Date and click UPLOAD, to proceed.
- A Queued job will be created and can be reviewed on your Manage Queued Job page.
Overview
Sellercloud provides you with a structured process to Create Vendors and manage their properties, ensuring effortless control over your inventory supply. The Vendor Properties page gives you easy access to a list of products for which the vendor is the Default supplier, and allows you to configure specific preferences, such as fees, payment terms, lead time to ship, and more. Additionally, you can review the history of all emails sent to the vendor, manage Vendor Invoices, apply discounts or promotions, and track all purchase orders and received shipments.
Manage Vendor Properties
To access the Vendor Properties, navigate to Settings > Vendors > Select the desired Vendor Name.
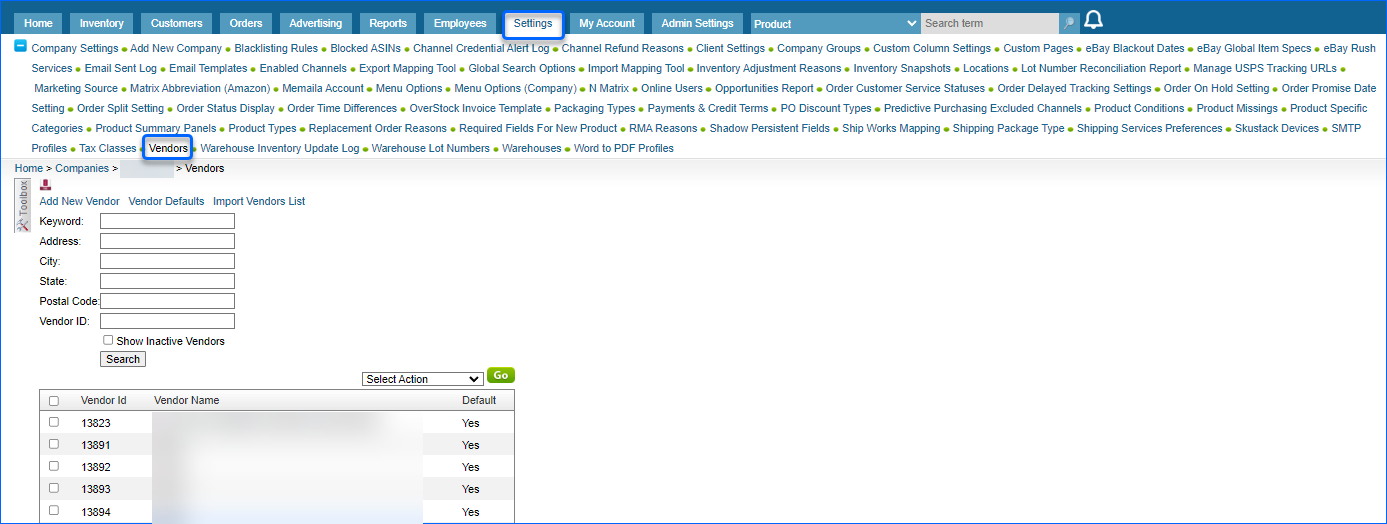
A list of Vendor Settings will be displayed:
- General Information
-
-
- Input Vendor’s general settings.
-
- Contact Info
-
-
- Enter Billing and Shipping information.
-
- Additional Properties
-
-
- Insert additional Vendor information, e.g., Vendor Cellphone, Warranty: Vendors Return Policies, etc.
-
- Categories
-
-
- Select and assign Vendor Categories.
-
- Products
-
-
- Display all products supplied by this Vendor so you can manage them.
-
- Notes
-
-
- Insert, edit, or remove any Notes for your Vendor.
-
-
-
- A grid with all Vendor POs, which you can Mark Paid/Unpaid, Print to PDF, or Download Vendor Invoices.
-
- PO Items by Invoice#
-
-
- Used to Seach Received Products by an Invoice Number.
-
-
-
- A template email to which your PO will be attached and sent to your Vendor.
-
-
-
- Use to define Vendor Dropship settings.
- Promotions
- Here you can specify Vendor promotions parameters, such as duration, discount value and type.
-
-
-
- To manage Vendor multi-discounts. You can define the discount type, amount, and calculation type.
-
- Rebates
-
-
- Here, you can set, edit, and delete Vendor rebates.
-
- Emails
-
-
- A Log of your emails sent to the Vendor via Sellercloud.
-
-
-
- Here you can search and manage your Vendor Invoices.
-
-
-
- In this tab, you can search and manage your Vendor Payments.
-
-
-
- A Search engine for all Vendor PO Received Shipments, reflected in Sellercloud.
-
- Change Log
-
- Here, you can find all changes and updates applied to the Vendor settings in Sellercloud. You can see who initiated the change and when.
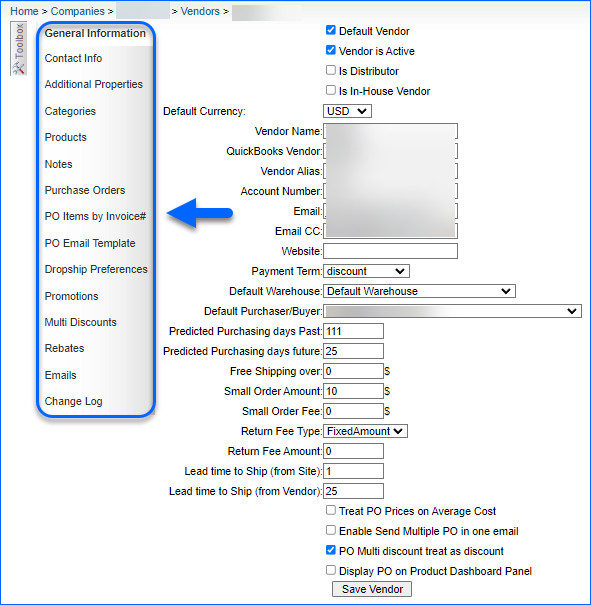
General Information
| Field | Description |
| Default Vendor | Check to assign a Default vendor if you are using only one vendor or for your most frequently used one among multiple vendors. |
| Vendor is Active | Check Is Active to indicate that the Vendor is functional. |
| Is Distributor | Check to mark the Vendor as a Distributor. |
| Is In-House Vendor | Check to indicate that the Vendor is an in-house supplier. |
| Default Currency | Choose a default currency for your Purchase Orders from the dropdown menu. |
| Vendor Name | Enter the selected Vendor’s name. |
| QuickBooks Vendor | If applicable, specify the name of the Vendor in Quickbooks accounting software.
The QuickBook Vendor field will only display when the Client Setting Enable QuickBooks WorkFlow is enabled.
|
| Vendor Alias | Alternative Vendor Name. |
| Account Number | Vendor Account Number. |
| Enter a Vendor contact email to receive your POs. | |
| Email CC | Alternative contact email to be copied in PO emails. |
| Website | The website associated with the specific Vendor. |
| Payment Term | The timeframe in which a payment should be processed. |
| Default Warehouse For DropShip | Select the default warehouse for Dropship POs. This can only be a warehouse without Bins. |
| Default Warehouse For Regular PO | Select the default receiving warehouse for regular POs. This can be a warehouse with or without Bins. |
| Predicted Purchasing days Past | Days past the last Vendor restock, used to calculate your Predictive Purchasing. |
| Predicted Purchasing days future | Days till next Vendor restock, used to calculate your Predictive Purchasing. |
| Free Shipping over | Once this amount is reached, the shipping will be considered free, as agreed with the Vendor. |
| Small Order Amount | Orders below the appointed dollar threshold are considered Small orders and therefore Small Order Fee applies. |
| Small Order Fee | Applicable to Orders with a total value that is below the appointed Small Order Amount. |
| Return Fee Type | Choose a type of Return Fee:
|
| Return Fee Amount | Enter the desired Return Fee. |
| Lead time to Ship (from Site) | Estimated Period before shipping from Site. |
| Lead time to Ship (from Vendor) | Estimated Period before shipping from Vendor. |
| Treat PO Prices on Average Cost | Check to include PO prices in the Product’s Average cost calculation. |
| Enable Send Multiple PO in one email | Check to permit multiple POs in a single email. |
| PO Multi discount treat as discount | Check to include applicable discounts in the PO total. |
| Display PO on Product Dashboard Panel | Check to incorporate the PO panel on the Product’s Dashboard. |
Contact Info
Billing Information
| Field | Description |
| First Name | Given name that appears in the billing details. |
| Last Name | Surname to appear in the billing details. |
| Address | Business address of the entity to appear in the bill. |
| Address 2 | Alternative billing address. |
| City | City of entity to appear in the bill. |
| State | State of entity to appear in the bill. |
| ZipCode | Entity’ ZIP Code |
| Country | The country of the entity to appear in the bill. |
| Phone | Contact phone of the business entity to appear in the bill. |
| Fax | Fax number of the business entity to appear in the bill. |
Shipping Information
Press Copy Billing to replicate the information from the Billing Information fields.
| Field | Description |
| First Name | Given name of the shipper. |
| Last Name | Surname of the shipper. |
| Address | Address from which the shipment will be processed. |
| Address 2 | Alternative shipping address. |
| City | City from which the shipment will be processed. |
| State | State from which the shipment will be processed. |
| ZIP Code | Zip Code from which the shipment will be processed. |
| Country | Country from which the shipment will be processed. |
| Phone | Phone number of the shipping contact. |
| Fax | Fax number of the shipping contact. |
Dropship Preferences
| Field | Description |
| DropShip Email Template | First, create a dropshipping email template in your Company Settings > Toolbox > Email Settings > Email Templates > Add New Template.
Then, select the email template from the dropdown menu and Save. |
| PO Export Format | Choose a PO Export Format from the dropdown menu. |
| Custom Format | Select an Export Mapping profile or an applicable Company plugin. |
| Order # Prefix | Dedicated prefix to be added to each Vendor dropship order. |
| Shipping Method (Default) | Select Vendor’s default shipping method for orders you dropship. |
| Shipping Method (Rush) | Select the Vendor’s default shipping method for Rush Orders. |
| DropShip Fee | Fee charged by the supplier for providing the dropshipping service. |
| File Name format | Choose the default file name format of your PO. |
| General Shipping Instructions | Enter universal shipping instructions. |
| Do Not count Inventory for DropShip PO | Check to exclude product’s addition and deduction amounts associated with direct dropshipping from the product’s available inventory in Sellercloud. |
| Enable Reminder emails for Dropship Orders | Check to enable the use of dropshipping reminder emails and define:
|
| Send Export PO via FTP | Check for Vendors that can receive POs via FTP and enter their FTP details:
|
Products
In this section, Sellercloud enables you to:
-
- Search for SKU or Vendor SKU.
-
- Add Products
-
- Edit Product’s:
- Notes
- Quantity
- Availability
- Price
- Price/Case
- Qty/Case
- Edit Product’s:
- Display History of Vendor product changes.
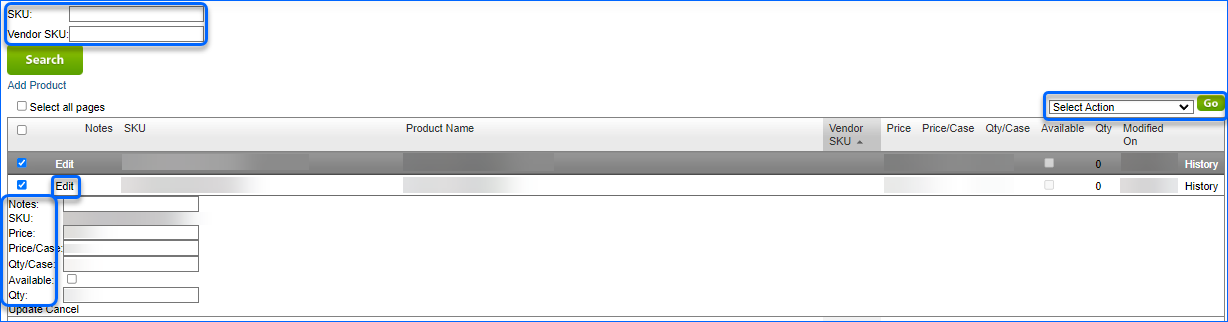
Via the Select Action dropdown menu, you can also Add to PO and Export Vendor Products.
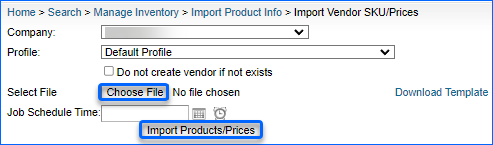
Import Vendor Prices
Sellercloud has the capability to import Vendor SKUs and Vendor Prices: Go to Inventory > Import Product Info > Import Vendor SKU/Prices.

To add Vendor SKUs and Vendor Prices in bulk, download and use the VendorSKU.txt template. Purchase orders created with that vendor selected will auto-populate their Unit Cost field with the Vendor price. The file can also be created in Excel and saved as a .txt file.
Template columns are:
- Product ID — product SKU used by Sellercloud as the unique identifier for an item.
- Vendor — Use the vendor name.
- VendorSKU — SKU the vendor wants people to use when submitting purchase orders
- Vendor Qty — required product quantity.
- Vendor Price — the price the vendor charges you for the product.
- Is Default Vendor For Product— if there are multiple vendors for a particular product, one can be associated as the main vendor (valid values: True, False).
- Is Available — states if the product is available from the vendor (valid values: True, False).
- PricePerCase — Vendor’s price per case.
- QtyPerCase — Product’s quantity per case.
- VendorPricesNotes — Purchasing notes for your Vendor on a product level.
- _ACTION_ — this column enables you to _ADD_ or _DELETE_ Vendor products.
Once your Import document is ready, select your File and click Import. To ensure that no new Vendors are created by your import, check Do not create vendor if not exists.
 A Queued job will be created and can be reviewed on your Manage Queued Job page.
Vendor Promotions
Occasionally, vendors conduct product promotions over a specific period of time. Sellercloud allows you to enter these promotions into the system so that throughout the promotional period, purchase orders automatically reflect the discounted prices.
Add a product promotion
To add a promotion to a product:
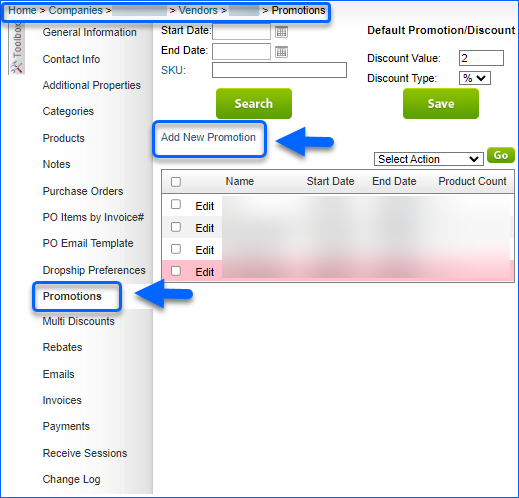
- Go to your Company Settings and select Vendors.
- Choose the required Vendor name, click on Promotions and select Add New Promotion.
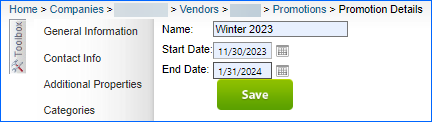
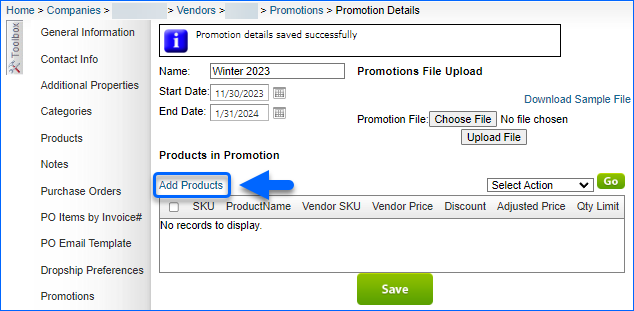
- Enter the name of the promotion and its applicable date range, and Save.
- Click on Add Products.
- A pop-up will open, in which you can search for the product SKUs that should be included in the promotion and specify if the discount will be a dollar amount or percentage per unit.
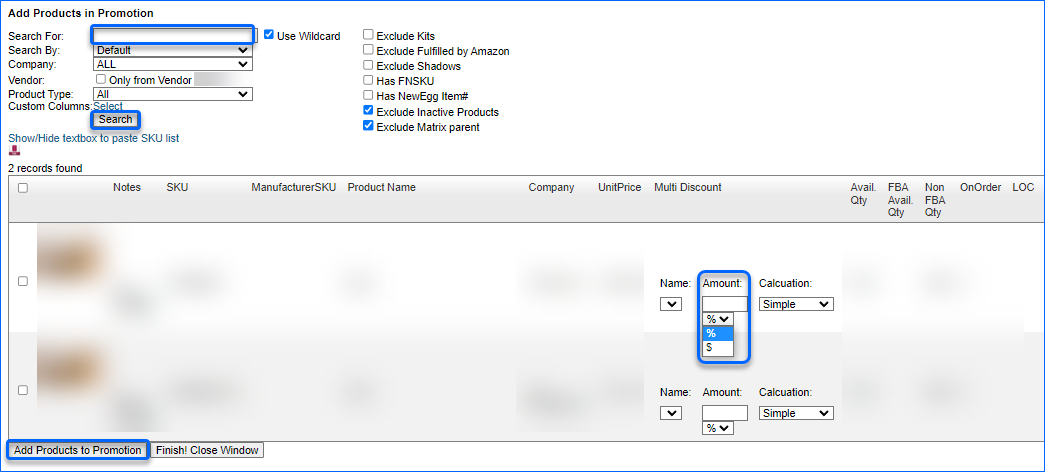
- Click Add Products to Promotion to add the product and repeat for as many products as necessary. Once all applicable products are added, click Finish! Close Window.
- After all desired products are applied to the promotion, you can modify the discount values and the list of products.

Default Promotion for multiple products
Sellercloud enables you to set a Default Promotion for a Vendor, so it’s applied to all POs for the same vendor:
- Navigate to Settings > Vendors.
- Select the desired Vendor name > Promotions.
- In Default Promotion/Discount enter:
- Discount Value – discount amount.
- Discount Type – dollar amount or percentage per unit.
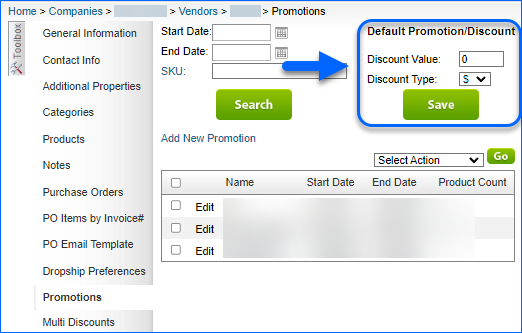
- Click Save to complete the task.