Overview
The final step in the Purchase Order (PO) Workflow is to receive the ordered units from your vendor(s). Once the purchased items arrive at your warehouse, you can update your POs as fully or partially received using Sellercloud, Skustack, or the standalone Receivebridge app. By following this process, you verify that the correct item quantities are received, maintain accurate inventory records, and ensure a smooth flow of goods into your warehouse.
After you fully receive a PO:
- The PO’s Purchase status changes to Received.
- The PO’s Receiving status changes to Fully Received.
After you partially receive a PO:
- The PO’s Purchase status doesn’t change.
- The PO’s Receiving status changes to Partially Received.
Receive a PO
To receive a PO:
- Go to the PO Details Page.
- Click Actions and select:
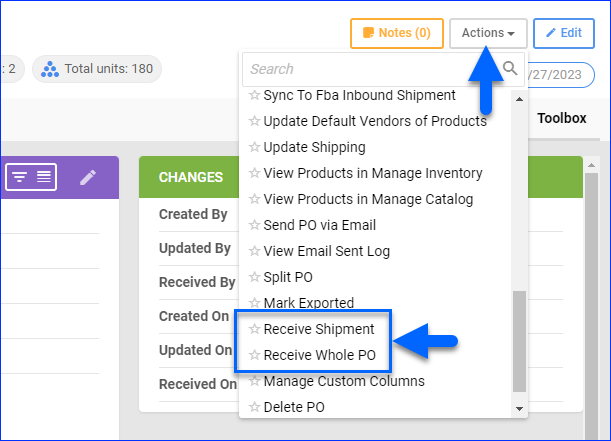
- Receive Whole PO – Receive all items, skip adding details and verifying product quantities, and set the PO to Received.
- Receive Shipment – Process the receiving manually and continue with the next steps.
For quick access to this option, click the Receiving status button at the top.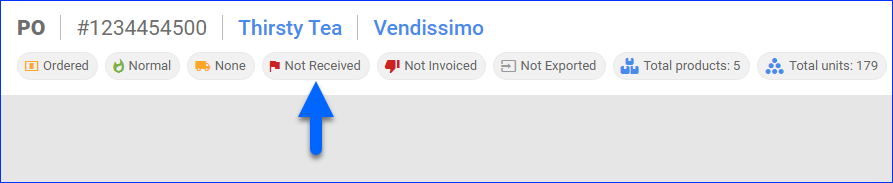
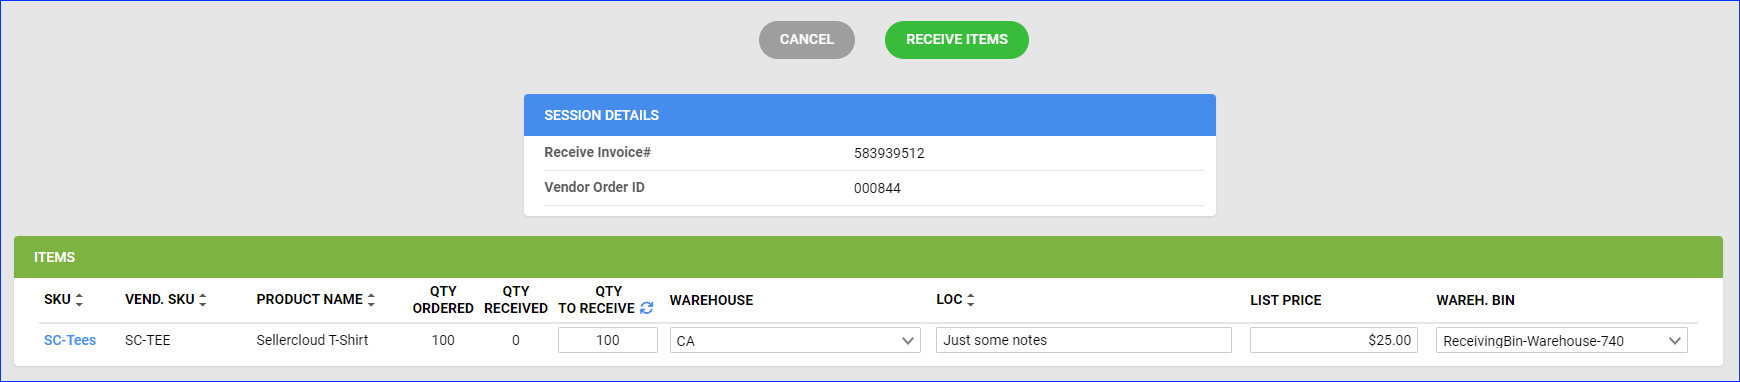
- Optionally, in the Session Details panel, you can enter:
- Receive Invoice # – The number of the invoice associated with the receiving.
- Vendor Order ID – The number of the associated order issued by the vendor.
- In the Items panel, you can sort the list by clicking the arrows next to each column header. The grid columns are:
- Quantity To Receive – Enter the number of received product units or click the blue arrows icon to autofill the remaining quantity of all SKUs.
To be able to over-receive POs, enable the Client Setting Allow To Over Receive PO. - Warehouse – Select the warehouse where the items are delivered. The product’s inventory in the selected warehouse will increase once you save the receiving session.
- Location – Enter notes related to the product’s location in the warehouse. This field is pre-populated based on the product’s Location Notes field on the Product Details Page.
- List Price – Corresponds to the Standard/List Price field on the Product Details Page.
- Warehouse Bin – If you are receiving in a Bin-Enabled Warehouse, you must also select bins for the SKUs in the PO.
You can also receive POs in bin-enabled warehouses with Skustack.
- Quantity To Receive – Enter the number of received product units or click the blue arrows icon to autofill the remaining quantity of all SKUs.
- Click Receive Items.
- If the products you receive have Serial Numbers, add the serials associated with the units you received by clicking Toolbox and selecting Serial Numbers.
Manage Receiving Sessions
You can view and manage receiving sessions by opening the Receiving tab on the PO details page. This tab allows you to:
- View all receiving sessions related to the PO
- Add a new receiving session
- Bulk-import sessions
- Edit sessions
- Delete sessions
- Print sessions to an Excel spreadsheet or PDF file
- Print product or location labels
View Receiving Sessions
To view all receiving sessions associated with a PO:
- Go to the PO Details Page.
- Click the Receiving status button at the top or click Toolbox and select Receiving.
- All sessions associated with the PO appear in the Receiving Sessions panel.
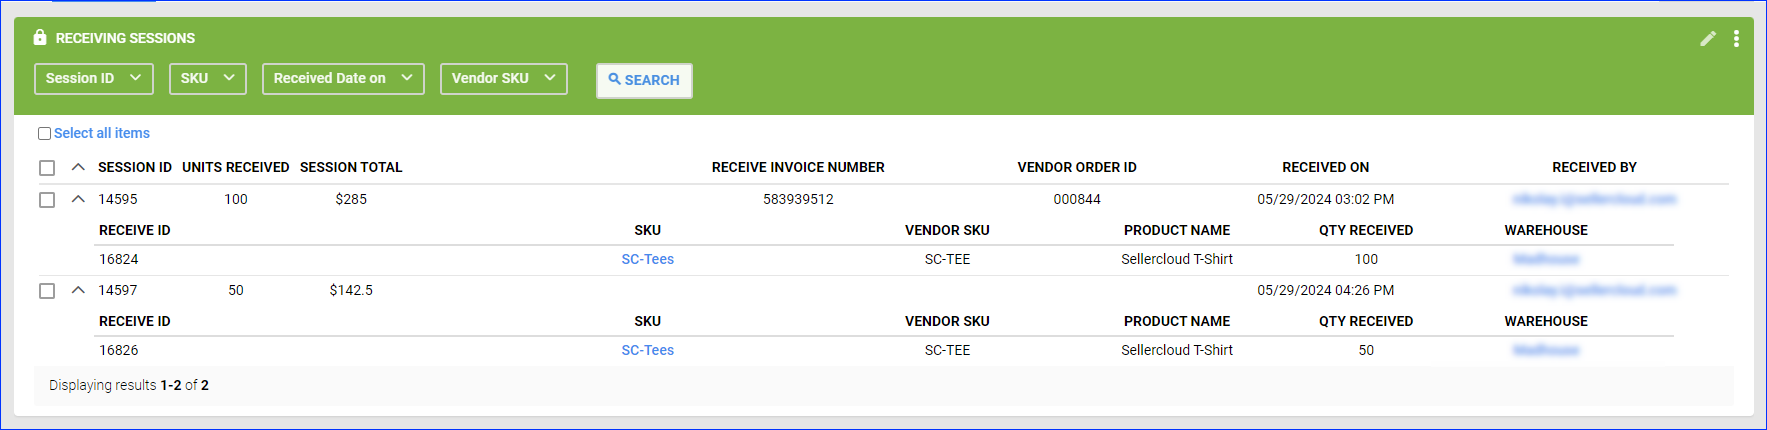
- You can filter receiving sessions by:
- Session ID – Search sessions by their unique identification number.
- SKU – Show only sessions with a specific SKU.
- Received Date On – Show sessions by their receive date.
- Vendor SKU – Show sessions based on the received item’s Vendor-Specific SKU.
- The Receiving Sessions grid shows these details about each session:
- Session ID – The unique ID of the receiving session.
- Units Received – The number of received units.
- Session Total – The total amount paid for the received items.
- Receive Invoice Number – The number of the invoice associated with the receiving session.
- Vendor Order ID – The number of the associated order issued by the vendor.
- Received On – The date when the receiving session was added.
- Received By – The Employee who completed the receiving session.
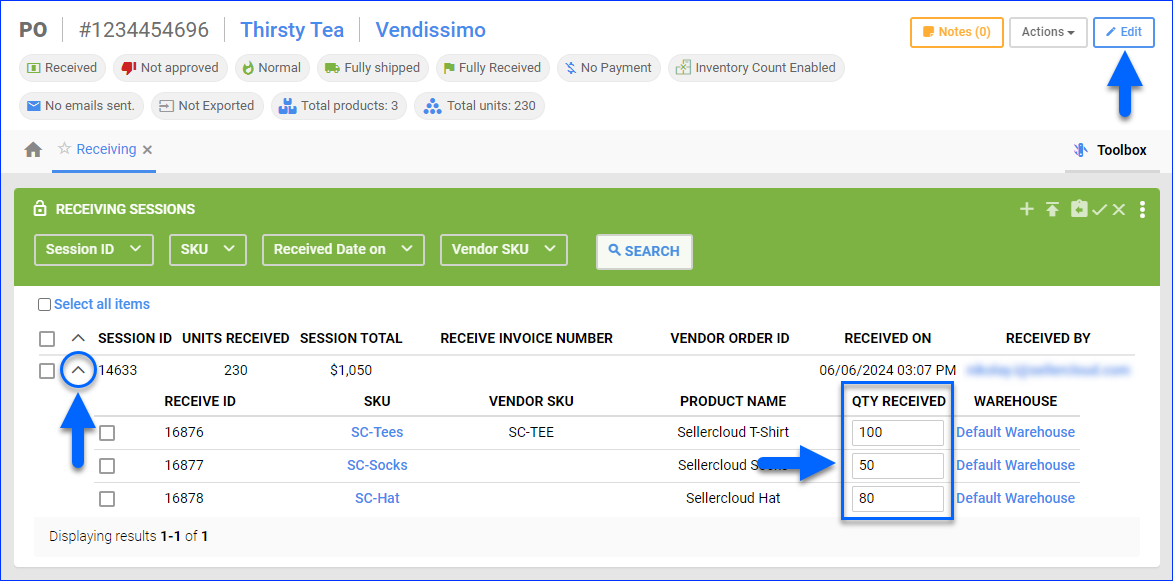
Clicking the dropdown arrow to the left of the Session ID displays an additional row with more details:
- Receive ID – Each SKU within a receiving session has a unique Receive ID.
- SKU – The product’s Sellercloud SKU
- Vendor SKU – The product’s Vendor-Specific SKU.
- Product Name – The product’s name.
- Quantity Received – The number of product units received in the session.
- Warehouse – The warehouse where the item has been received.
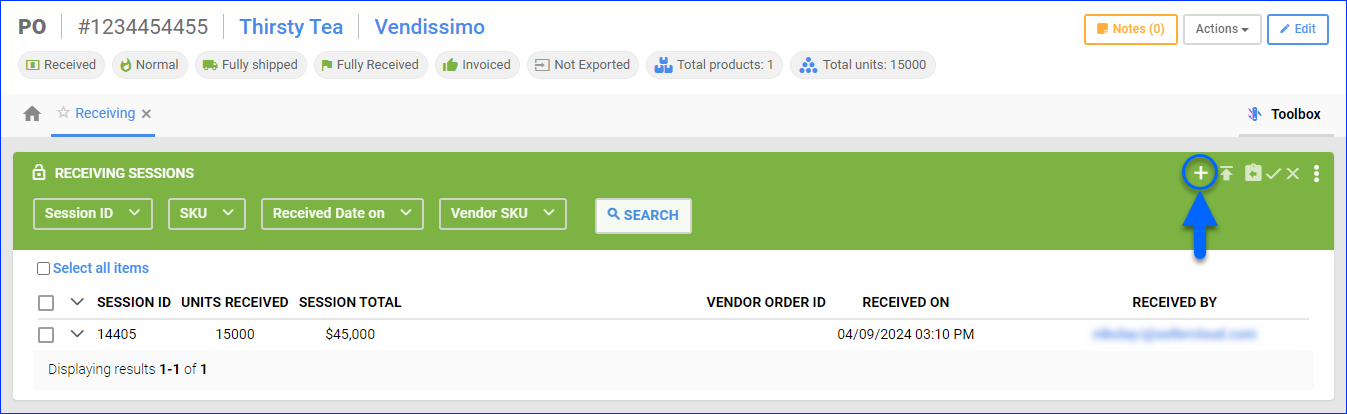
Add a Receiving Session
To add a new receiving session:
- Open a PO’s Receiving page.
- Click the Edit pencil icon at the top right of the Receiving Sessions panel.
- Click the + icon.
- Optionally, in the Session Details panel, you can enter:
- Receive Invoice # – The number of the invoice associated with the receiving.
- Vendor Order ID – The number of the associated order issued by the vendor.
- In the Items panel:
- Quantity To Receive – Enter the number of received product units or click the blue arrows icon to autofill the remaining quantity of all SKUs.
To be able to over-receive POs, enable the Client Setting Allow To Over Receive PO. - Warehouse – Select the warehouse where the items are delivered. The product’s inventory in the selected warehouse will increase once you save the receiving session.
- Location – Enter notes related to the product’s location in the warehouse. This field is pre-populated based on the product’s Location Notes field on the Product Details Page.
- List Price – Corresponds to the Standard/List Price field on the Product Details Page.
- Warehouse Bin – If you are receiving in a Bin-Enabled Warehouse, you must also select bins for the SKUs in the PO.
You can also receive POs in bin-enabled warehouses with Skustack.
- Quantity To Receive – Enter the number of received product units or click the blue arrows icon to autofill the remaining quantity of all SKUs.
- Click Receive Items.
- If the products you are receiving have Serial Numbers, next, add the numbers associated with the units you received by clicking Toolbox and selecting Serial Numbers.
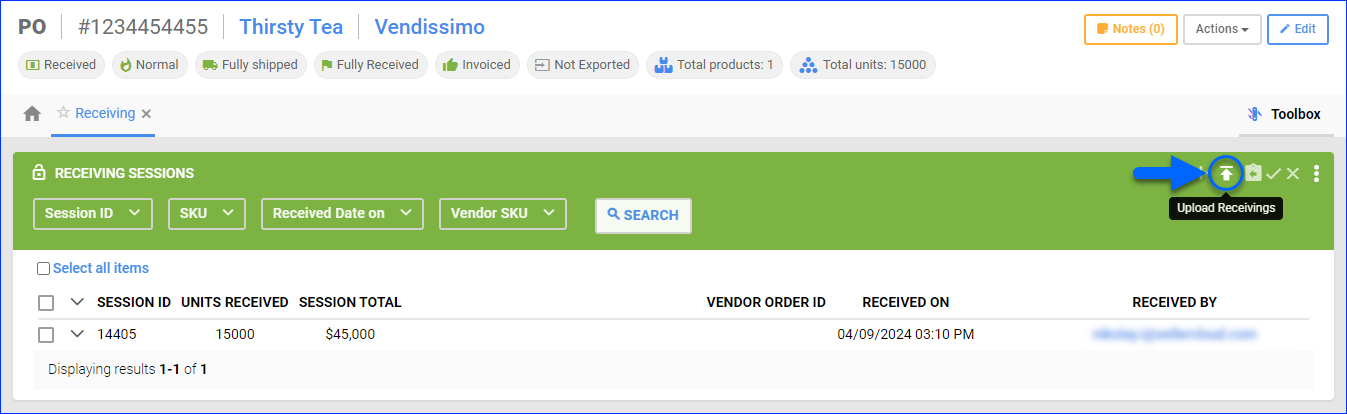
Bulk Import Receiving Sessions
To bulk-import receiving sessions:
- Open a PO’s Receiving page.
- Click the Edit pencil icon at the top right of the Receiving Sessions panel.
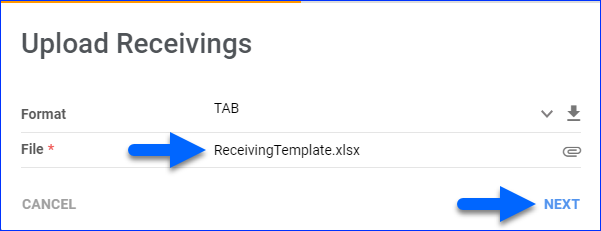
- Click the Upload Receivings icon.
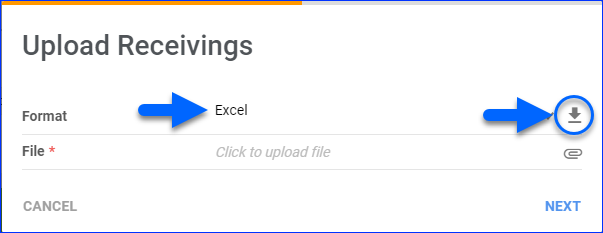
- To download a sample template, select the appropriate file Format and click the Download icon.
- Open the file and populate the following columns:
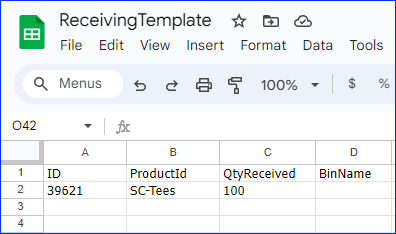
- ID – The line ID of an item in the PO, from Toolbox > Items on the PO Details page.
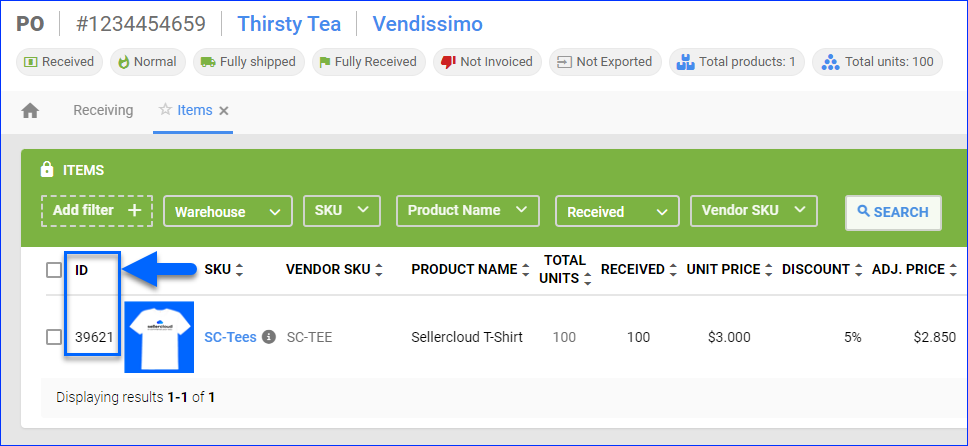
- ProductID – The item’s SKU.
- QtyReceived – The quantity to receive.
- BinName – If you are receiving to a Bin-Enabled Warehouse, enter the bin name. Otherwise, leave this column blank.
- Save the updated template file.
- Return to the Upload Receivings screen, select the File, and click Next.
- In the Receive Session dialog box, complete the details:
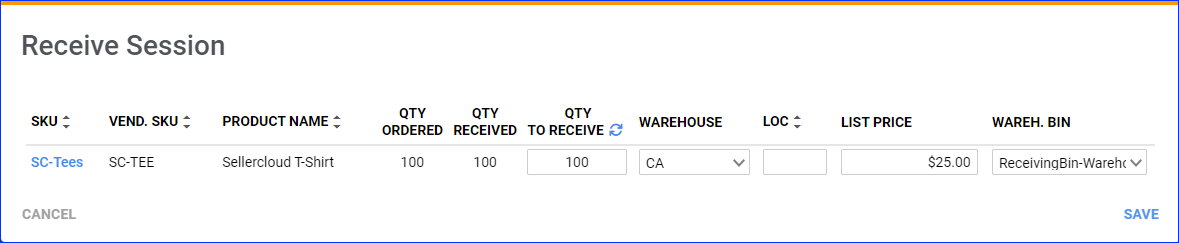
- Quantity To Receive – Enter the number of product units to receive or click the blue arrows icon to autofill the remaining quantity of all SKUs.
- To be able to over-receive POs, enable the Client Setting Allow To Over Receive PO.
- Warehouse – Select the warehouse where the items are delivered. The product’s inventory in the selected warehouse will increase once you save the receiving session.
- Location – Enter notes related to the product’s location in the warehouse. This field is pre-populated based on the product’s Location Notes field on the Product Details Page.
- List Price – Corresponds to the Standard/List Price field on the Product Details Page.
- Warehouse Bin – If you are receiving in a Bin-Enabled Warehouse, you must also select bins for the SKUs in the PO.
- Click Save.
- Quantity To Receive – Enter the number of product units to receive or click the blue arrows icon to autofill the remaining quantity of all SKUs.
Edit Sessions
To update the received quantities on your receiving sessions.
- Open a PO’s Receiving page.
- Click the dropdown arrow icon to the left of the Session ID to see all SKUs and quantities.
- Click Edit.
- Edit the Quantity Received fields.
- Click Save.
Delete Receiving Sessions
When you delete only some of the receiving sessions in a PO:
- The increases in your warehouse inventory due to the receiving sessions are removed.
- The associated Inventory Movements are removed from the Warehouse Inventory Movements.
- The PO’s Receiving status changes to Partially Received.
If you delete all receiving sessions in a PO:
- All increases in inventory are removed, and all inventory movements are removed.
- The PO’s Purchase status changes to Ordered.
- The PO’s Receiving status changes to Not Received.
You can’t undo this action. To re-add a deleted receiving session back to the PO, you must Add a New Receiving Session.
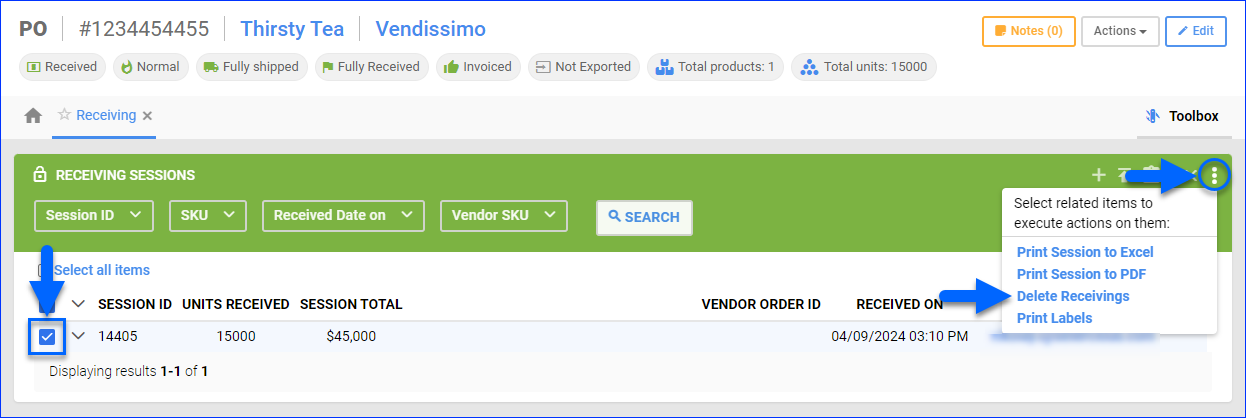
To delete receiving sessions in regular warehouses:
- Open a PO’s Receiving page.
- Check the box to the left of a receiving session to select it.
- Click three dots at the top right and select Delete Receivings. Note that you can’t undo this action.
Print Sessions
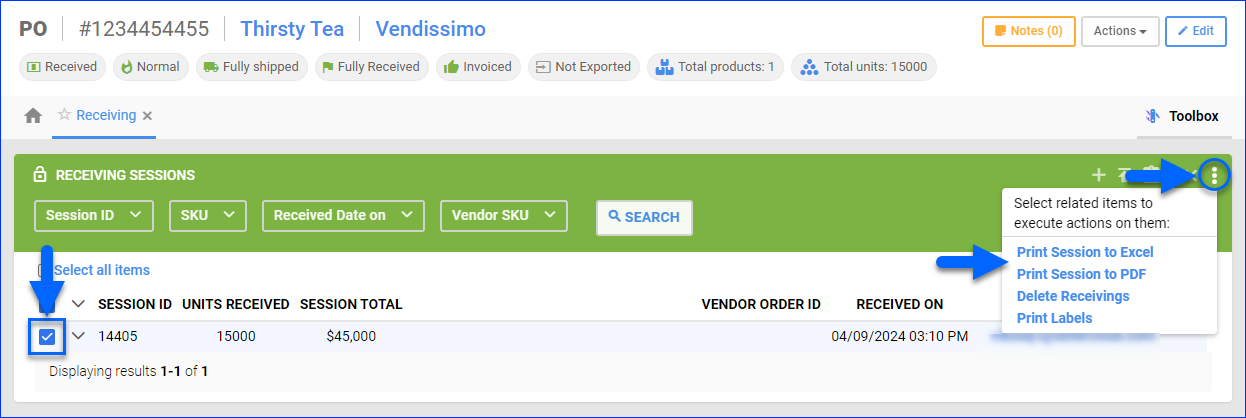
To export session details to a PDF file or Excel spreadsheet:
- Open a PO’s Receiving page.
- Check the boxes to the left of the receiving sessions to select them.
- Click three dots at the top right and select Print Session to Excel/PDF.
Print Labels
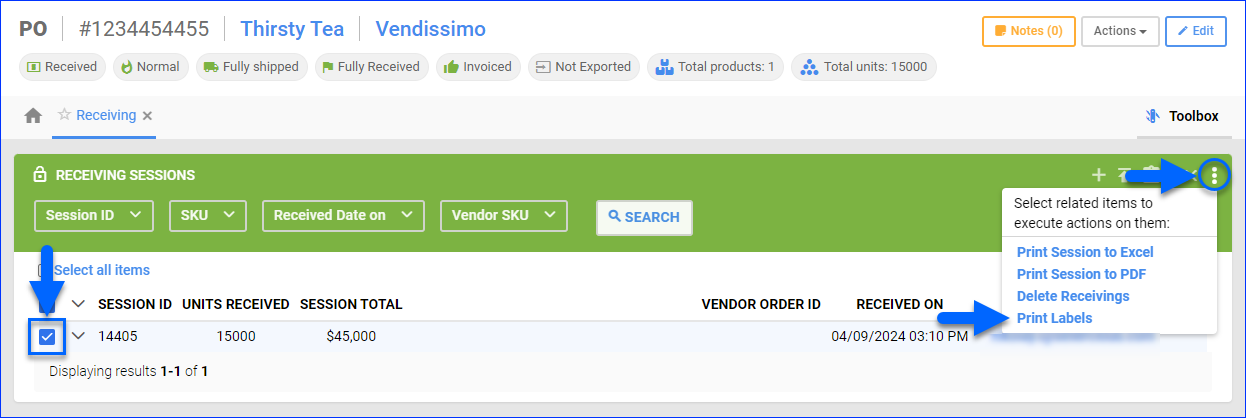
To print product or location labels for the SKUs in a receiving session:
- Open a PO’s Receiving page.
- Check the boxes to the left of the receiving sessions to select them.
- Click three dots at the top right and select Print Labels.
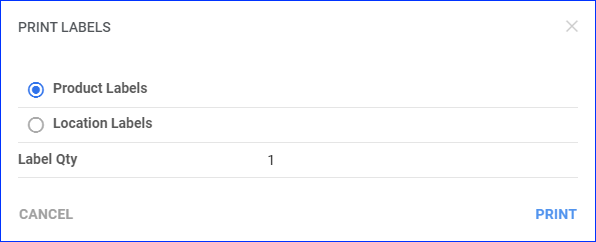
- Select the Type of label you want to print.
- Enter the Label Quantity to print.
- Click Print.
Manage Receiving Sessions Page
The Manage Receiving Sessions page lets you view all the receivings in your Sellercloud account. The following filters are available:
- Company – Accepts multiple values.
- Session ID – Allows you to search for a specific receiving session.
- Vendor – Accepts multiple values.
- SKU – Will pull up all receiving sessions that contain the selected product.
- PO # – Search for all receiving sessions linked to a specific Purchase Order.
- Invoice Status – Filter sessions based on whether they ave linked invoices.
- Drop Ship – Filter based on dropship status.
- Received On – Filter sessions based on specific receiving dates.
- Received On Date Range – Filter sessions based on a predefined range, such as This Week, Last Month, etc.
- Container ID – Search for sessions associated with a specific Shipping Container.
- Show Ignored Sessions – Filter based on the Ignored status of receiving sessions.

The search results display a list of Receiving Sessions that match your search criteria, with data columns showing various details separated into two levels. 
You can add, remove, and reorder data columns. To do so, click the three dots icon at the top right and select Customize Columns. After you click search, you can perform the Save View action, which will consider both the selected filters and the customized grid for later use.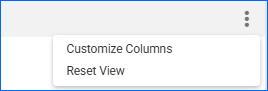 When you select one or more Receive Sessions from the grid, you will see the Actions button in the bottom right corner. You can Mark Ignored, Mark UnIgnored, and Export to Excel the selected results in bulk.
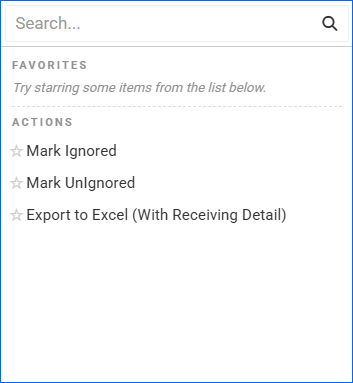
View Sessions by Vendor
In Sellercloud, you can view all receiving sessions with products purchased from a specific Vendor.
To view receiving sessions by vendor:
- Go to Purchasing > Vendors > Manage Vendors.
- Search for vendors and click the ID or Name of the one you are interested in.
- Click Toolbox and select Receive Sessions.
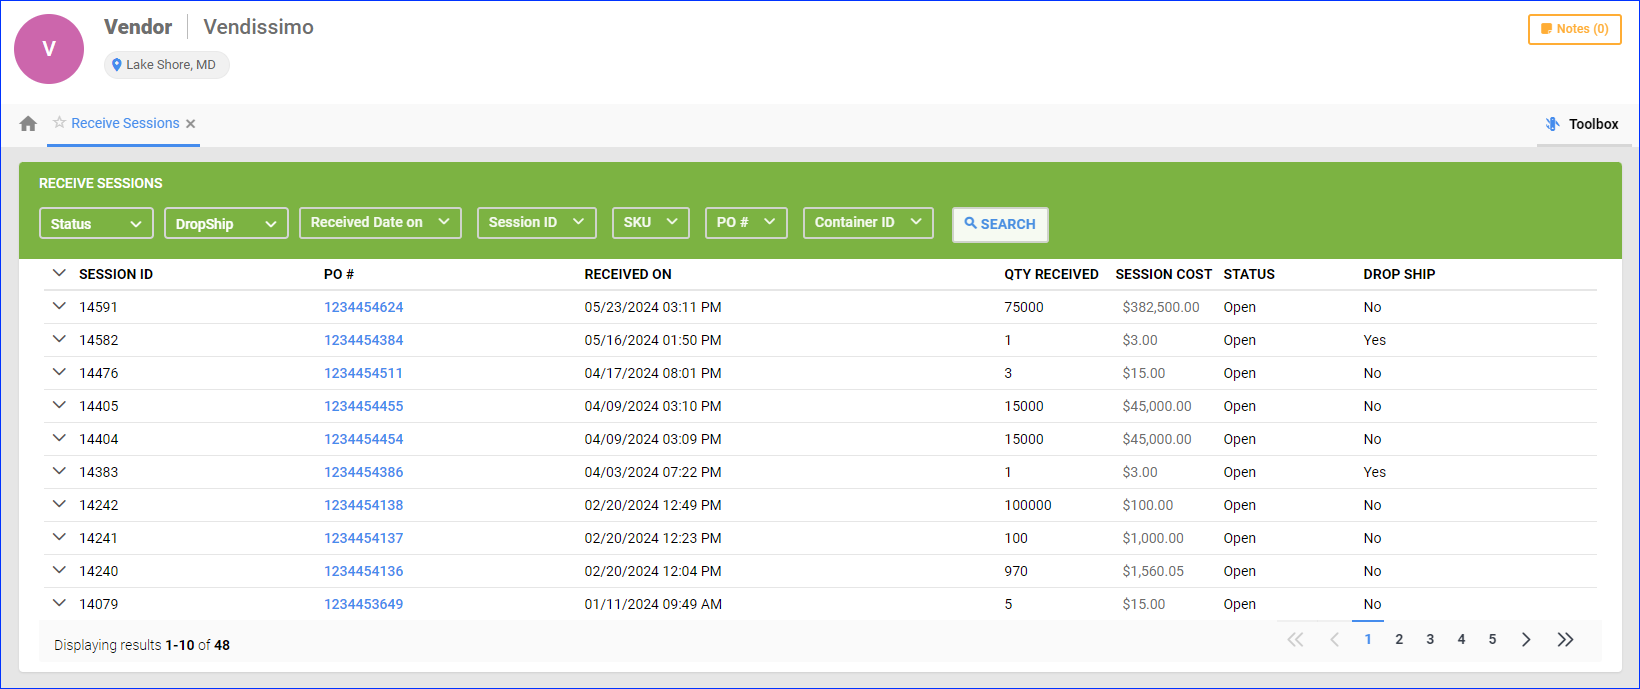
- All logged receiving sessions appear, with ten results per page, with these details:
- Session ID – The unique identification number of the receiving session.
- PO # – The unique identification number of the PO in Sellercloud.
- Received On – The date when the PO was marked as received.
- Quantity Received – The product quantity received in the session.
- Session Cost – The amount paid for the items.
- Status – Indicates the Invoice status of the PO.
- Drop Ship – Indicates whether the PO is created for Dropshipping.
- You can use these filters at the top of the panel to find specific sessions:
- Status – Show only POs that are Partially or Fully Invoiced.
- DropShip – Show only POs that are or are created for Dropshipping.
- Received Date On – Show only sessions received within a specific time range.
- Session ID – Show only a specific session by searching for its unique identifier.
- SKU – Show only sessions including a specific SKU.
- PO # – Show only sessions associated with a specific PO.
- Container ID – Show only POs associated with a specific Shipping Container.
Unreceive POs
When you unreceive POs:
- The PO’s Purchase status changes to Ordered.
- The PO’s Receiving status changes to Not Received.
- All increases in your warehouse inventory due to the receiving sessions are removed.
- The associated Inventory Movements are removed from the Warehouse Inventory Movements.
- You don’t delete any receiving sessions, but their Units Received and Session Total become 0. Alternatively, you can achieve the rest of the effects listed above by Deleting Receiving Sessions.
To clear the received quantities from all receiving sessions in one or more selected POs:
- Go to Purchasing > Manage POs.
- Search for POs and select them by checking the boxes on the left.
- Click the blue Actions icon at the bottom right and select Unreceive Selected.
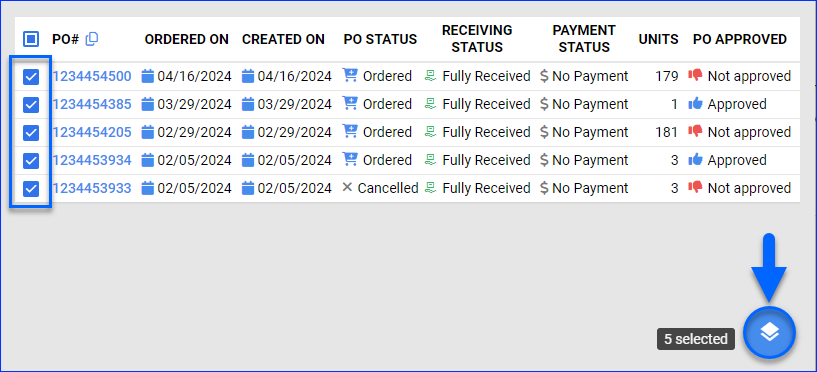
- Click Yes to confirm.
- A Queued Job is created. You will receive a Notification once it finishes processing.
Related Client Settings
These Client Settings affect PO receiving:
Approval Requirement
- Allow Receiving PO Only When Marked As Approved: Make it possible to receive POs only after they have been marked as Approved.
Cost Calculation
- Do Not Consider Over Received PO Qty For Average Cost: Skip any over-received quantities in the Product Average Cost calculation.
Dropship POs
- Mark Dropship PO As Received Only When Dropship Acknowledged: When this setting is enabled, a dropship PO will only be marked as received in the system once the supplier has acknowledged the dropship and the associated order’s Dropship Status changes to Acknowledged.
- Do Not Mark Drop Ship PO As Received When Order Shipped: By default, dropship POs are marked as Received when a related order is shipped by the supplier. If this setting is enabled, the PO status will not change, and you must manually Receive the PO.
- Only Receive Dropship PO When Order Is Fully Shipped: Automatically mark a dropship PO as Received when the Shipping Status of the related order changes to Fully Shipped.
Editing Fields
- Allow To Edit UPC And Weight When Receiving PO: Show the UPC and Weight fields while receiving POs, allowing you to update ordered items quickly.
- Allow To Edit MSRP And LOC When Receiving PO: Show the List Price and Location Notes fields while receiving POs, allowing you to update ordered items quickly.
- Show Price When Receiving PO: Show the Unit Price field when receiving orders, allowing you to update the cost per unit of each ordered item.
- Disable Editing PO Items If Partially Or Fully Received: Prevent PO items from being edited after the PO has been Partially or Fully Received.
Invoice Date
- Set PO Invoice Date To Last Receive Date, If There Is None: Set the date on the PO invoice to the date of the last receiving session if there is no other date.
Over Receiving
- Allow To Over Receive PO: With this setting enabled, you can receive more than the original Ordered amount when receiving POs.
- Allow To Over Receive Container: Allows you to receive more than the original amount of items in a Shipping Container.