Overview
When you enable a product for a channel, you usually also allow Sellercloud to send automatic updates regarding the available inventory to the channel. However, there are cases when you may need to pause these automatic updates, for example, if you’re managing your listings through another system or want to avoid overselling during a daily deal.
The Disconnect Inventory and Disable Inventory product actions allow you to stop sending updates for specific products’ available inventory to any of your integrated channels.
Disconnect from Inventory
The Disconnect From Inventory action prevents Sellercloud from sending any new quantity updates to the channel, leaving the current quantity on the channel intact.
You can disconnect products from inventory updates individually or in bulk.
Individually
To disconnect a single product from Inventory:
- Go to the Product Details Page.
- Click Toolbox and select Channel Properties, where Channel is the name of the channel you want to stop sending inventory updates to.
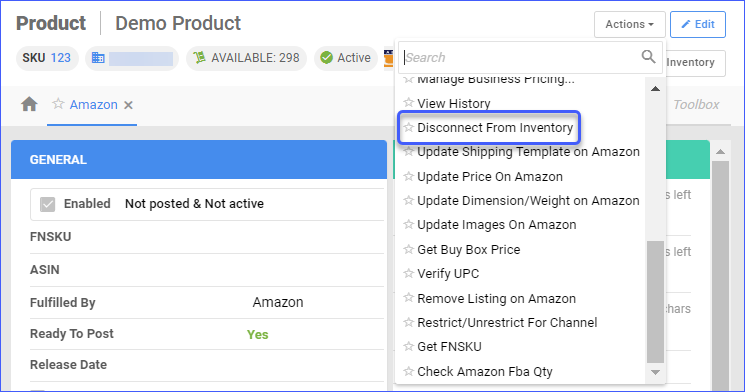
- Click Actions and select Disconnect From Inventory.
In Bulk
To disconnect multiple products from inventory:
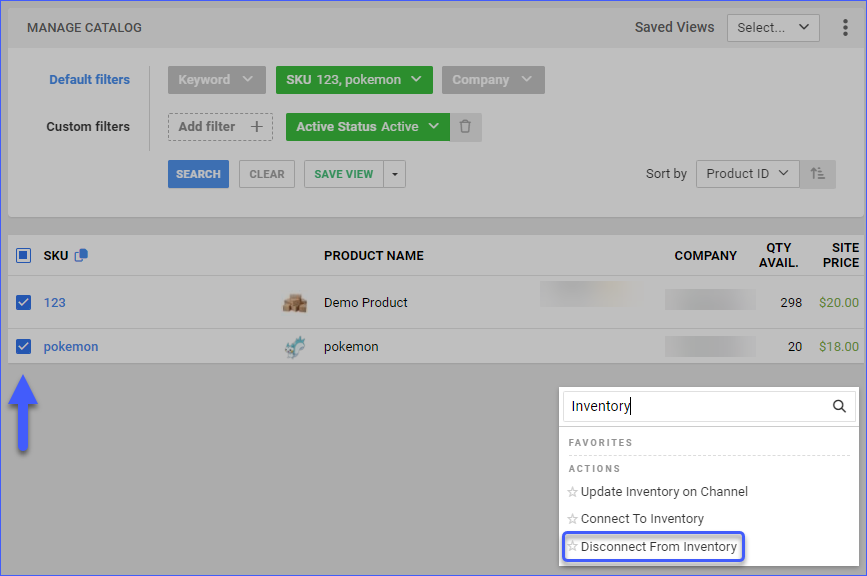
- Go to Catalog > Manage Catalog.
- Find and select products.
- Click the blue Actions icon and select Disconnect from Inventory.
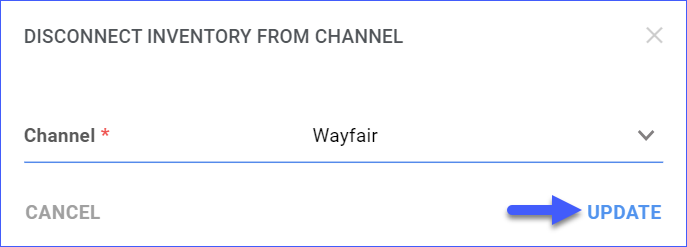
- In the pop-up window, choose your desired channel from the dropdown menu or select All.
- Click Update.
You can also disconnect inventory via a Bulk Update by using column headers. Type in the header name based on the channel (e.g. DisconnectFromInventoryAmazon for Amazon), and enter True below.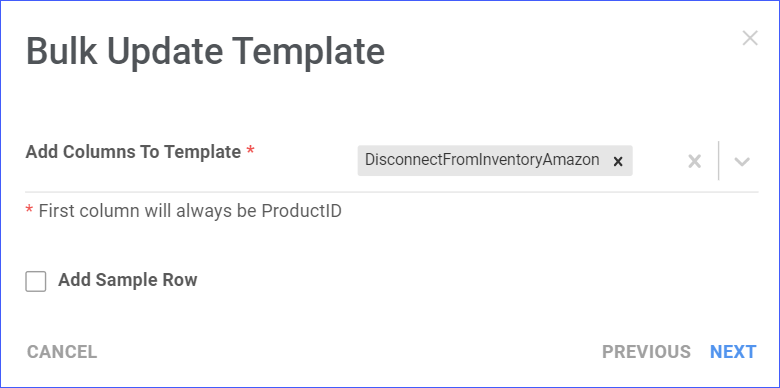
Manage Disconnected Inventory
To view and manage all items that are currently disconnected from inventory updates on specific channels:
- Go to Catalog > Tools > Disconnected Inventory.
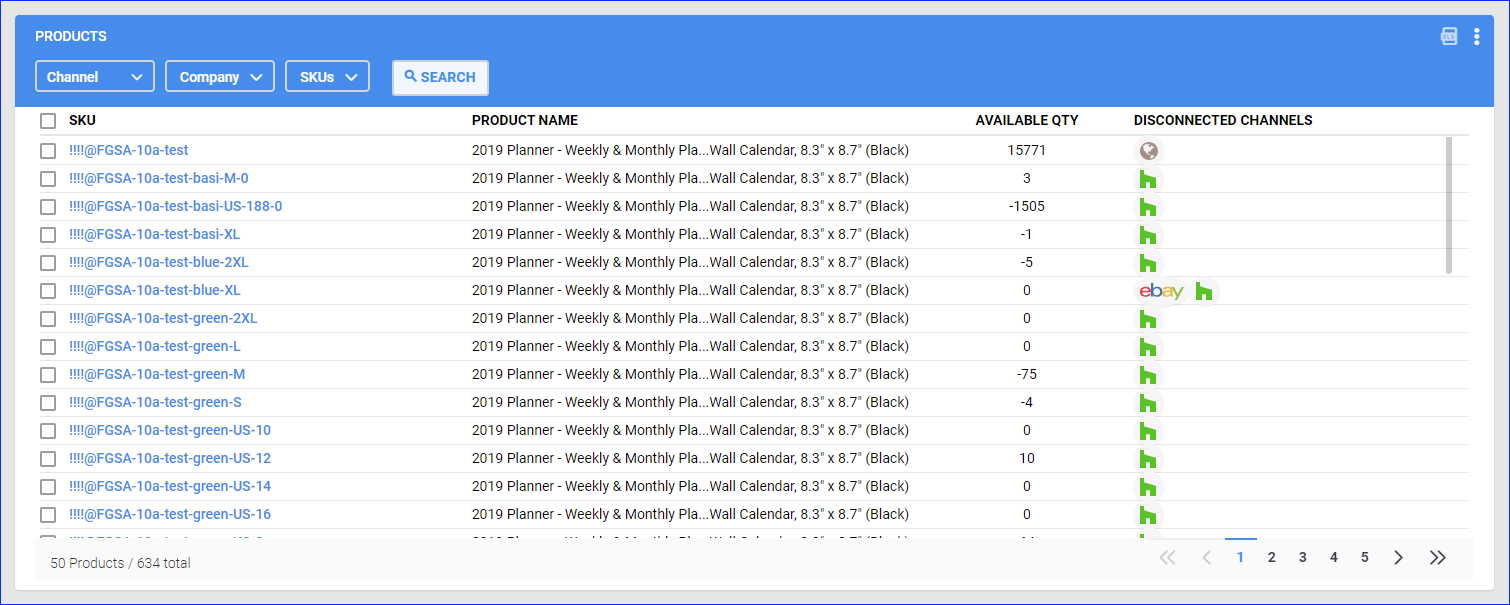
- Optionally, use the filters at the top left before you click Search:
- Channel – Show only products disconnected from specific channels.
- Company – Show only products from specific companies.
- SKUs – Show only specific SKUs.
- The following information is displayed in the grid:
- SKU – The product’s SKU.
- Product Name – The product’s name.
- Available Qty – The product’s available quantity.
- Disconnected Channels – A list of all disconnected channels. You can click the channel icons to reconnect the product.
- There are two action icons at the top right:
- Export disconnected inventory – Download the entire report to an Excel spreadsheet.
- Three dots icon – allows you to reconnect the selected products to specific channels or to all channels at once.
Disable Inventory
With the Disable Inventory product action, often referred to as Disable for Channel, you can zero out the inventory of your channel listings and stop sending further updates.
For most Sellercloud core channels, such as Amazon and eBay, if a product is not enabled but has an existing listing, an inventory update with a quantity of zero will be sent. To exclude it from the inventory feed completely, you must Disconnect it instead.
There are some exceptions to this rule:
- For Etsy, you can go to the Etsy Account Settings and enable Update Inventory For Etsy Enabled Products Only to prevent sending a quantity of zero for disabled products.
- By default, zero quantities are not sent when you disable inventory for DSW, Gilt, Newegg, Newegg Business, One Stop Plus, or Wayfair. To send zero quantity for products disabled for these channels within the last 24 hours, enable the Client Setting called Include Channel Disabled Products In Inventory Update Feed.
- For plugin integrations, the functionality of the plugin may vary. Check the related help article or contact Sellercloud Support for details.
You can disable products either individually or in bulk.
Individually
To disable a single product for a specific channel:
- Go to a Product Details Page.
- Click Toolbox and select Channel Properties.
- Click Edit.
- In the General panel, uncheck the Enabled box, and click Save.
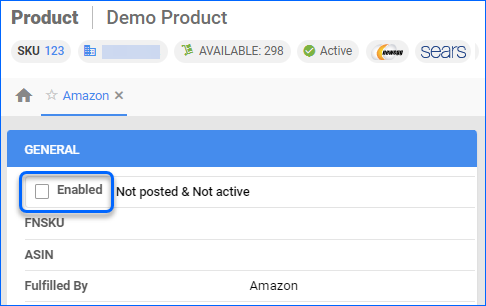
Alternatively, you can disable a single product for all channels without having to go to each channel-specific properties page to manually uncheck the enabled boxes. To do that:
- Go to the Product Details Page.
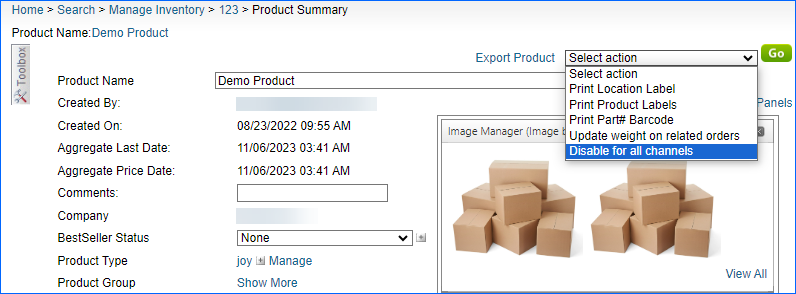
- Click Actions and select Disable for all Channels.
In Bulk
To disable Inventory for multiple products:
- Go to Catalog > Manage Catalog.
- Find and select products.
- Click the Actions icon and select Enable/Disable for Channel.
- In the pop-up window, select your desired channel.
- Select Disable, and click Update.
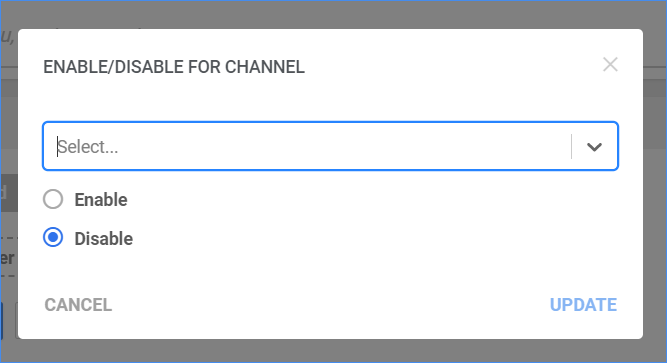
You can also disable inventory with a Bulk Update by adding the column headers for enabling a product on a channel (such as AmazonEnabled for Amazon) and then entering False in the column.
Overview
When you enable a product for a channel, you usually also allow Sellercloud to send automatic updates regarding the available inventory to the channel. However, there are cases when you may need to pause these automatic updates, for example, if you’re managing your listings through another system or want to avoid overselling during a daily deal.
The Disconnect Inventory and Disable Inventory product actions allow you to stop sending updates for specific products’ available inventory to any of your integrated channels.
Disconnect from Inventory
The Disconnect From Inventory action prevents Sellercloud from sending any new quantity updates to the channel, leaving the current quantity on the channel intact.
You can disconnect products from inventory updates individually or in bulk.
Individually
To disconnect a single product from Inventory, navigate to:
- Inventory > Open a product.
- From the Toolbox, select Channel Properties.
- Actions menu > Disconnect From Inventory > Go.
In Bulk
To disconnect multiple products from inventory:
- Navigate to Inventory > Select products > Action menu > Disconnect from Inventory.
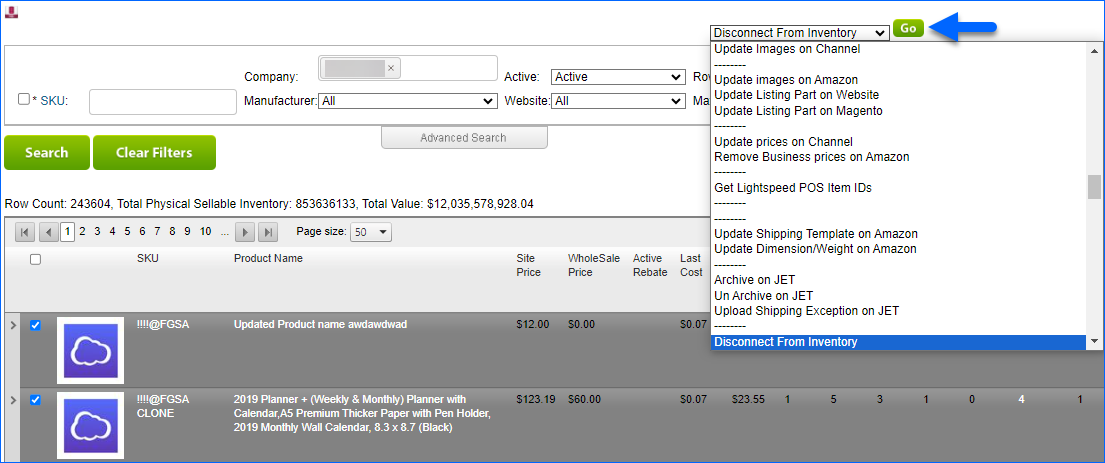
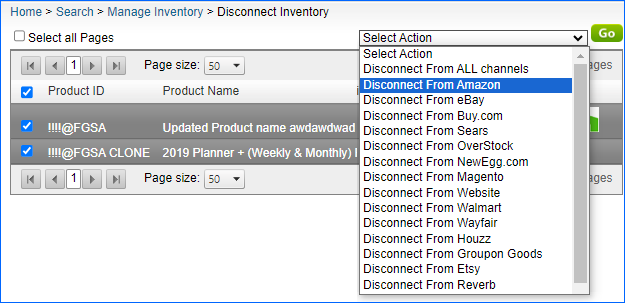
- From the new window, select the channel or select Disconnect From All Channels.
- Click Go.
You can also disconnect inventory via a Bulk Update by using column headers. Type in the header name based on the channel (e.g. DisconnectFromInventoryAmazon for Amazon), and enter True in the column.
To view all items that are disconnected from the channels, go to Inventory > Disconnected Inventory.
Disable Inventory
With the Disable Inventory product action, often referred to as Disable for Channel, you can zero out the inventory of your channel listings and stop sending further updates.
For most Sellercloud core channels, such as Amazon and eBay, if a product is not enabled but has an existing listing, an inventory update with a quantity of zero will be sent. To exclude it from the inventory feed completely, you must Disconnect it instead.
There are some exceptions to this rule:
- For Etsy, you can go to the Etsy Account Settings and enable Update Inventory For Etsy Enabled Products Only to prevent sending a quantity of zero for disabled products.
- By default, zero quantities are not sent when you disable inventory for DSW, Gilt, Newegg, Newegg Business, One Stop Plus, or Wayfair. To send zero quantity for products disabled for these channels within the last 24 hours, enable the Client Setting called Include Channel Disabled Products In Inventory Update Feed.
- For plugin integrations, the functionality of the plugin may vary. Check the related help article or contact Sellercloud Support for details.
You can disable products either individually or in bulk.
Individually
To disable a single product for a specific channel:
- Go to Inventory > Open a product.
- From the Toolbox, select Channel Properties.
- Uncheck the Enabled box, and click Save.
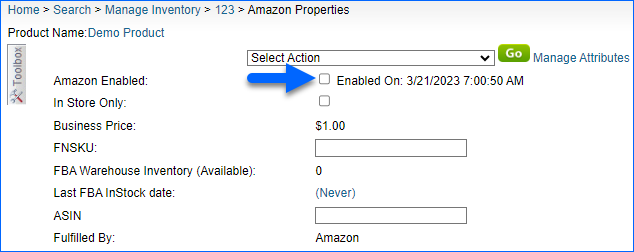
Alternatively, you can disable a single product for all channels, without having to go to each channel-specific properties page to manually uncheck the enabled boxes. To do that:
In Bulk
To disable Inventory for multiple products, navigate to:
- Inventory > Select products.
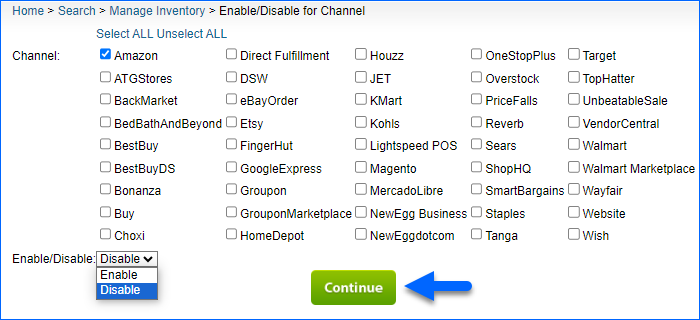
- Action menu > Enable/Disable for Channel > Go.
- In the new window, choose your desired channel/s.
- Select Disable from the dropdown menu and click Update.
You can also disable inventory with a bulk update using column headers depending on the channel, such as AmazonEnabled for Amazon, and then enter False in the column.
