Overview
FBA Removal Orders are requests for Amazon to ship back FBA inventory to the merchant. While you must place such orders in Seller Central, doing so automatically creates a Warehouse Inventory Transfer in Sellercloud. Warehouse inventory transfers will be created with a Shipped status and named after the removal order ID. This workflow allows you to track the inventory’s movement history. For example, you can mark the shipment as received when it arrives at your warehouse.
Amazon provides 2 reports for removals: Removal Order Detail and Removal Order Shipment Detail. The Removal Order Shipment Detail report is used to create warehouse inventory transfers. By default, Sellercloud downloads removal orders created in the past 45 days. Since this report only includes shipped removal orders, only orders that were shipped within 45 days of their creation will be imported.
Prerequisites
To enable the workflow:
- Go to Company Settings.
- Click Toolbox and select Amazon Settings > General Settings.
- Click Edit.
- Enable the Auto Create FBA Removal Transfers setting.
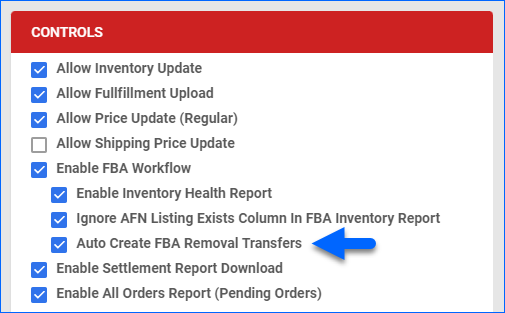
- Click Save.
Warehouse Setup
To select the default Ship From Warehouse for FBA Removal Transfers:
- Go to the Company Settings.
- Click Toolbox and select Channel Warehouse.
- Click Edit.
- Under the Channel column, find FBA.
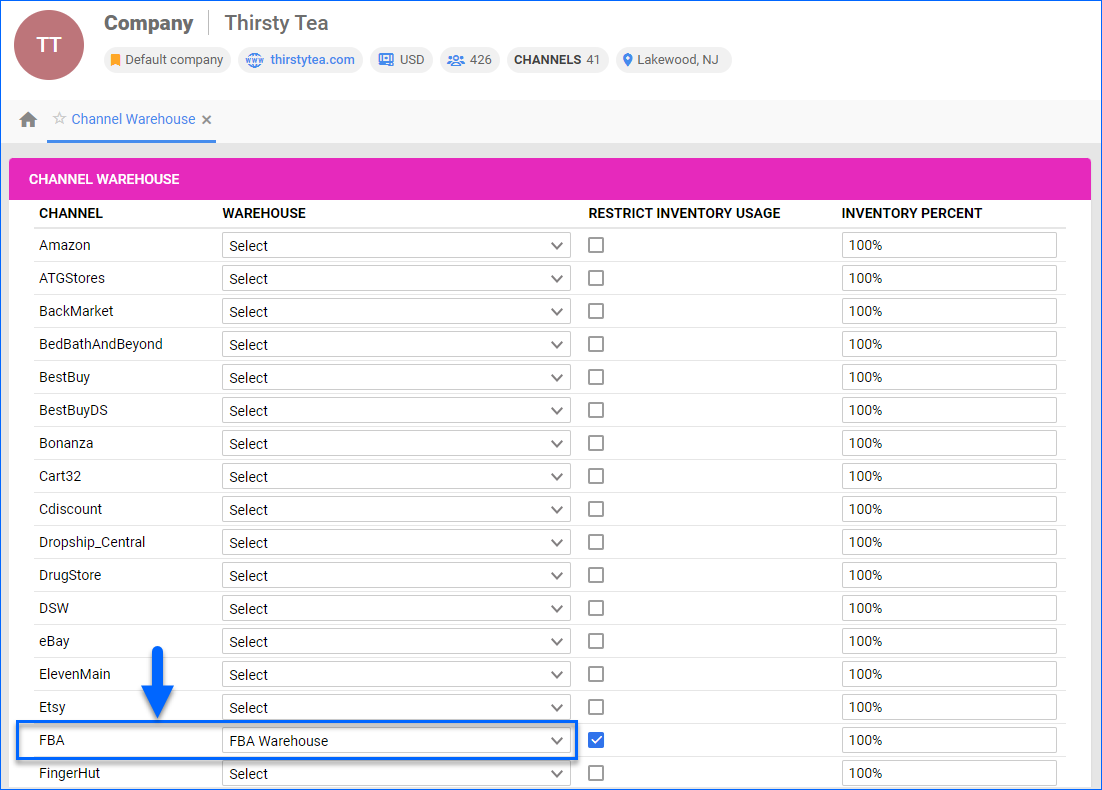
- Select your FBA-Type Warehouse as the Warehouse for FBA.
- Click Save.
To select the default Interim and Ship To Warehouses:
- Go to Client Settings.
- Type Default FBA into the search field on the top right.
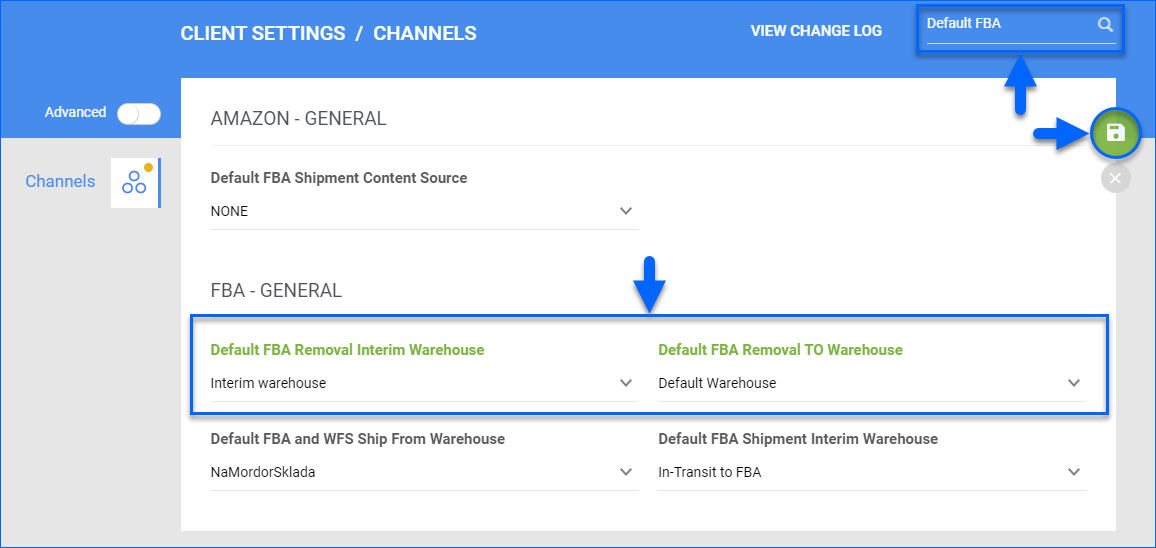
- Update the Default FBA Removal Interim Warehouse setting.
- Update the Default FBA Removal TO Warehouse setting.
- Click Save.
Manage Inventory Transfers
To manage inventory transfers for FBA removals:
- Go to Inventory > Tools > Warehouse Inventory Transfer.
- Next to Default filters, click the FBA Removal filter and select Yes.
- Click Search.
- Click the ID to view and manage a transfer.
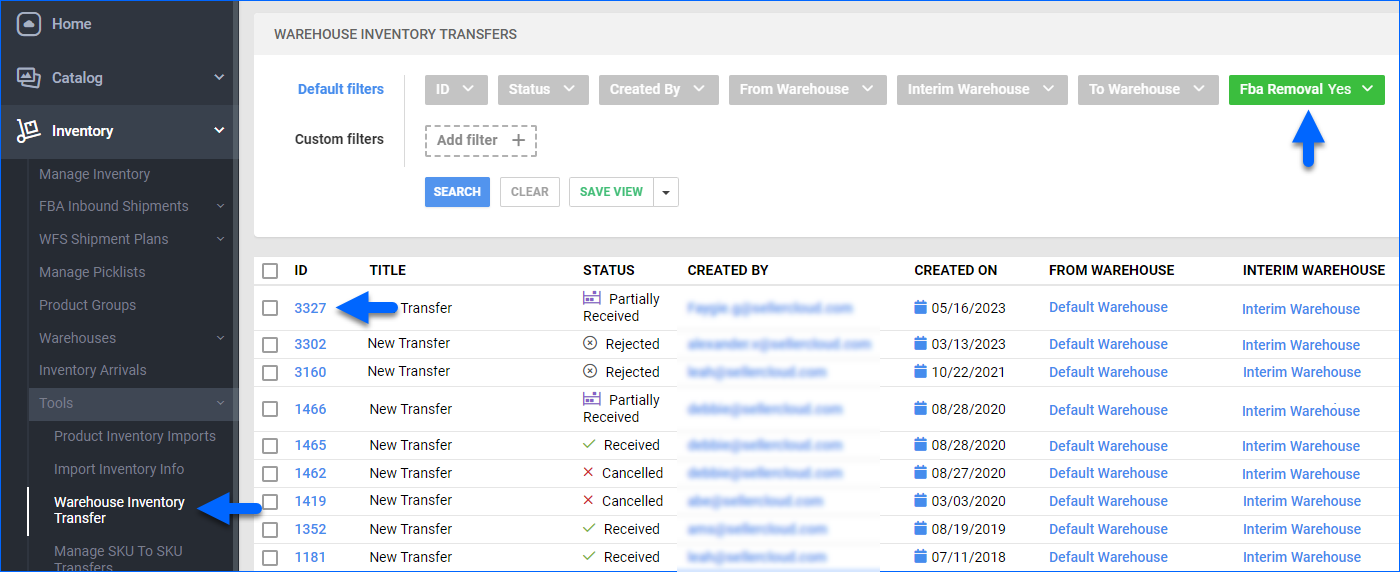
- When you receive the shipments, confirm that the Transfer Qty sent from Amazon for each item is correct. Then click Actions and select Set Received.
Skustack users must use the FBA Removals Module within Skustack. - Optionally, to add serial numbers to the transfer, click Actions and select Manage Serial Number.
Troubleshoot Missing Transfers
Sometimes, you may find that some FBA removal orders are missing their corresponding warehouse inventory transfer in Sellercloud. The reason is often that removal orders shipped more than 45 days after their creation do not get imported to Sellercloud by default.
To import missing removal orders:
- Go to Company Settings.
- Click Toolbox and select Amazon Settings > Reports.
- Click the three dots icon on the top right and select Request New Report.
- Set the Report Type to FBA Removal Shipment Detail Report.
- Set the From Date and To Date to select a time range that includes the removal orders based on their creation date.
- Click Request.
- Contact Sellercloud Support for assistance with downloading the report.
- Click Toolbox and select Amazon Settings > Upload Report File.
- Click Choose File and select the downloaded report file.
- Set the Report Type to FBA Removal Shipment.
- Click Upload Report.