Overview
Sellercloud has a comprehensive order management system that can import orders from multiple websites and marketplaces automatically. You are also able to create orders manually for your Wholesale customers, add payments and tracking, change order statuses, send shipping confirmations and invoices to channels, and more.
You can edit and configure your orders in the Order Details Page.
Navigate the Order Management Page
To access any order, select Orders > Manage Orders.
On this page, you can use filters to search for desired orders, customize columns (show/hide columns or add more, such as Picked, Ship Date, Delivery Date, etc.), add custom filters, and perform various actions for individual or multiple orders. To access an order’s details page, click on the Order ID.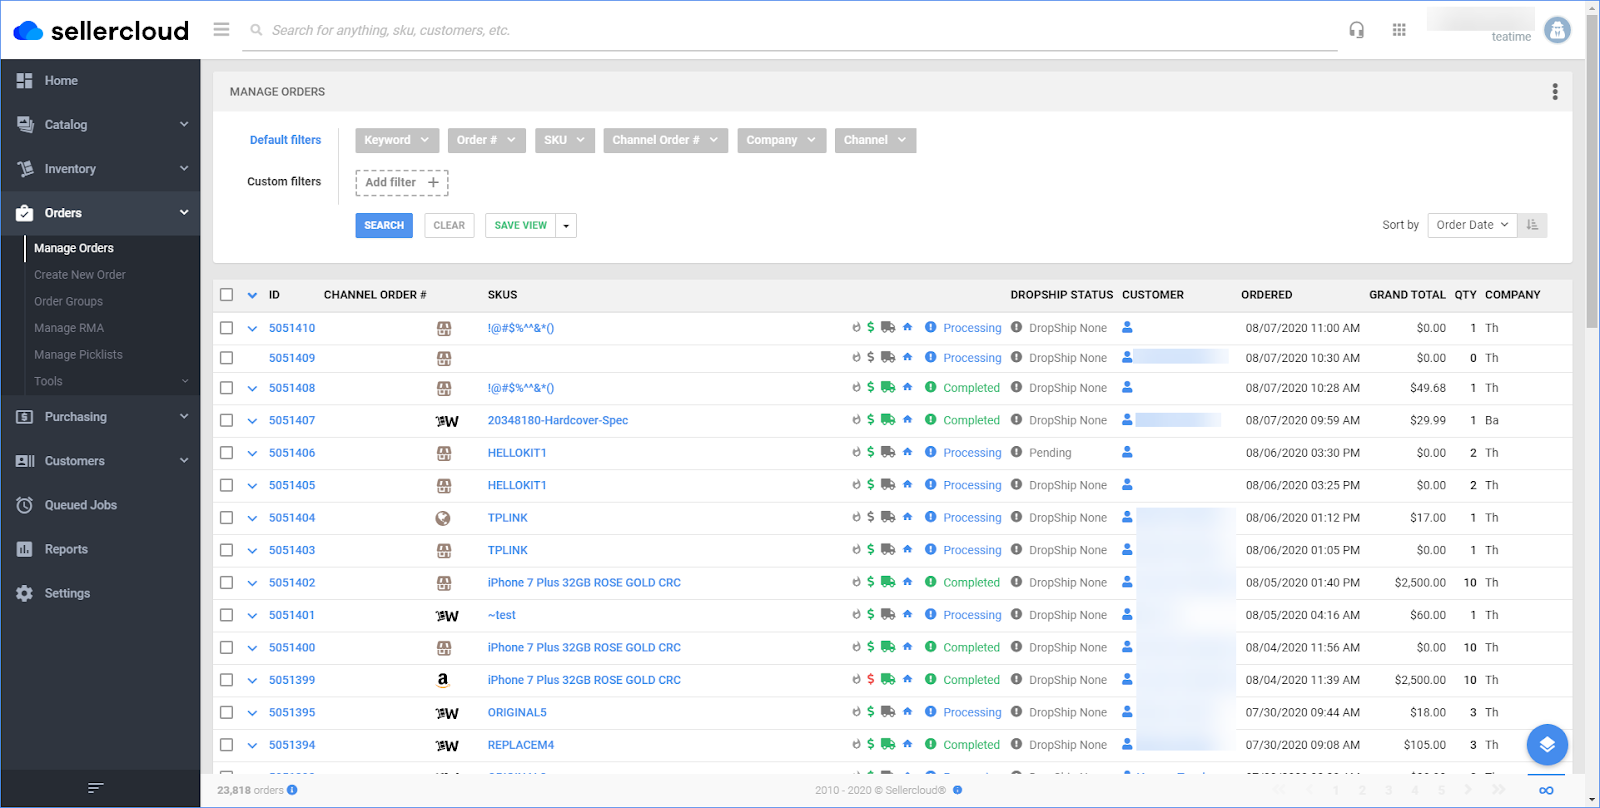
Filter Search
You can customize Search Filters and Create Saved Views from this page. Using filters on the order management page can significantly enhance the accuracy, relevance, quality, and value of the information presented. For example, you can search for orders with specific statuses or under a dedicated channel. If you add multiple values in one filter, for example, several channels, the results will include all the orders with either of the selected values.
You can also save this search for the future and use it to automate processes.
Actions Menu
The Action Menu on the Manage Orders Page can help you perform numerous functions and execute actions in bulk. You can export order information, generate statements, print labels and invoices, manage payments, create new orders, export orders, change order statuses, ship orders, mark orders as dropship, and more. Scroll down to find your desired actions, or search for them at the top.
You can mark actions as favorites by clicking on the star icon next to an action so they will always appear at the top. This could be helpful if you frequently perform specific actions.
Most of the actions are also present on the Order Details Page. If you’re not sure what some of them mean, you can contact Sellercloud Support for assistance.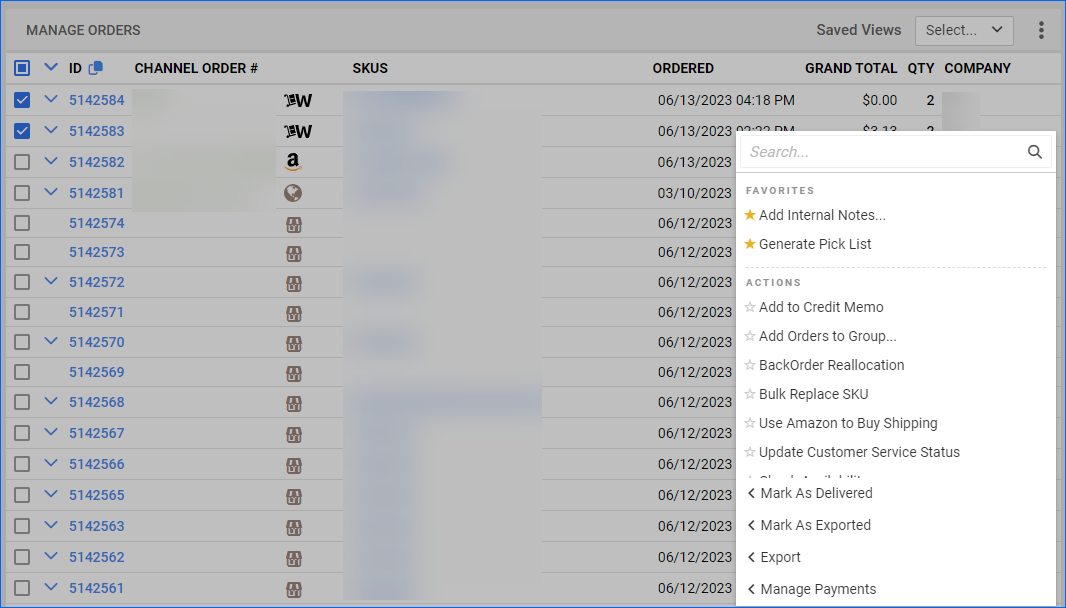
Order Status
Each order has a main status but also has other statuses that are specific to different aspects of the order, such as its Shipping Status, Payment Status, etc.
The main statuses are:
- Completed – Order is shipped and charged.
- Hold – Orders can be placed On Hold due to a number of reasons, such as pending payment, fraudulent activity, or inventory availability. Order that is put On Hold cannot be processed until the status is changed back to Processing.
- Canceled – The order was canceled.
- Problem Order – The order was put on hold but marked to check for problems, such as fraud.
- Shopping Cart – When a website shopping cart runs directly off Sellercloud. Also used while Sellercloud is building an order until the order is completely formed.
- Void – Hides the order, similar to deleting it. Read more about voided orders.
- Processing – New order has not been processed. Partially shipped orders have this status and get a Partially Shipped shipping status, or an order is Charged but not Shipped.
To find orders with Shopping Cart and Void statuses, use the Status filter on the Manage Orders page.
You can manually update an order’s status on these two pages:
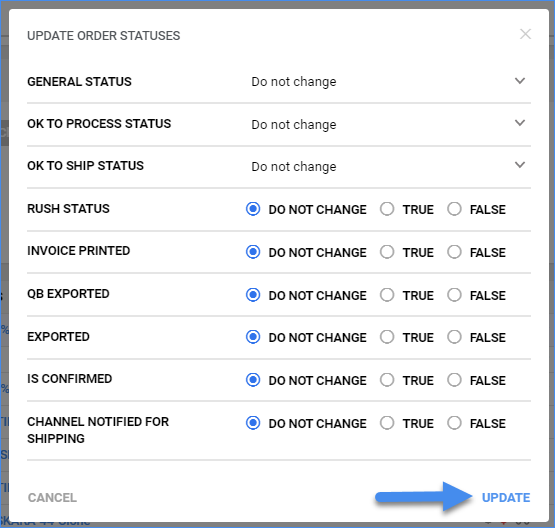
- Manage Orders: Select the orders to update > Action Menu > Update Order Statuses > Fill in information > Update.
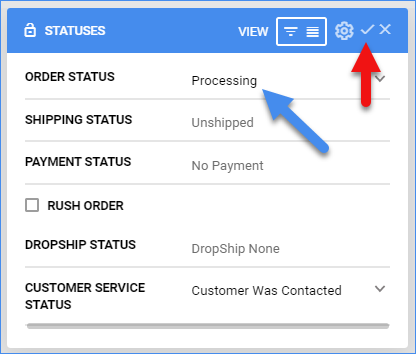
- Order Details: Go to Statuses > Click the pencil icon > Use the dropdown to select a status > Click the check mark.
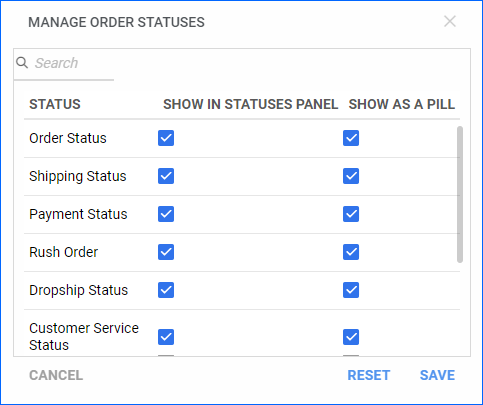
Order status display
The order status display controls what statuses are shown in your Status panel. To access:
- From the order details, click Edit.
- Go to Statuses > Click the Settings icon.
- Make your selections > Save.
Replace Order SKUs
In some cases, you may need to replace the SKUs on an order in order to fulfill it. You can do this on individual orders and in bulk.
Individual order
You can replace SKUs for individual orders from the order detail page.
- On the order detail page, click Edit.
- Go to Items.
- In the SKU field, enter a new SKU.
- Use the check mark to save.

Multiple orders in bulk
You can bulk-replace SKUs on multiple orders with a file upload.
- Go to Orders > Tools > Import Order Info > Order Info.
- Create a template and populate the columns Order ID, Original SKU, and New SKU.
- Save file > Return to Sellercloud.
- Select Company > Channel > Click to upload file > Import.
There is a separate feature called Replacement Products, which allows you to set up replacements that will be accepted in Shipbridge without having to actually change the SKU on the order.
Add Orders to Groups
Orders can be grouped together for various management purposes.
From the Manage Orders page
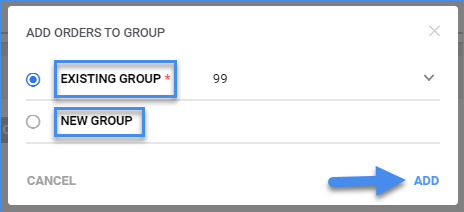
- Access the Manage Orders page > Select orders > Action menu > Add Orders to Group.
- Select to add to an existing group or to create a new group.
- Click Add.
From the Order details page
- Click Actions > Add Order to Group.
- Select the Existing Group or create a New Group.
Orders can be filtered by group using Custom filters on the Manage Orders page.
You can also remove orders from groups in the manage orders and order details pages. Simply use the action menu and select Remove Order From Groups.
Order Action Documents
When an order is downloaded from a channel into Sellercloud, an order document with order details is created. When the order is shipped, a tracking document is created and sent to the channel. Order documents passed between Sellercloud and the sales channels (tracking upload, cancellations, etc.) can be viewed from the order detail page. Depending on how the channel sends orders, the order download document may or may not display.
To view documents, select View Action Documents from Actions.
The documents will display in a grid and can be downloaded and viewed. Documents are also stored per channel on the channel company settings submenu. Depending on the document, it may be stored under Reports, Downloaded Documents, or Uploaded Documents.
Customizations
You can customize your order management workflows by using the Order Rule Engine or executing Post Order Plugins.
Order Rule Engine
The Order Rule Engine allows you to apply changes to your orders automatically. You can split an order, change warehouses, order statuses, and more. To set specific conditions and actions and enable the Order Rule Engine, navigate to Settings > Orders > Rule Engine > Manage Rules.
From this page, you can add new rules, edit existing ones, or change the order of execution. To do that, drag and drop the rule ID.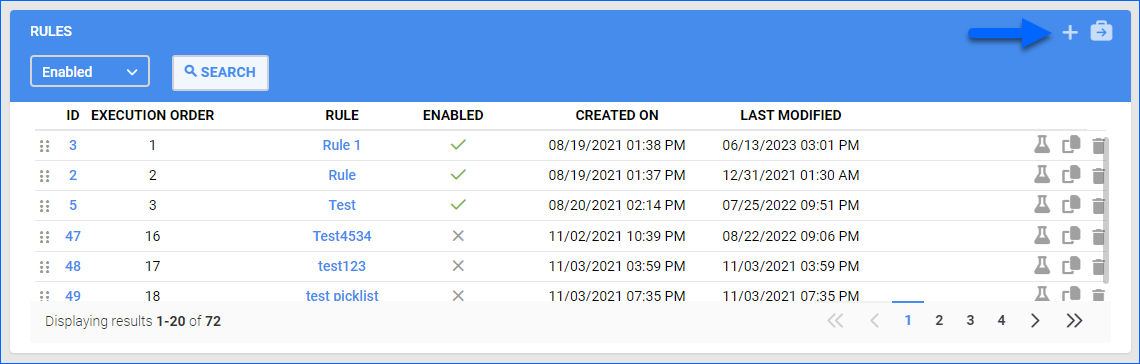
Post-Order Plugins
You can open a ticket with Sellercloud Support to request a Post-Order Plugin to optimize your workflow. Any such customizations will be billable.
For example, you can use a Post-Order Plugin to assign Ship From Warehouse based on availability or split the order if one of the items is available in a higher-priority warehouse. Another example is to request a plugin that ships orders automatically via FBA.
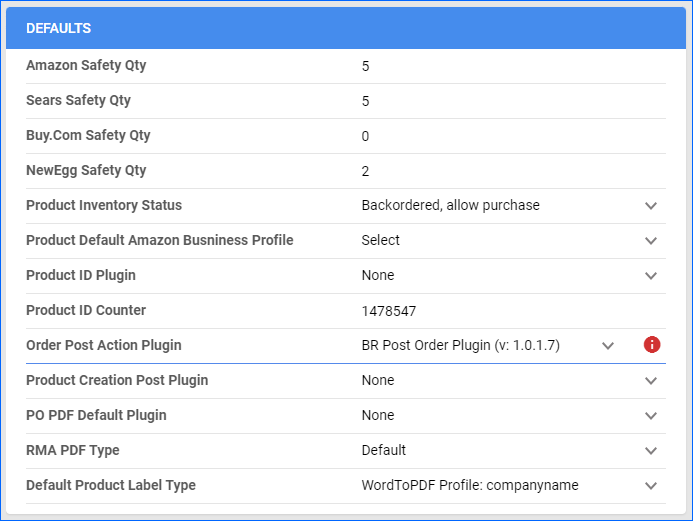
Once your plugin is created, open a Company > Toolbox > Defaults > select the plugin from Order Post Action Plugin.
Relevant Client Settings
You can enable the following Client Settings to further customize your workflow:
- Enable Rule Engine Action For Post Order Plugin – This Client Setting allows the rule engine to control when and how the post-order plugins are executed. When enabled, post-order plugins will not run on their own. However, it lets you run multiple plugins on orders under the same company using the Order Rule Engine.
- Run Post-Order Plugin On Duplicate Orders – Enables the execution of a plugin after a duplicate order is created.
- Run Post order plugin on Replacement Orders – When enabled, it will trigger the Order Rule Engine and Post order plugins to apply to Replacement Orders as soon as they are created.
- Run Order Rules and Post order plugin after split order – When enabled, it will trigger the Order Rule Engine and Post order plugins to apply to Child Split Orders as soon as they are created.
Overview
Sellercloud has a comprehensive order management system that can import orders from multiple websites and marketplaces automatically. You are also able to create orders manually for your Wholesale customers, add payments and tracking, change order statuses, send shipping confirmations and invoices to channels, and more.
You can edit and configure your orders in the Order Details Page.
Manage your Order Details page
To access any order, go to the Orders tab.
On this page, you can use filters to search for desired orders, customize columns (show/hide columns or add more, such as Picked, Ship Date, Delivery Date, etc.), add advanced filters, and perform various actions for individual or multiple orders.
To access an order’s details page, just click on the Order ID.
Filter Search
You can customize Search Filters and Create Saved Searches from this page. Using filters on the order management page can significantly enhance the accuracy, relevance, quality, and value of the information presented. For example, you can search for orders with specific statuses or under a dedicated channel.
You can also save this search for the future and use it to automate your workflow.
Action Menu
The Action Menu on the Manage Orders Page can help you perform numerous functions and execute actions in bulk. You can export order information, generate statements, print labels and invoices, manage payments and components, create new orders, export orders, change order statuses, ship orders, mark orders as dropship, and more. Scroll down to find your desired actions.
Most of the actions are also present on the Order Details Page. If you’re not sure what some of them mean, you can contact Sellercloud Support for assistance.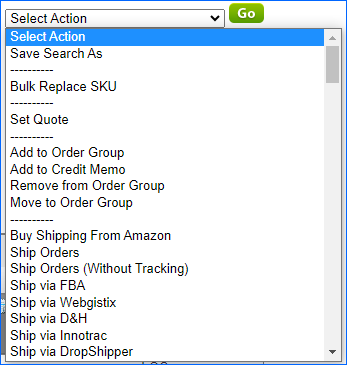
Order Status
Each order has a main status but also has other statuses that are specific to different aspects of the order, such as its Shipping Status, Payment Status, etc.
The main statuses are:
- Completed – Order is shipped and charged.
- Hold – Orders can be placed On Hold due to a number of reasons, such as pending payment, fraudulent activity, or inventory availability. Order that is put On Hold cannot be processed until the status is changed back to Processing.
- Canceled – The order was canceled.
- Problem Order – The order was put on hold but marked to check for problems, such as fraud.
- Shopping Cart – When a website shopping cart runs directly off Sellercloud. Also used while Sellercloud is building an order until the order is completely formed.
- Void – Hides the order, similar to deleting it. Read more about voided orders.
- Processing – New order has not been processed. Partially shipped orders have this status and get a Partially Shipped shipping status, or an order is Charged but not Shipped.
To find orders with Shopping Cart and Void statuses, use the Advanced Search filter on the Manage Orders page.
You can manually update an order’s status on these two pages:
- Manage Orders Page: Select the orders to update > Action Menu > Update Order Statuses > Enter Comments > Save.

- Order Details: Action Menu > Select a status > Enter Comments > Save.
Replace Order SKUs
In some cases, you may need to replace the SKUs on an order in order to fulfill it. You can do this on individual orders and in bulk.
Individually
You can replace SKUs for individual orders from the order detail page.
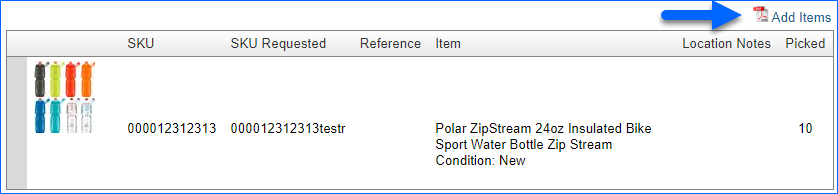
- On the order detail page, go to Items.
- Click Add Items.
- A pop-up window will appear.
- Enter the new SKUs in the order items grid at the top and mark the checkbox next to them.
- Go to the Action Menu > Update Items Qty/Prices > Click Go.
Multiple orders in bulk
You can bulk-replace SKUs on multiple orders with a file upload.
- Go to Orders > Import Orders.
- Create a template and populate the columns Order ID, Original SKU, and New SKU.
- Save file > Return to Sellercloud.
- On the Import Orders page, select Company > Channel > Choose file > Process Order.
There is a separate feature called Replacement Products, which allows you to set up replacements that will be accepted by Shipbridge without having to actually change the SKU on the order.
Add Orders to Groups
Orders can be grouped together for various management purposes.
From the Manage Orders page
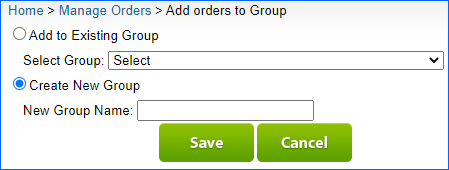
- Access the Manage Orders page > Select orders > Action menu > Add to Order Groups > Click Go.
- Select to add to an existing group or to create a new group.
- Click Save.
From the Order details page
- Select an Action > Add Order to Group.
- Select the Existing Group or create a New Group.
Orders can be filtered by group using Advanced filters on the Manage Orders page.
You can also remove orders from groups in the manage orders and order details pages. Simply use the action menu and select Remove Order From Groups.
Order Action Documents
When an order is downloaded from a channel into Sellercloud, an order document with order details is created. When the order is shipped, a tracking document is created and sent to the channel. Order documents passed between Sellercloud and the sales channels (tracking upload, cancellations, etc.) can be viewed from the order detail page. Depending on how the channel sends orders, the order download document may or may not display.
To view documents, select View Action Documents from Actions.
The documents will display in a grid and can be downloaded and viewed. Documents are also stored per channel on the channel company settings submenu. Depending on the document, it may be stored under Reports, Downloaded Documents, or Uploaded Documents.
-
- Go to Client Settings > Enable Wholesale Options in Manage Orders Action Menu.
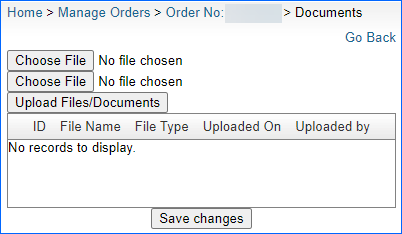
- In the order detail page > Actions > Manage Documents.
- Choose files and click Upload Files/Documents.
- Click Save Changes.
Customizations
You can customize your order management workflows by using a Post Order Plugin. If you want such plugins to be built on your server, open a ticket with Sellercloud Support to request them. Any such customizations will be billable.
Post-Order Plugins
You can use a Post-Order Plugin to assign Ship From Warehouse based on availability or split the order if one of the items is available in a higher-priority warehouse. Another example is to request a plugin that ships orders automatically via FBA.
Once your plugin is created, open a Company > Toolbox > Product Defaults > select the plugin from Order Post Action Plugin.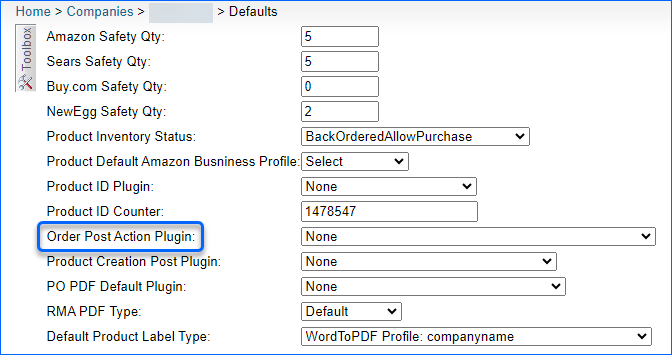
- Relevant Client Settings
- Run Post Order Plugin On Duplicate Orders – Enables the execution of a plugin after a duplicate order is detected.