Overview
The Orderback General Settings page gives you the flexibility to control various aspects of the application and tailor it to your own unique needs. As an administrator, you can customize the appearance and functionality of the self-service Orders and Returns Portal and configure custom return policies and workflow options.
Manage Settings
To access and update your settings in Orderback:
- Log in to the Admin Portal.
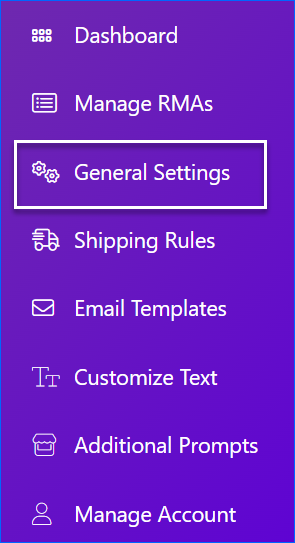
- Select General Settings in the menu on the left.
- Update the settings in the following panels:
- General Settings – Set up your team name, admin account, and Orderback web address.
- Appearance Settings – Personalize the appearance of Orderback according to your preferences and branding.
- Orders – Customize the Order History page for your customers.
- New Orders – Configure rules for the New Order wizard.
- Return Policy – Configure custom Return policy rules.
- Workflow Options – Configure workflows and control what features are available to end users.
- Click Save to confirm the updates.
General Settings
Refer to the list below for a detailed definition of each of the General Settings:
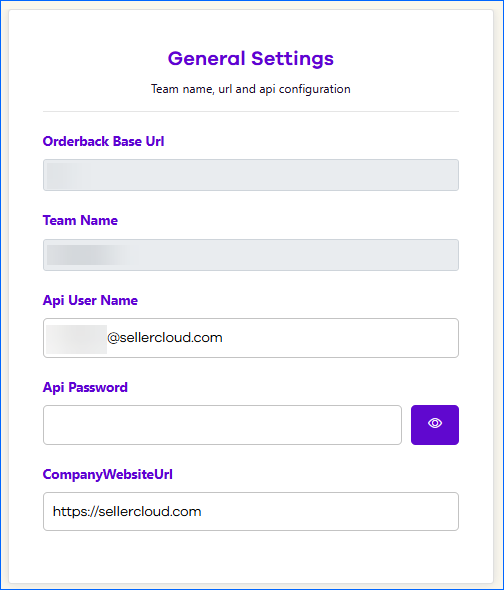
- Orderback Base Url – The subdomain in your Orderback web address – for example, https://xyz.orderback.io/.
- Team Name – Your Sellercloud team name. If you don’t know your team name or your company doesn’t have a team name yet, contact your onboarding representative or open a ticket with Sellercloud Support.
- Api User Name – The login email address of the Account you want to use to connect Orderback to Sellercloud. See Get Started for more information.
- Api Password – The login password of the Client Admin account.
- CompanyWebsiteUrl – The web address of your website. Clicking the company logo (coming from Appearance Settings > Your logo) on top of any Orderback page, both in the Admin Portal and on the customers’ Orders and Returns Portal, redirects to this web address.
Appearance Settings
Refer to the list below for a detailed definition of each of the Appearance Settings:
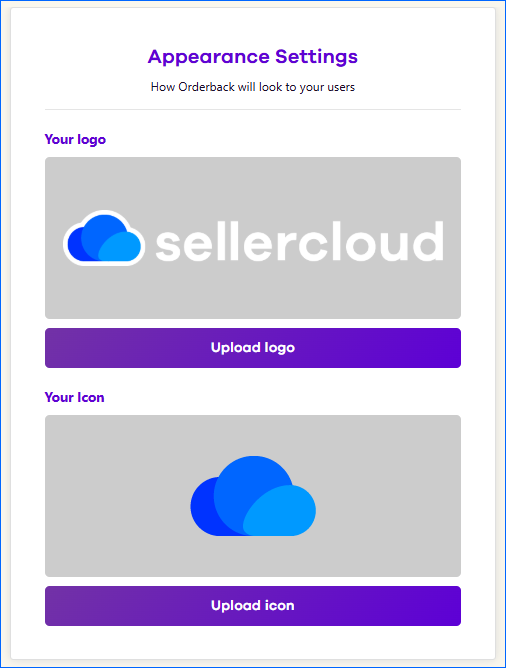
- Your logo – Upload your company logo. It will appear at the top of any Orderback page, both in the Admin Portal and on the Orders and Returns Portal.
- Your Icon – Upload your company favicon. It will appear on all Orderback tabs in the browser.
Orders
Refer to the list below for a detailed definition of each of the Orders settings:
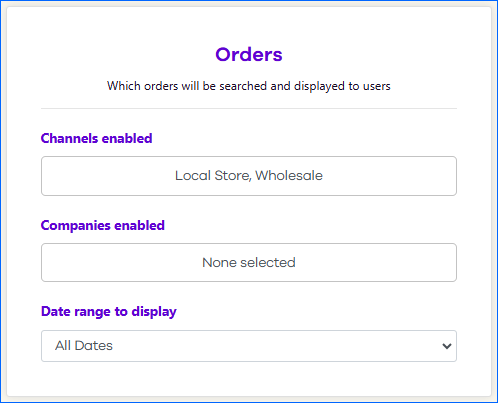
- Channels enabled – Allow self-service RMAs and display only those channels on the Order History page. By default, none are selected, so all channels are displayed.
- Companies enabled – Show only orders from specific Companies on the Order History page. By default, none are selected, so orders from all companies will be displayed.
- Date range to display – Show orders placed within a specific date range. By default, orders from all dates will be displayed.
New Orders
Refer to the list below for a detailed description of each New Orders setting.
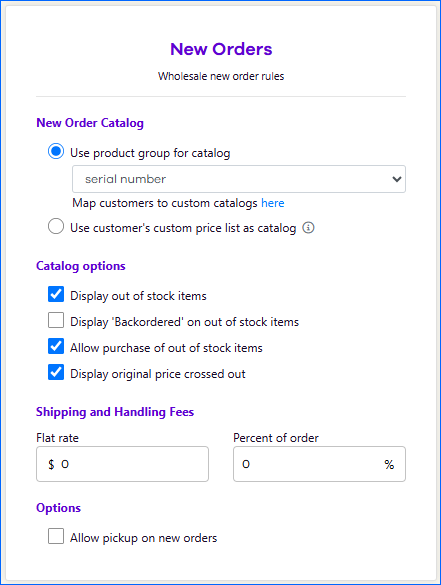
New Order Catalog
- Use product group for catalog – Allow your customers to place orders for products from a specific Product Group.
- You can map Customer Groups to an additional product group, which allows you to further customize the available catalog based on your preferences.
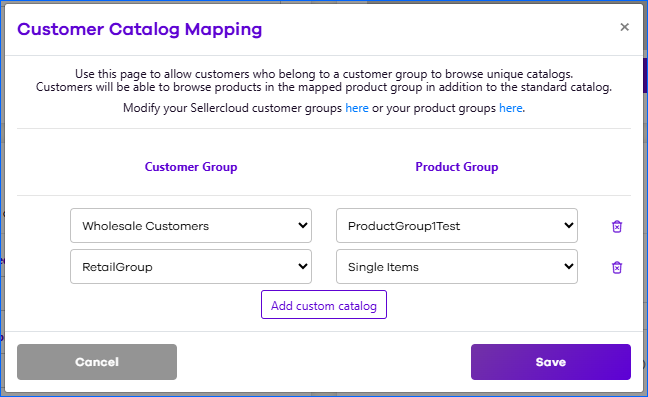
- You can map Customer Groups to an additional product group, which allows you to further customize the available catalog based on your preferences.
Catalog Options:
- Display out of stock items – When enabled, customers will be able to see items that currently have no inventory in the Add Items panel when placing a new order.
- Display ‘Backordered’ on out of stock items – When enabled, customers will see an indication that they have purchased an item that is currently not available.
- Allow purchase of out of stock items – Enable to allow your customers to place backorders.
- Display original price crossed out – When enabled, customers that have wholesale prices for items will see the original product price with a strike-through.
Shipping and Handling Fees
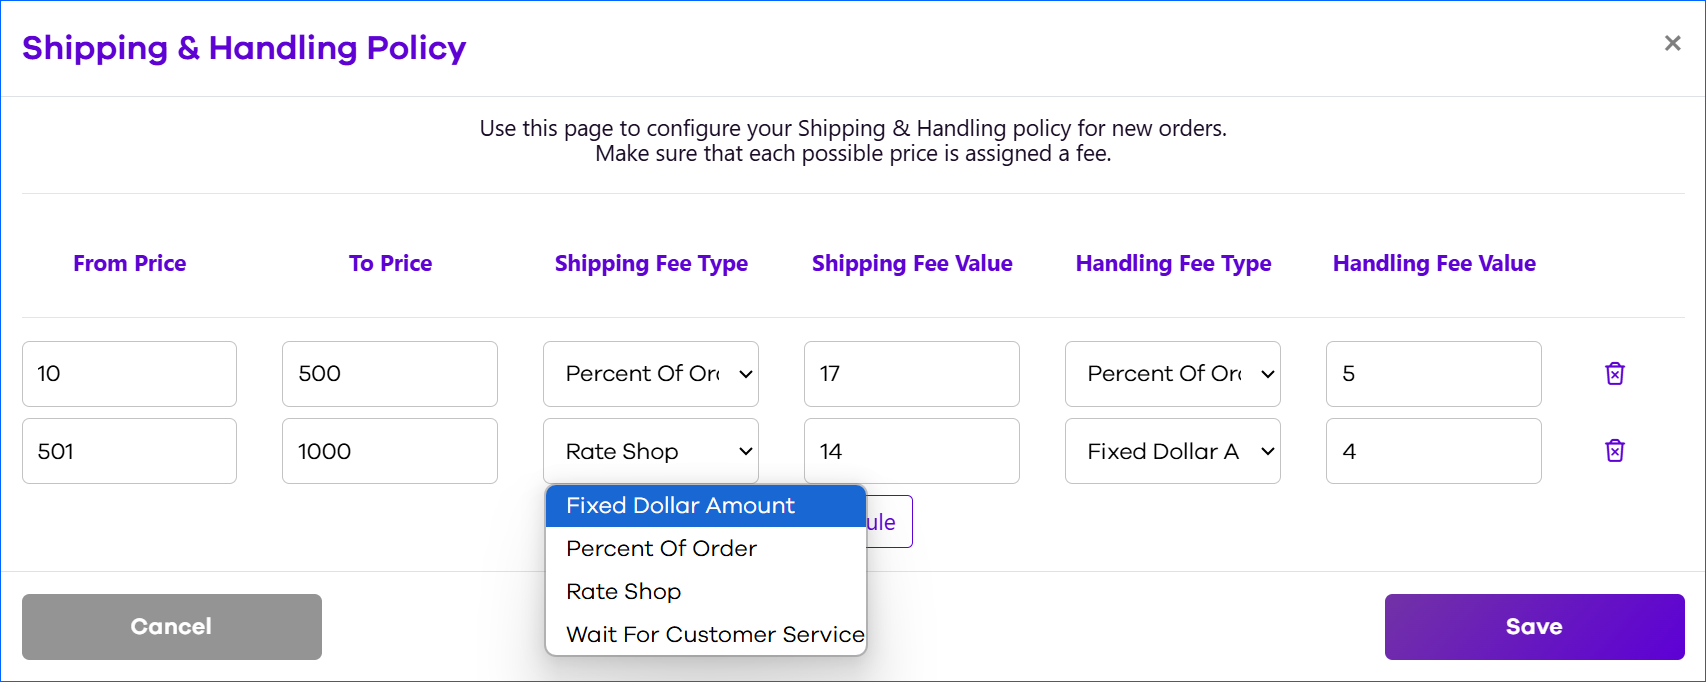
You can configure additional fees to automatically apply to each new order created in Orderback. There are two types:
- Standard Fees – Choose between a flat dollar amount or a percentage of the order. The Standard Fees will apply to all orders regardless of their total price.
- Rule Based Fees – You can also set up different shipping and handling fees for orders based on specific custom rules.
Options
- Allow pickup on new orders – Enable this setting to allow customers to select Pickup in store on the Shipping Address step of the New Order wizard.
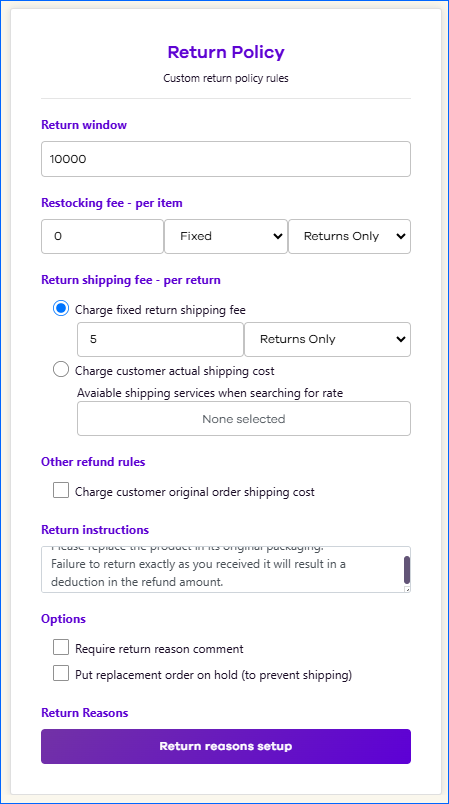
Return Policy
Refer to the list below for a detailed definition of each of the Return Policy settings:
- Return window – The number of days customers are allowed to create an RMA after placing the original order.
- Restocking fee – per item – The restocking fee per item, either a percentage or a fixed amount in USD. You can choose whether it applies to returns only, exchanges only, or both.
- Return shipping fee – per return – Shipping fee in USD for the entire RMA. Select between:
- Charge fixed return shipping fee – Configure a flat shipping fee for each RMA.
- Charge customer actual shipping cost – With this setting, instead of a fixed return shipping fee, Sellercloud finds and chooses the best shipping rate and then deducts the actual shipping cost from the refund amount. You must configure the Shipping API settings for the companies you have linked to Orderback. Additionally, you can select specific carriers and services in the field below.
- Charge customer original order shipping cost – Charge customers for the original shipping cost of their order when processing refunds.
- Return instructions – Provide details and guidelines for customers on how to handle the return. These instructions appear above the shipping labels on the Orderback RMA Details page.
- Require return reason comment – Require a mandatory comment regarding the reason for the return.
- Put replacement order on hold (to prevent shipping) – Automatically set the status of any replacement orders to On Hold in Sellercloud to prevent shipping. This status will not auto-update later; you must change it manually per order on the Order Details Page or in bulk on the Orders > Manage Orders page by selecting the orders and then clicking Update Order Status.
- Return reasons setup – Configure the list of return reasons available to customers on Orderback’s Orders and Returns Portal and map them to your Sellercloud Return Reasons.
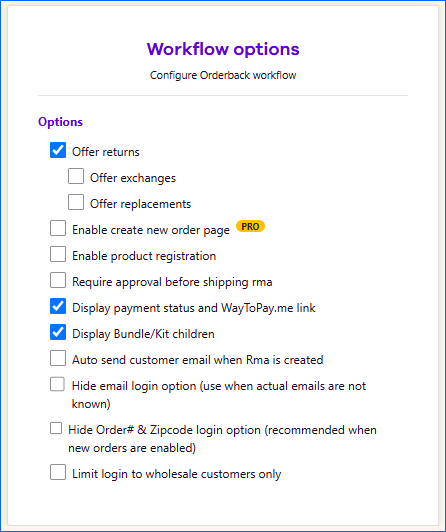
Workflow Options
Refer to the list below for a detailed definition of each of the Workflow settings:
- Offer returns – Controls customers’ ability to initiate returns (including refunds, exchanges, and replacements) from the Orders and Returns Portal. When disabled, users can still perform any enabled order-related actions.
- Offer exchanges – Enable customers’ ability to request an exchange for Product Variations.
- Offer replacements – Enable customers’ ability to request replacements.
-
PRO) – Display the New Order button in the Orders and Returns Portal, allowing customers to place new orders.
-
- Require approval before shipping RMA – Enable to require all RMAs to be manually approved before shipping. The shipping labels will only be available after you approve the RMA. RMAs can be approved by clicking Approve on the RMA Dashboard or updating the Approval Status on the RMA Details page in Sellercloud.
This setting prevents the Auto send customer email when RMA is created option from automatically emailing the customer and requires you to click Send email after approving the RMA. - Display payment status and WayToPay.me link – Display orders’ Payment Status and the option to generate a Waytopay.me link in the Orders and Returns Portal.
- Display Bundle/Kit children – When the order includes a Kit Product, show all its components instead of only showing the parent item on the Orders and Returns Portal. This only applies to All Components and Main Component kits.
- Auto send customer email when RMA is created – Automatically sends an email confirmation to the customer once they create an RMA.
This setting only works when Require approval before shipping RMA is disabled. If enabled, you must approve the RMA on the RMA Dashboard and then click Send email. See Email Templates to learn how to customize the email. - Hide email login option – Hide the Email address login option in the Orders and Returns Portal. When enabled, customers can only look up orders by order number and zip code. For example, this is useful if you usually deal with Amazon customers who can’t use email to check for orders.
- Limit login to wholesale customers only – When this option is enabled, only customers marked as Wholesale can log in to the Orders and Returns portal.
Customize Text
In addition to the Appearance General Settings, you can further personalize the Orders and Returns Portal with the Customize Text functionality. This refers to the text visible to your customers on any of the Orderback pages, such as, but not limited to:
- The Login page.
- The Logout page.
- The Order History Page.
- The Create New Order Wizard.
- The Create New RMA Wizard.
To Customize Text in Orderback:
- Log into the Admin Portal.
- Click Customize Text in the side menu.

- Fill in the fields you want to customize. The ones you leave empty will retain their default values.
- Click Save.
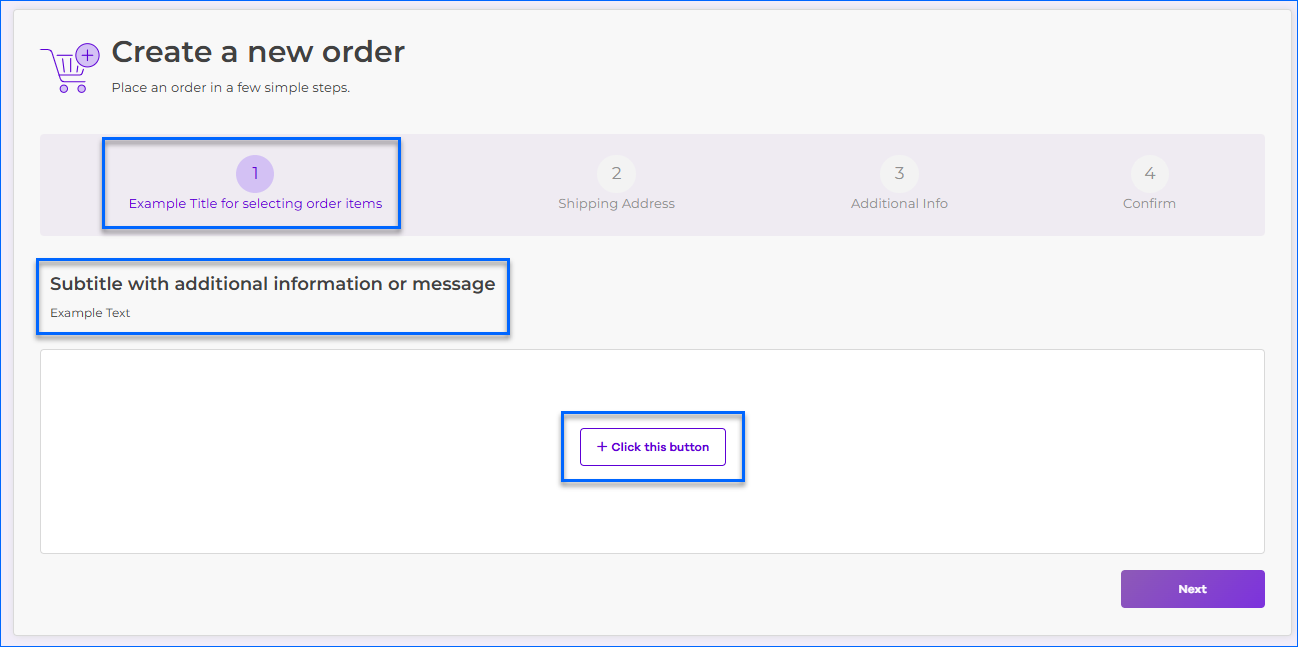
The screenshot below provides an example of how you can set up the Select Items Tab of the Create New Order Wizard: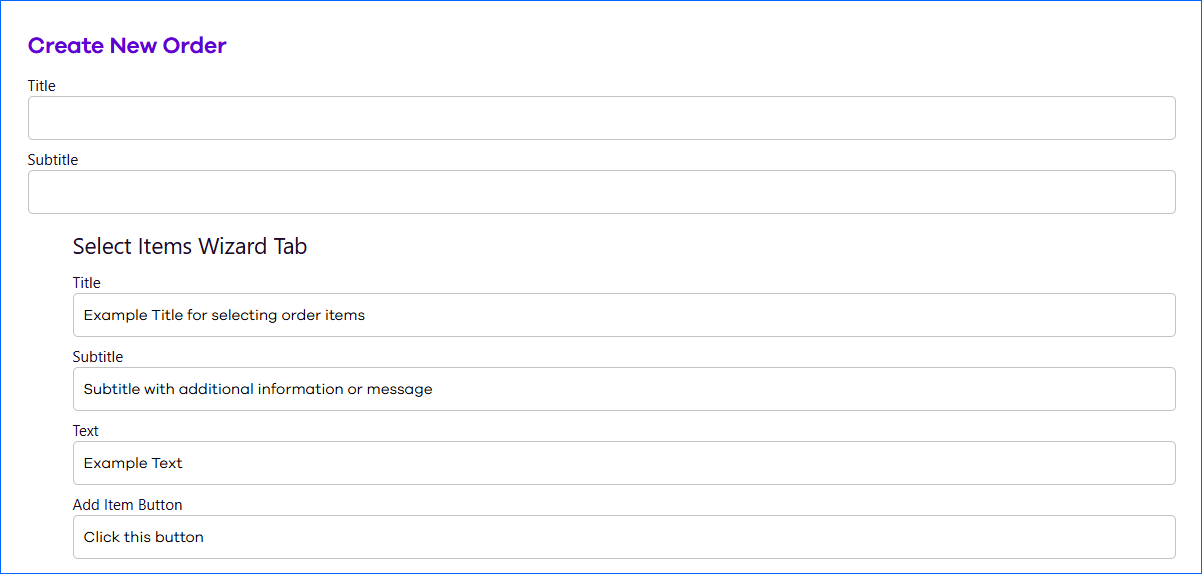
With the above configuration, customers will see the following: