Overview
Sellercloud allows you to remove products you no longer wish to use by deleting them from your inventory. Alternatively, you can mark such products as Inactive. This will hide them from default inventory searches instead of removing them completely.
Delete a Product
You can delete products individually or in bulk.
Individually
To delete a single product, navigate to:
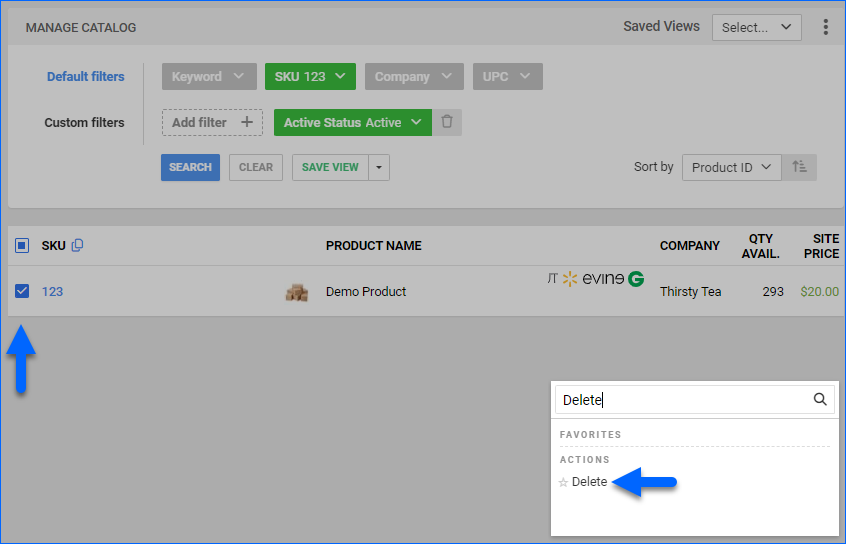
- Catalog > Manage Catalog.
- From this page, select one or more products.
- Action menu > Delete.
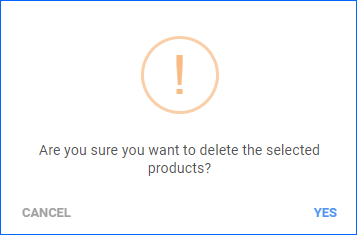
- A Confirmation Message will appear > Click Yes to confirm the deletion.
In Bulk
To delete multiple products at once, navigate to:
- Catalog > Manage Catalog > Import Product Info.
- Select Bulk Product Update.
- Click Generate Template and add the following columns:
- _Action_
- _Action_Confirm_
- Specify the appropriate SKUs, and enter DELETE for each product line within both the _Action_ and _Action_Confirm_ columns.

- Go back to Sellercloud and Upload the template.
Relevant Client Settings
The following related client setting is available:
- Require PIN To Delete Product
- This setting ensures that a PIN will be requested upon deleting products.
Overview
Sellercloud allows you to remove products you no longer wish to use by deleting them from your inventory. Alternatively, you can mark such products as Inactive. This will hide them from default inventory searches instead of removing them completely.
Delete a Product
You can delete products individually or in bulk.
Individually
To delete a single product, navigate to:
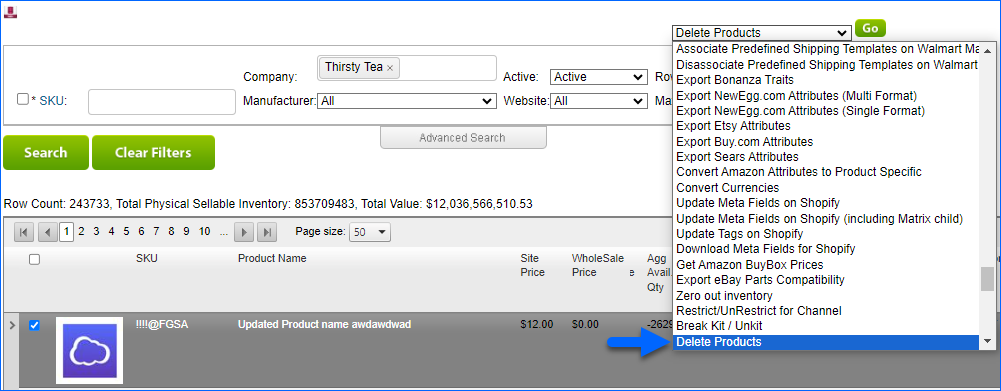
- Inventory > From this page, select one or more products.
- Click Go.
- Action menu > Delete.
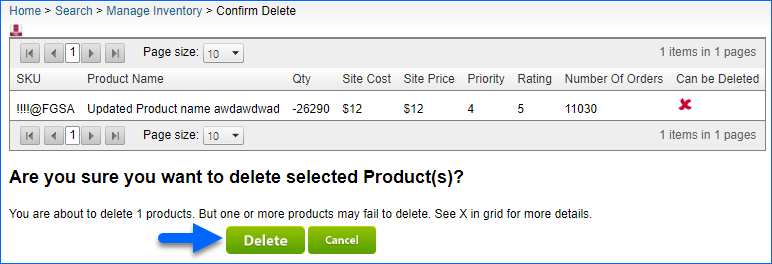
- A Confirmation Message will appear > Click Delete to confirm the deletion.
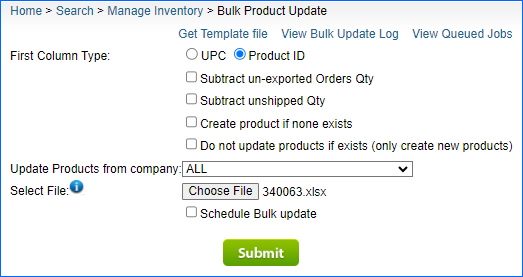
In Bulk
To delete multiple products at once, navigate to:
- Inventory > Bulk Product Update.
- Click Get Template File and add the following columns:
- _Action_
- _Action_Confirm_
- Specify the appropriate SKUs, and type DELETE for each product line within both _Action_ and _Action_Confirm_ columns.
- Go back to Sellercloud and upload the newly created template.
- Click Submit.
Relevant Client Settings
The following related client setting is available:
- Require PIN To Delete Product
- This setting ensures that a PIN will be requested upon deleting products.