Overview
JCPenney, often referred to as JCP, is a department store chain with a long history in the retail industry. They sell a wide range of products, including clothing, footwear, accessories, jewelry, beauty products, home furnishings, appliances and more.
Integrating JCPenney into your Sellercloud account allows you to seamlessly import orders, upload tracking information, and ensure your listings are always up-to-date with the latest inventory data. This integration works through EDI documents, transmitting information between the two services via plugins and Scheduled Tasks. The document exchange goes through Rithum, previously known as CommerceHub.
If necessary, you can open a ticket with Sellercloud Support to request additional customizations or other plugins for this integration. Any such modification will be billable.
Prerequisites
Before you can integrate JCPenney with Sellercloud, complete the following requirements.
Rithum Support
Contact Rithum Support and obtain:
- A Supplier Test Plan and a Supplier Guide. Prior to production deployment, the entire test plan must be completed according to the documented procedures, including submission of a test transaction for each test order.
- Test and production credentials. Once you complete all test cases outlined in the test plan document, the platform will provide you with the production SFTP details: Server Name, Username, and Password. You will need them when setting up the scheduled tasks to automate the plugins. Also, make sure to obtain Belk’s ISA ID and Qualifier, and provide your Customer ISA ID.
Sellercloud Support
Open a ticket with Sellercloud Support and request the following plugins to be installed on your server:
- JCPenney 850 Order Import EDI – Imports orders from JCPenney to Sellercloud in EDI 850 format
- JCPenney 856 Order Export EDI – Exports tracking information from Sellercloud to JCPenney in EDI 856 format.
- JCPenney 846 Product Export EDI – Exports inventory from Sellercloud to JCPenney in EDI 846 format.
- JCPenney Packing Slip – Generates a printable PDF packing slip in a format that complies with JCPenney’s requirements.
Custom Company Settings
Create the following Custom Company Settings.
On your default company:
- STControlNumber
- GSControlNumber
- ISAControlNumber
- GS1_CompanyPrefix – Used by the JCPenney Packing Slip plugin. Enter your GS1 Company Prefix here.
- (Optional) JcPenneyLeaveOrdersUnpaid – Used by the JCPenney 850 Order Import EDI. Defaults to False. If set to True, orders will be imported with Payment Status: Unpaid. Set the Data Type to Boolean.
- (Optional) JCP_DefaultCarrier – Used by the JCPenney 850 Order Import EDI. Defines a default carrier for JCPenney Orders. If the Order Import plugin cannot map the carrier, it will use the default one.
- (Optional) JCP_DefaultShippingMethod – Used by the JCPenney 850 Order Import EDI. If the code sent from JCPenney contains UNSP and this setting is populated, it will set the ShippingServiceSelected to the value from the setting.
- (Optional) JCPBackOrderedAllowPurchase – Used by the JCPenney 846 Product Export EDI. Set to True to enable the Next Available Inventory Date segment for Backorders. Set the Data Type to Boolean.
- JcPenney_ShippingRequiresThirdPartyBilling – This is an optional but recommended setting, which is enabled by default if you don’t create it. With this setting, orders will be imported with Third-Party Billing required. To disable this setting, create it and set it to False. Set the Data Type to Boolean.
On the company created for the integration:
- JcPenney Customer ISA ID – Your ISA ID. Enter a unique phone number that you don’t use for any other EDI integration.
- JcPennyCustomerQualifier – Your Qualifier. Set to ZZ.
- JcPennyQualifier – JCPenney’s Qualifier. Typically, it’s 12. Contact JCPenney for the value of this setting.
- JcPenneyReceiverID – JCPenney’s Receiver ID. Contact JCPenney for the value of this setting.
- (Optional) ExportMultipleWarehousesOnJCPenney846 – Set to True to Export Inventory per warehouse instead of sending the total inventory. Set the Data Type to Boolean.
- (Optional) JCPenney_WarehouseCodeMapping – If the ExportMultipleWarehousesOnJCPenney846 setting is enabled, you must map the warehouses here by following the format WarehouseID,WarehouseCode. Example: “123,WHNY;456,WH2”. Set the Data Type to String.
Custom Product Columns
Create the following Custom Product Columns:
- JCPENNEY_SKU – The product’s SKU at JCPenney. Set the Data Type to String.
- JCP_Enabled – Enable only specific products for JCPenney. Set to True for any products you want to send with the Inventory Export plugin. Set the Data Type to Boolean.
- JCPENNEY_SAFETY_QTY – The Safety Quantity, which is to be subtracted from the Available Quantity to prevent overselling on JCPenney. Set the Data Type to Integer.
- JCP_BACK_ORDER_DAYS – Used by the JCPenney 846 Product Export EDI. If the JCPBackOrderedAllowPurchase setting is enabled, this column is mandatory. Enter the number of days to send to JCPenney from the current time and date. Set the Data Type to Integer.
- JCP_BACK_ORDER_INVENTORY – Used by the JCPenney 846 Product Export EDI. If the JCPBackOrderedAllowPurchase setting is enabled, this column is mandatory. Enter the quantity to send to JCPenney. Set the Data Type to Integer.
Custom Order Columns
Create the following Custom Order Columns:
- IsShipToStore – Used by the JCPenney Packing Slip. Set the Data Type to Boolean.
- (Optional) JCPenney_SoldTo – Used to save the N1 * SO (Sold To Name) value by the JCPenney 850 Order Import EDI. Set the Data Type to String.
Order Import
The JCPenney 850 Order Import EDI plugin imports order data from JCPenney to Sellercloud in EDI 850 format.
Automate Order Import
To create a Scheduled Task that imports orders:
- Navigate to Settings > Scheduled Tasks > Manage Scheduled Tasks.
- Click the green + icon: Create New Scheduled Task.
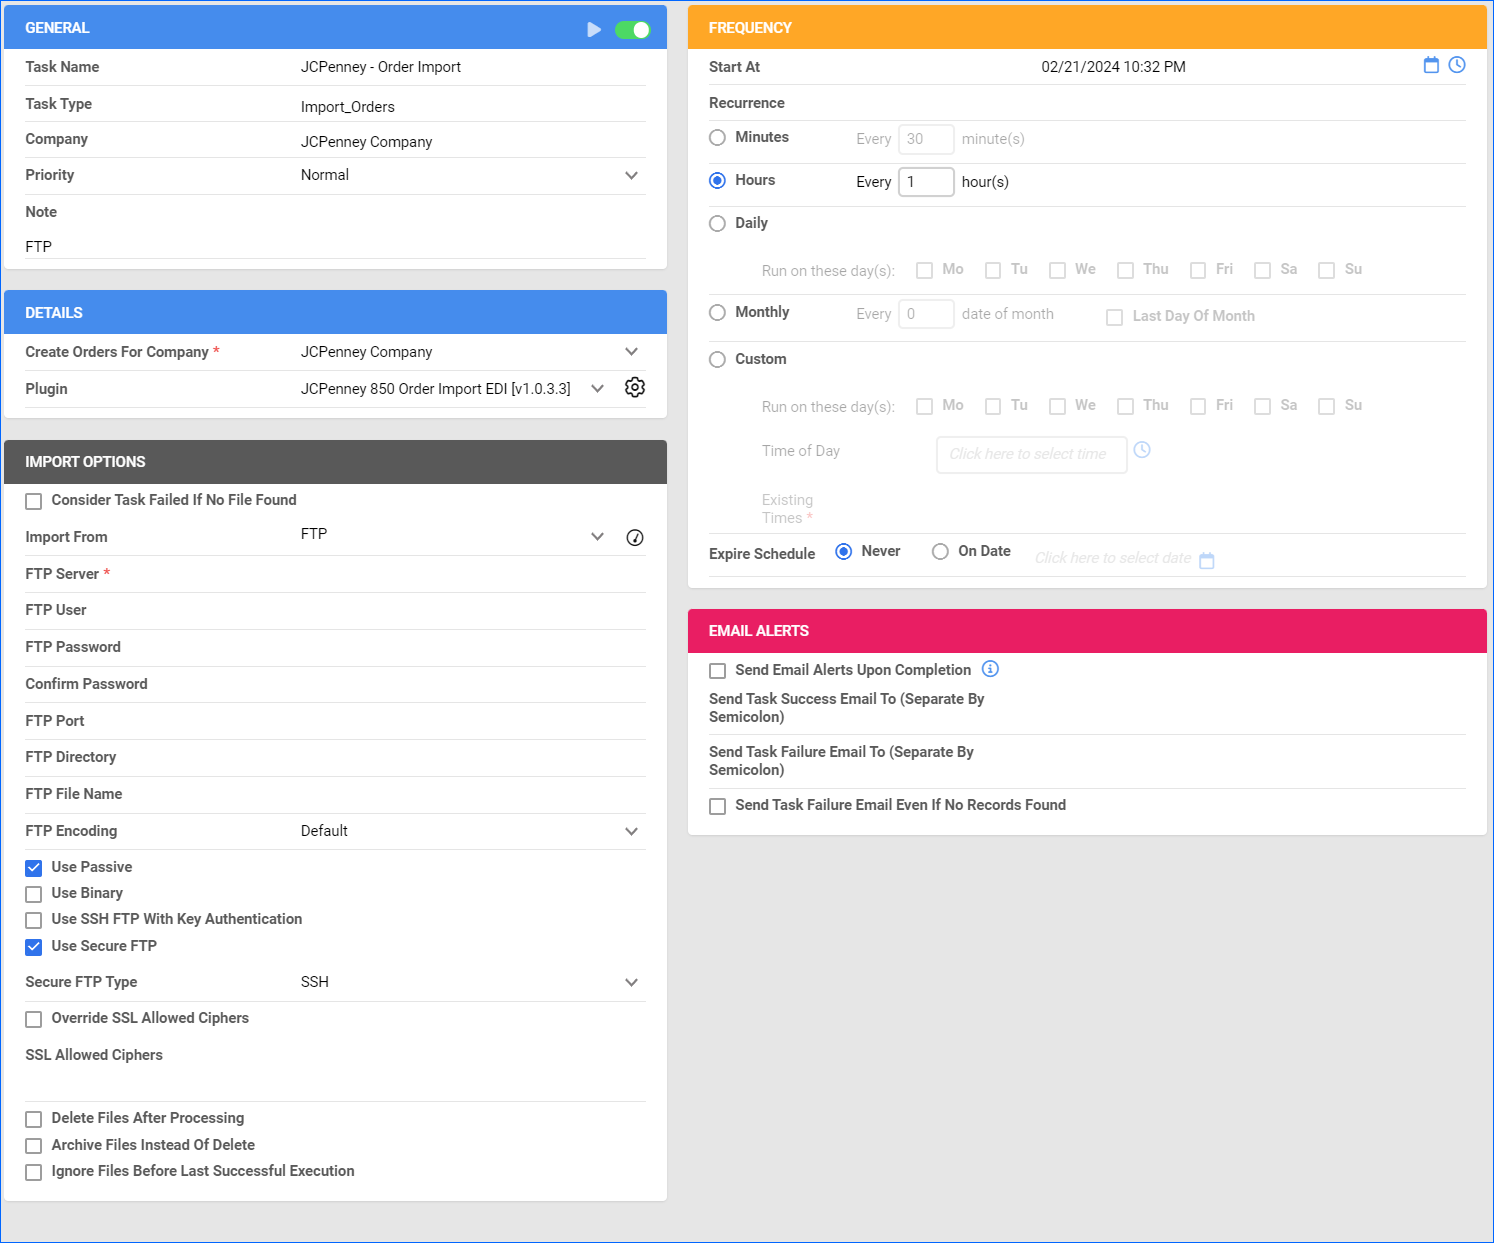
- Complete as follows:
- Click Task Type and select Import Orders.
- Set the Task Name.
- Select the Company.
- Select the Start Time.
- Click CREATE.
- On the Scheduled Task page, click the Edit button at the top right corner.
- In the Details panel:
- Click Create Orders For Company and select the company designated for this integration.
- Click the Plugin menu and select JCPenney 850 Order Import EDI.
- In the Import Options panel:
- Set Import From to FTP and fill out your FTP credentials.
- Set the FTP Directory to /outgoing/intchg.
- Make sure to check Use Passive and Use Secure FTP.
- In the Frequency panel, specify the task frequency. For optimal performance, select a range between thirty minutes and one hour.
- In the General panel:
- Fill in “FTP” in the Note field.
- Click the Enable button.
- Click Save.
Tracking Export
The JCPenney 856 Order Export EDI plugin exports tracking from Sellercloud to JCPenney in EDI 856 format.
The plugin includes the SSCC ID per package if it is a Ship to Store order. The invoice plugin generates the SSCC, so for Ship to Store orders, you must first print the packing slip. Then, when the tracking is exported, it will include the SSCC.
For Split Orders, the Tracking Export plugin now exports parent and child orders together by adding the child packages and items to the parent item and exporting a single transaction of the parent.
- Parent orders that are not fully shipped are skipped along with their child orders.
- Child orders that are not fully shipped are skipped, but won’t stop their parent from being exported. This will mark the Order JCP as partially shipped, and the child order in Sellercloud will be marked as Source Notified For Shipping.
Before you move on, create a Saved Search for orders filtered by:
- Company – The company you created for the integration
- Order Status – InProcess Or Completed
- Shipping Status – FullyShipped
- Payment Status – Charged
- Tracking Uploaded – No
- Exported – Not Exported
![]()
Automate Tracking Export
To create a Scheduled Task that exports order tracking:
- Navigate to Settings > Scheduled Tasks > Manage Scheduled Tasks.
- Click the green + icon: Create New Scheduled Task.
- Complete as follows:
- Click Task Type and select Export Orders.
- Set the Task Name.
- Select the Company.
- Select the Start Time.
- Click CREATE.
- On the Scheduled Task page, click the Edit button at the top right corner.
- In the Details panel:
- Click the User ID menu and select your email.
- Click the Saved Search menu and select the saved search you created earlier.
- Click the Export Via menu and select JCPenney 856 Order Export EDI.
- Check Mark Orders As Exported.
- Check This Is Tracking Export.
- In the Export Options panel:
- Set Export To to FTP and fill out the FTP fields.
- Set the Remote Folder path to /incoming/intchg.
- Make sure to check Use Passive and Use Secure FTP.
- In the Frequency panel, specify the task frequency. For optimal performance, select a range between thirty minutes and one hour.
- In the General panel, click the Enable toggle button.
- Click Save.
![]()
Inventory Export
The JCPenney 846 Product Export EDI plugin exports inventory quantities (total or per warehouse) from Sellercloud to JCPenney in EDI 846 format. Note that product prices are not included.
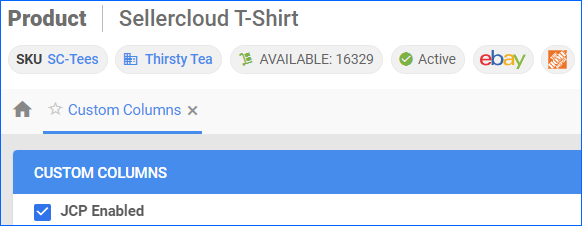
Optionally, you can enable only specific products for JCPenney by setting their JCP_Enabled Custom Product Column to True:
- For one product at a time: go to the Product Details Page > click Toolbox and select Custom Columns > click Edit, update the JCP_Enabled column, and Save.
- For multiple products in bulk: follow the steps to Bulk Update Products and use the JCP_Enabled column – set it to True for all products you want to enable.
Unlike core integrations, plugin integrations don’t require products to be in the company with the scheduled tasks. The export will include the products you select with your Saved Search.
Next, create a Saved Search for products filtered by JCP_Enabled – True. Optionally, you can add more filters to the search to narrow down the export further.
Automate Inventory Export
To create a Scheduled Task that exports inventory:
- Navigate to Settings > Scheduled Tasks > Manage Scheduled Tasks.
- Click the green + icon: Create New Scheduled Task.
- Complete as follows:
- Click Task Type and select Export Products.
- Set the Task Name.
- Select the Company.
- Select the Start Time.
- Click CREATE.
- On the Scheduled Task page, click the Edit button at the top right corner.
- In the Details panel:
- Click the User ID menu and select your email.
- Click the Saved Search menu and select the saved search you created earlier.
- Click the Export Via menu and select JCPenney 846 Product Export EDI.
- In the Export Options panel:
- Set Export To to FTP and fill out your FTP credentials.
- Set the Remote Folder path to /incoming/intchg.
- Make sure to check Use Passive and Use Secure FTP.
- In the Frequency panel, specify the task frequency. For optimal performance, select a range between thirty minutes and one hour.
- In the General panel, click the Enable toggle button.
- Click Save.

Configure PDF Invoices
With the JCPenney Packing Slip plugin set up under your designated company, you can print PDF Invoices with information about your JCPenney orders and the products they include through Sellercloud or Shipbridge.
If it is a Ship To Store order, it will also generate an SSCC ID per package and print each barcode and ID on the invoice. The SSCC will then be saved back to the package.
The SSCC code is comprised of the first 17 digits of your GS1 Company Prefix (pulled from the custom setting GS1_CompanyPrefix), the package ID, the order ID, and the order source order ID (numerics only). A check digit is then added to the end of the SSCC.
To set up the invoice plugin:
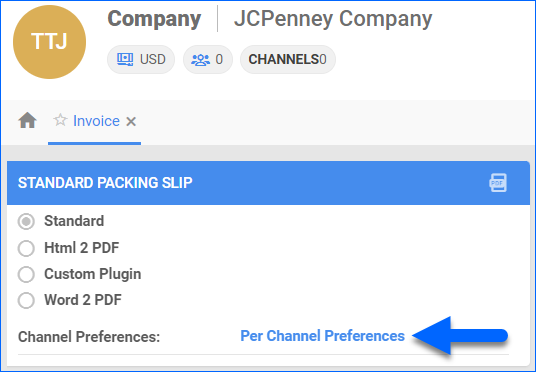
- Go to the Company Settings of the company you created for the integration
- Click Toolbox and select Invoice Settings.
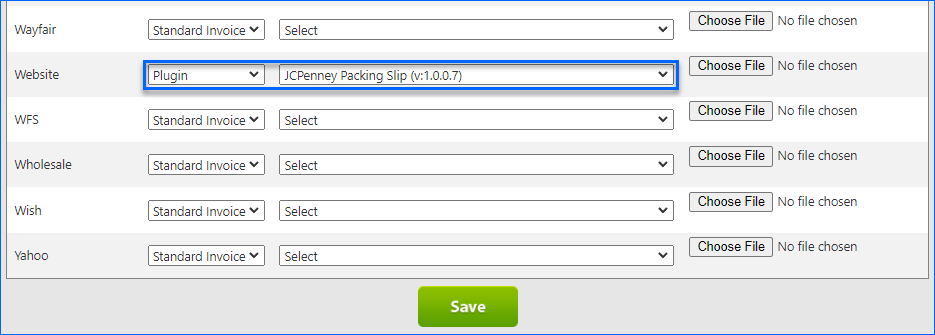
- Click Per Channel Preferences.
- For Website, select Plugin > JCPenney Packing Slip.
- Click Save.