Overview
Amazon Custom is an Amazon program that offers a personalized shopping experience by allowing your buyers to customize various aspects of your products, such as text, images, or design elements. Here are the key features and benefits of Amazon Custom:
- Marketplace Visibility – Amazon showcases customizable products in a dedicated section.
- Product Display – Customizable products have a dedicated product detail page that showcases the base product and the available customization options.
- Customization Options – You define the customizable options for your products.
- Pricing Rules – You set pricing rules and configure how customization options impact prices.
- Personalization Interface – Customers personalize products in a user-friendly interface.
Sellercloud’s integration with Amazon Custom retrieves the buyer’s customization request and images, allowing you to easily fulfill the order to their specifications.
Prerequisites
To process Amazon Custom orders in Sellercloud, you must:
- Have already set up the Amazon Account Integration.
- Ensure that the required order report column is enabled on Seller Central. Go to Orders > Order Reports > Add or remove order report columns and enable Customized URL.
- Contact Sellercloud Support and request that the Amazon Custom Info Format post order plugin be installed on your server.
- Go to the Custom Company Settings, create AmazonCustomizationInfo – Save ZIP File, and set it to True to ensure that the complete customization information from Amazon will be saved to each order’s Documents in Sellercloud.
- Go to Client Settings and check the status of the Enable Rule Engine Action For Post Order Plugin setting.
Integrate Amazon Custom
Depending on the Client Setting Enable Rule Engine Action For Post Order Plugin, there are different ways to configure the plugin. If it is disabled, you must use your Company Settings. If it is enabled, you must use the Order Rule Engine.
Once the plugin is set up, Sellercloud will automatically:
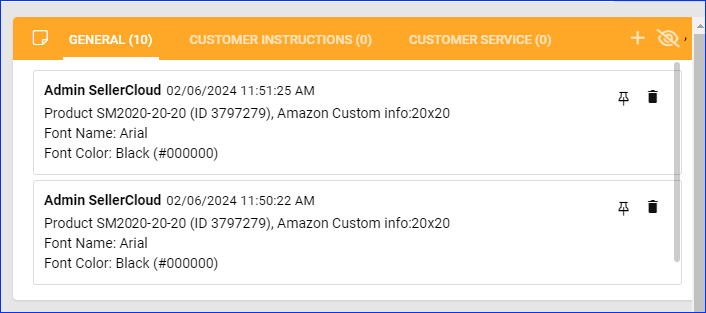
- Save customers’ customization requests into the Notes panel on the Order Details Page.
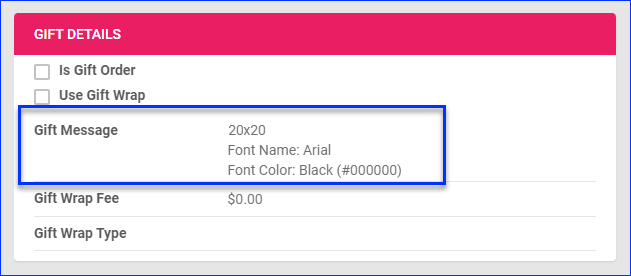
- Save customers’ customization requests as Gift Wrap Messages.
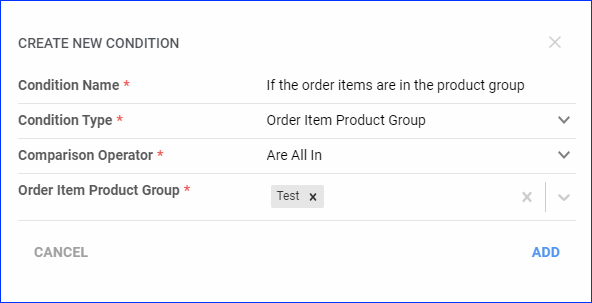
Orders with saved customization requests are not considered Gift Orders and don’t have Gift Wrap enabled, which means you can’t use the gift order filters on the Manage Orders Page to locate such orders. One way to quickly find such orders is to put all customizable items into a Product Group and then filter orders by that group. - Retrieve images from the Amazon customization and save them to the Order Documents with the same name as their respective order item ID.
- Save a zip archive with the complete customization information from Amazon in JSON and XML files, as well as any images, to the Order Documents.
You can control if the zip is saved in the Order Documents by going to your Custom Company Settings, creating AmazonCustomizationInfo – Save ZIP File, and setting it to True or False.
Company Settings Setup
To set up the plugin with the Company Settings:
- Go to Company Settings.
- Click Toolbox and select Defaults.
- Click Edit.
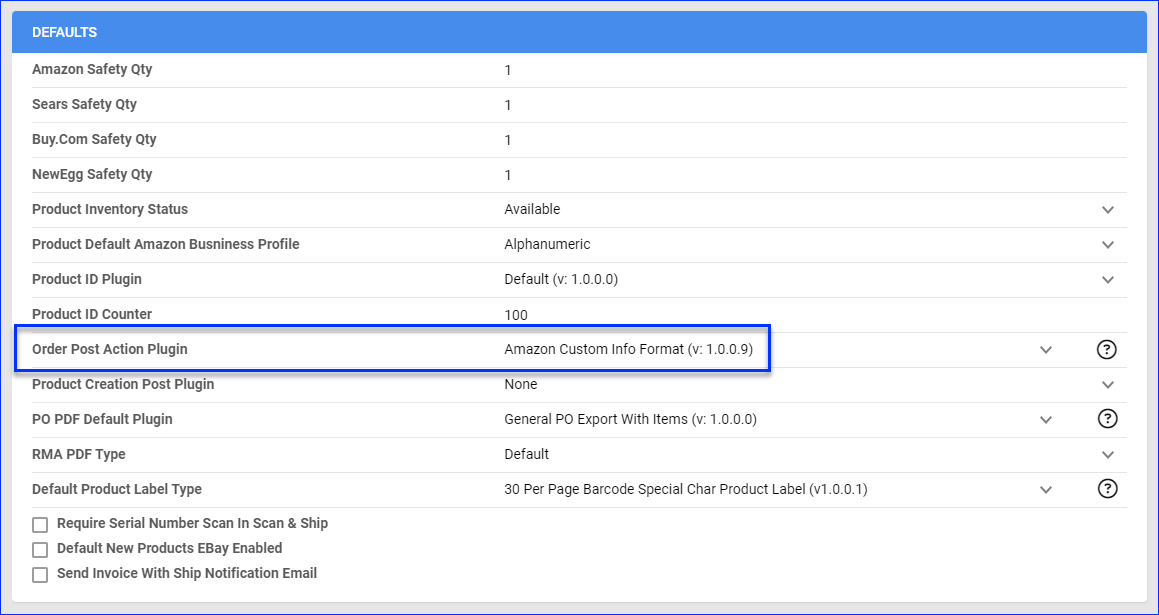
- Set the Order Post Action Plugin to Amazon Custom Info Format.
- Click Save.
Order Rule Engine Setup
To set up the plugin with the Order Rule Engine:
- Go to Settings.
- Select Orders > Rule Engine > Manage Rules.
- Click the Add New Rule + button at the top right.
- Enter a Rule Name and click Next Step.
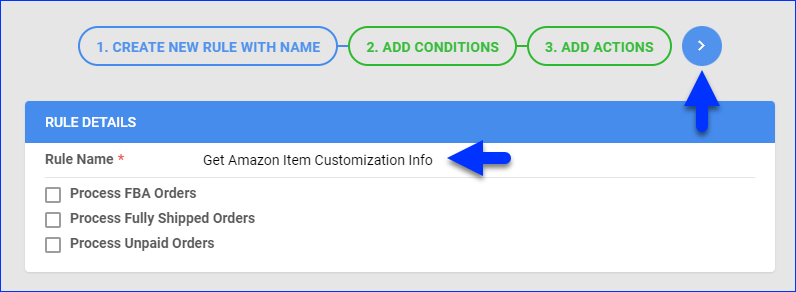
- At the right of the Conditions panel, click the Add Top Level Condition + button.

- Enter a Condition Name, Condition Type, and any other other relevant settings, then click Add.
One way to target orders with customization requests is to put all customizable items into a Product Group and then filter orders by that group. - Once you are done adding conditions, click Next Step.

- At the right of the Actions panel, click the Add New Action + button.

- Enter an Action Name, then set the Action Type to Execute Post Order Plugin and set the Plugin to Amazon Custom Info Format, then click Add.
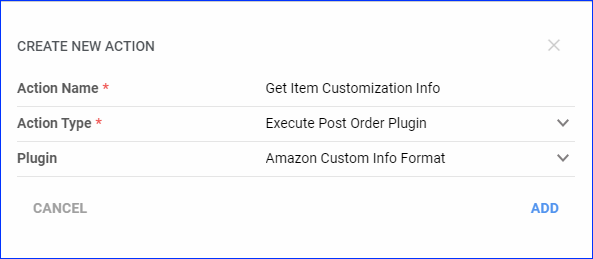
- Click the Create Rule button to finish the setup.

