Overview
When facing an extended period where you won’t be able to process orders, such as during a vacation, you can activate Vacation Mode to prevent your items from being purchased, or even viewed. Typically, this action is applied to the actual channel accounts, such as Seller Central. This article provides instructions for enabling vacation mode and alternative solutions as they relate to Sellercloud. For other channels, see the Other Channels section.
Channel-Specific Options
The following channels offer options for handling a vacation period:
- Amazon offers two options to choose from for vacations, holidays, and other absences.
- Vacation Mode is a Seller Central setting that allows you to temporarily deactivate your merchant-fulfilled listings, removing them from Amazon search results. When you are ready to sell again, simply turn the vacation mode off. Learn more about Amazon’s Vacation Settings.
- Sellercloud’s Global Fulfillment Latency setting allows buyers to purchase from you while temporarily delaying the required fulfillment time. With this option, you are still responsible for packing and shipping all orders based on the customer’s selected delivery time.
- Bonanza has a Vacation Mode that sets all your listings to Reserved while you are unavailable to process orders. See their Reserving Items and Booth Vacation Mode for more information.
- Cdiscount lets you temporarily deactivate your offers by enabling the Vacation Mode setting. See How to activate / deactivate the vacation mode for more information.
- eBay has the Time Away feature. When scheduling time away, remember that if you allow item sales, your time away can be up to 15 days, and if you pause item sales, your time away can be up to 30 days. Learn more about eBay’s Time Away Settings.
- Etsy’s Vacation Mode lets you put your shop on hold for a specific time period and set an auto-reply to respond to messages you receive while on vacation. See Vacation Mode for more information.
- Google Shopping has no vacation mode, but shipping lead time can be adjusted at the account level within Google Merchant Center. See Set up estimated delivery time for more information.
- Newegg lets you take your store account and items offline for a specific time period while you are unavailable. See how to Schedule Store Account Vacation Mode for more information.
- Reverb lets you enable Vacation Mode to prevent buyers from purchasing items. See How do I temporarily suspend my listings for more information.
- Sears doesn’t have a vacation mode that lets your buyers know that you are not working. However, you can set up non-shipping dates to provide a more accurate estimated arrival date. See Vacations and Holidays for more information.
- Shopify doesn’t have a dedicated vacation mode setting, but you can temporarily prevent buyers from placing orders or even accessing your store. See Closing for Vacations for more information.
- Walmart Marketplace allows you to set Additional Days Off for all days when you will not be processing orders. Learn more about Walmart’s options for Pausing Operations.
- Wish offers vacation settings that allow you to extend your order fulfillment timeline by up to seven calendar days or pause your warehouse operations on specific dates. See Vacation Settings for more information.
Other Channels
If your channel isn’t listed above, you can still check if it has a vacation mode setting, or a way to increase the fulfillment latency, also known as the shipping lead time. By increasing the shipping lead time, you allow customers to continue making purchases, with the understanding that there will be a delay in shipping.
If the above options are not available or you prefer another solution, you can have Sellercloud send zero inventory quantity to the channel and prevent purchases.
There are a few ways to send an inventory quantity of zero:
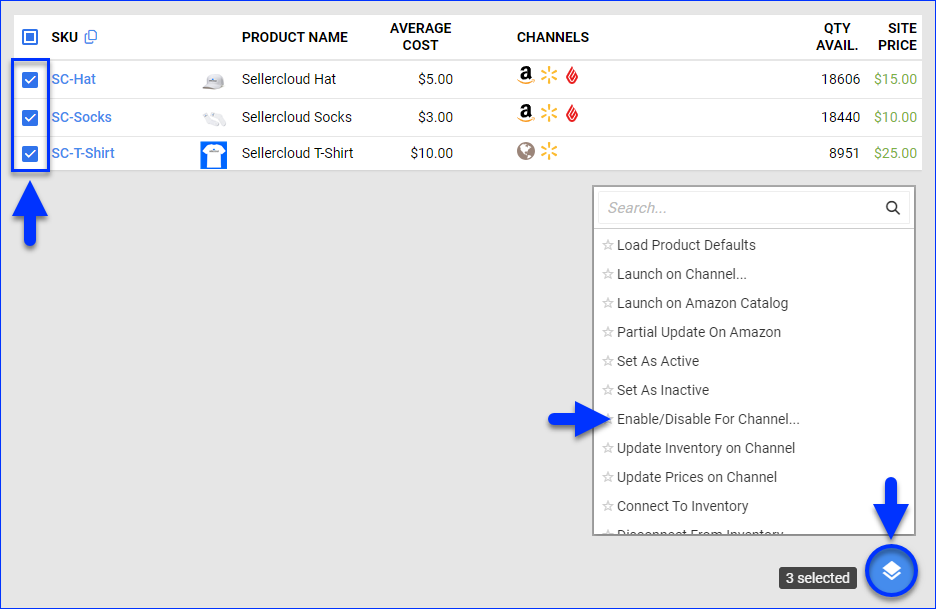
- Disable Products for the channel. For all core channels, when a product is not enabled but has an existing listing, an inventory update with a quantity of zero will be sent. However, this does not necessarily apply to plugin integrations, as the logic of the plugin may vary.
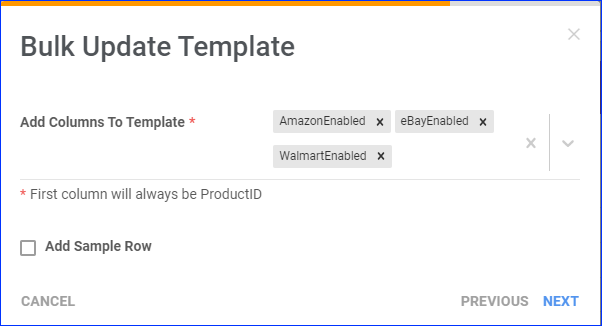
- With a Bulk Update, use the ChannelEnabled column header in your template (such as AmazonEnabled, eBayEnabled, etc.) and give it a value of FALSE.
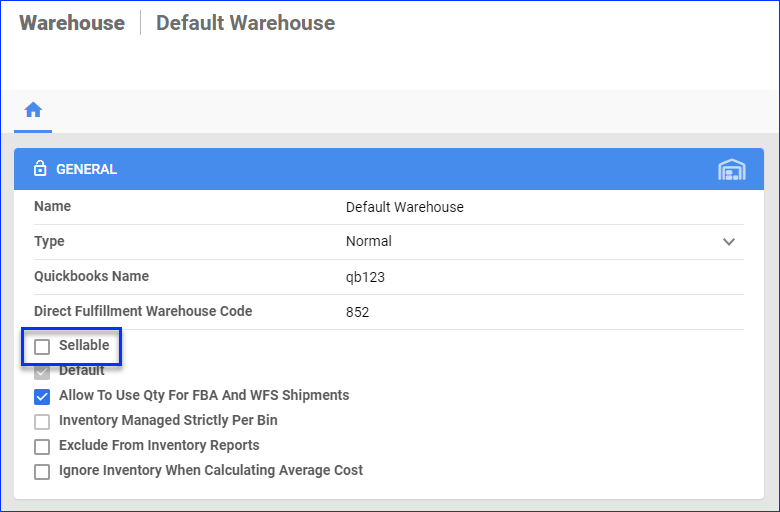
- Regardless of the integration type, making warehouses Unsellable zeroes out their inventory.
- Raise the channel’s default Safety Quantity above the available inventory level.
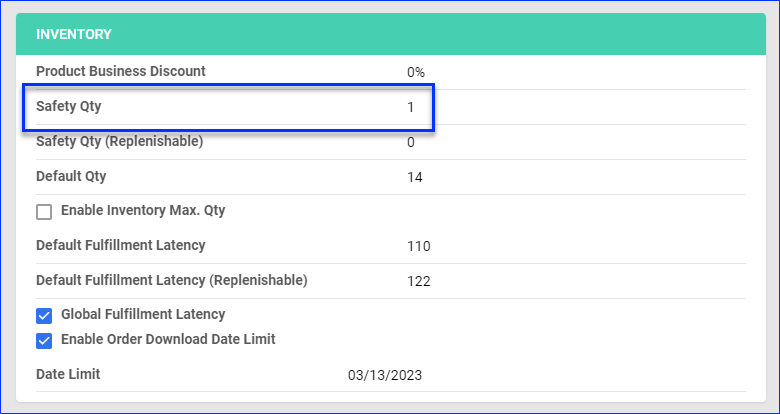
- For the core built-in integrations, use the Safety Qty field on the channel’s Company Settings > Channel > General Settings page. Be sure that your products are also configured to use the Default Safety Quantity values.
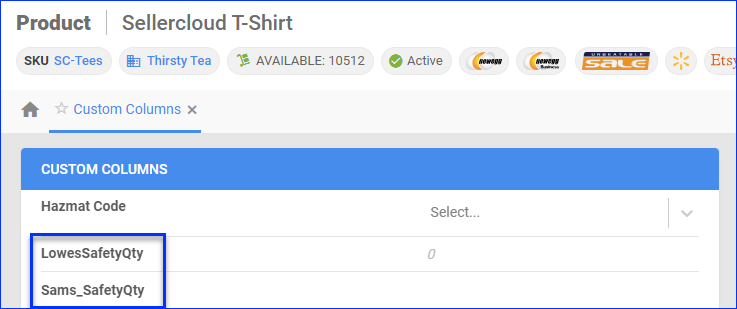
- For plugin integrations, when a default Safety Quantity setting is available, it is created as a Custom Company Setting. If there is no default setting, it is often available as a Custom Product Column.
- For the core built-in integrations, use the Safety Qty field on the channel’s Company Settings > Channel > General Settings page. Be sure that your products are also configured to use the Default Safety Quantity values.
Automate Company Settings Update
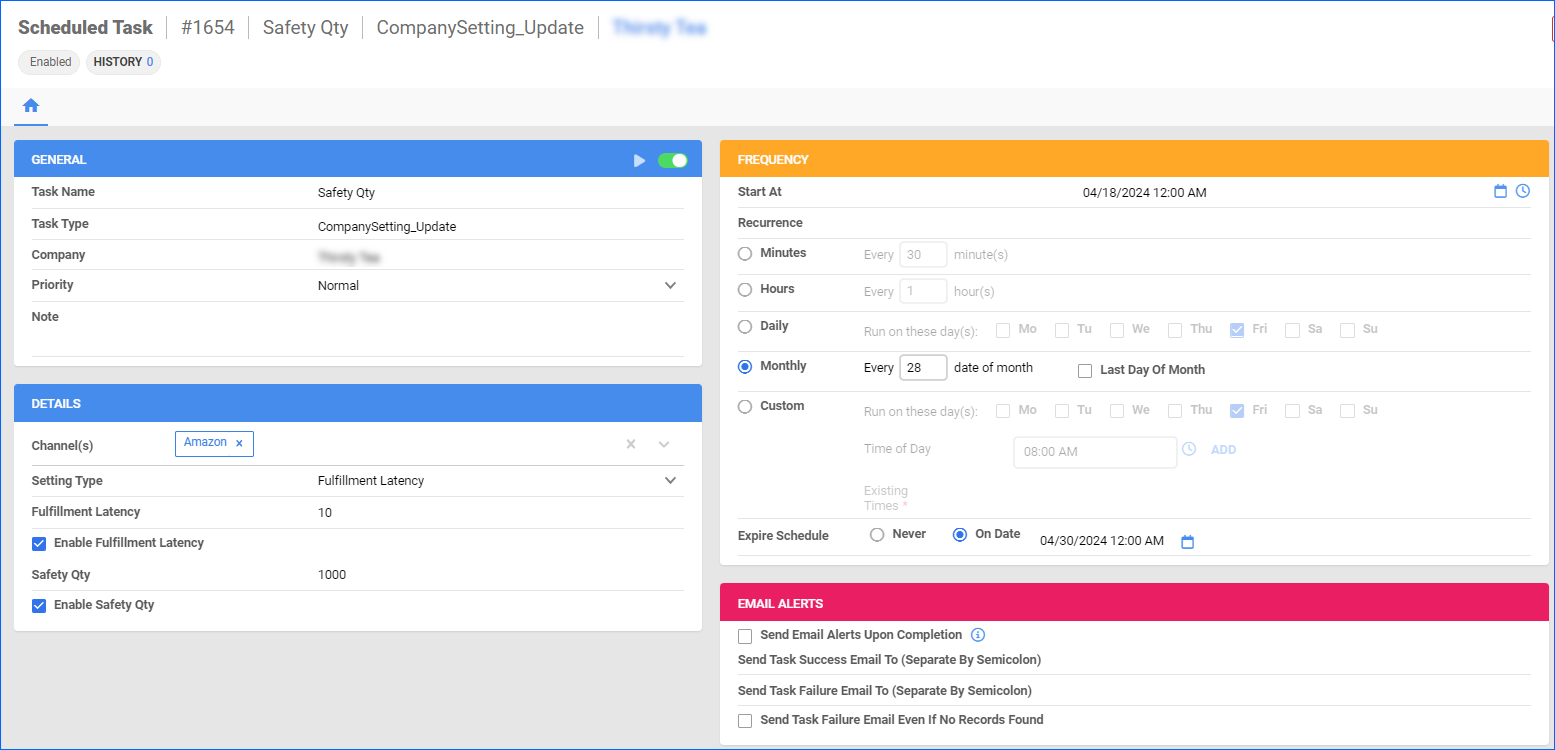
You can create a Scheduled Task to automatically change the Safety Quantity and Fulfillment Latency values of your company’s [Channel] General Settings pages. If you have increased them at the start of the vacation, this will also allow you to revert them back before your return.
Prerequisites
The General Settings page for each channel allows you to set default values for your products. For this workflow, you must ensure that the Use Default box is checked for each SKU. To do that, you can Bulk Update your products using a file import with the column headers [Channel]FulfillmentLatencyDaysUseDefault and [Channel]SafetyQtyUseDefault for each of your sales channels. Refer to our dedicated article for all the necessary Import Column Headers.
Create a Scheduled Task
To create a Scheduled Task that updates your company settings:
- Navigate to Settings > Scheduled Tasks > Manage Scheduled Tasks.
- Click the green + icon: Create New Scheduled Task.
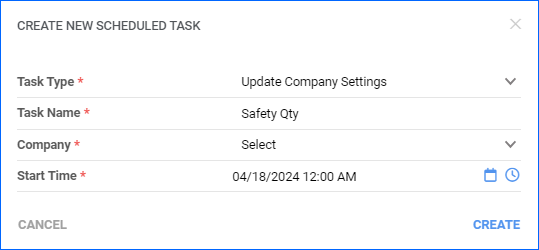
- Complete as follows:
- Click Task Type and select Update Company Settings.
- Set the Task Name.
- Select the Company.
- Select the Start Time.
- Click CREATE.
- The following message appears at the bottom of your screen: “Scheduled task created successfully. Click Here to configure the task details.” – click the link.
- Click the Edit button on the top right.
- In the Details section:
- Select a Channel from the dropdown menu. Only enabled channels are displayed.
- Fill in the desired values for Fulfillment Latency or Safety Quantity.
- Enable the corresponding checkboxes underneath each setting you want to update.
- In the Frequency panel, specify when the task should run.
- In the General section, click the Enable button.
- Click Save on the top right.