Overview
FBA inbound shipments are often split and directed to multiple Amazon fulfillment centers unless you have signed up for Amazon’s Inventory Placement Service, a per-unit-fee service. Amazon may even split units of the same SKU into different shipments – if you create a shipment with 100 units of a SKU, Amazon may send 50 to one center and 50 to another.
However, if you create a shipment with the Case Quantity Mode enabled, Amazon will not split it. Let’s say you create a shipment with 100 units of a SKU:
- If the Case Quantity is 100, Amazon will direct all 100 units to the same fulfillment center.
- If the Case Quantity is 25, Amazon may direct the shipment to 4 different fulfillment centers.
Products in cases are multiples of the same item, typically packaged by the manufacturer, with each case having the same quantity. See Case Quantity to learn how it works with Purchase Orders.
In Sellercloud, you can enable the Case Quantity feature per FBA Inbound Shipment. You can also set up default case quantities on the product level. See the following sections or the videos below for step-by-step guides to each option.
To set up Case Quantity on the FBA Inbound Shipment level:
To set up a default Case Quantity on the product level:
Case Quantity Per Shipment
You can enable Case Quantity for a New FBA Inbound Shipment while creating it or for any already existing shipment that hasn’t been processed by Amazon yet.
Enable During Creation
To enable Case Quantity on the FBA Inbound Shipment Wizard’s Products Tab while creating a new shipment:
- In the FBA Inbound Shipment wizard, go to the Products tab.
- Click the Enable Case Qty icon at the top right of the Products panel.

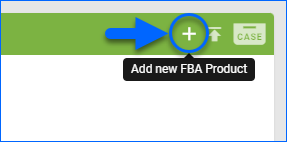
- Click the Add new FBA Product icon.
- Search for products, and when you find the ones you want to add, check the boxes to their left to select them.
- The Qty Per Case gets set to the default Case Quantity set on the product level, as described in the following section of this article. You can update it as you wish and enter a different Qty Per Case if needed.
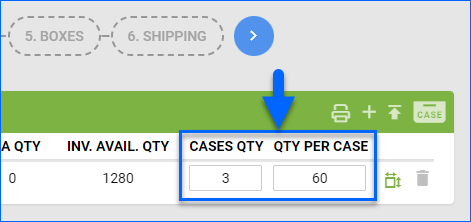
- Enter the Cases Qty. For example, if your Qty Per Case is 60, and you set the Cases Qty to 3, you will add a total of 180 units to the shipment.
- Click Add & Close to add the selected products and continue, or Add Selected to keep adding more products to the shipment.

Alternatively, you can add products first and enable the Case Quantity after:
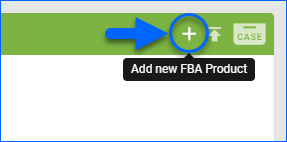
- On the FBA Inbound Shipment wizard’s Products tab, click the Add new FBA Product icon.
- Search for products, and when you find the ones you want to add, check the boxes to their left to select them.
- Enter the Qty To Ship.
- Click Add & Close to add the selected products and continue, or Add Selected to keep adding more products to the shipment.

- Click the Enable Case Qty icon at the top right of the Products panel.

- If you have configured the default Case Quantity per product and enable Case Quantity for a shipment, the product’s Cases Qty and Qty Per Case will automatically be set up accordingly. However, you can still update both fields and set a different Qty Per Case.
Enable After Creation
To enable Case Quantity for an existing shipment:
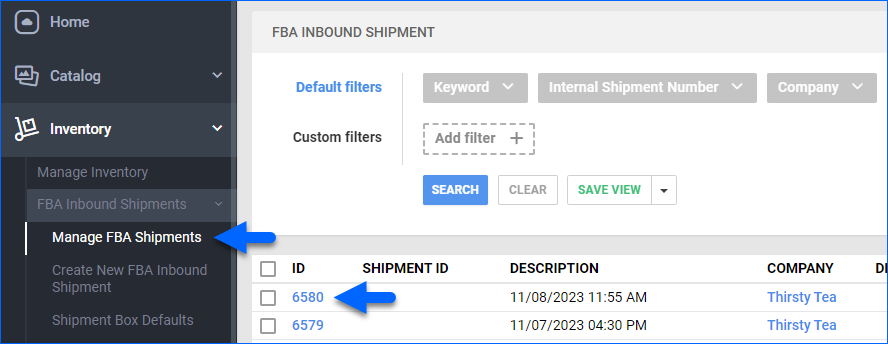
- Go to Inventory > FBA Inbound Shipments > Manage FBA Shipments.
- Click a shipment’s ID to open it.
- Click Actions and select Enable Case Qty.
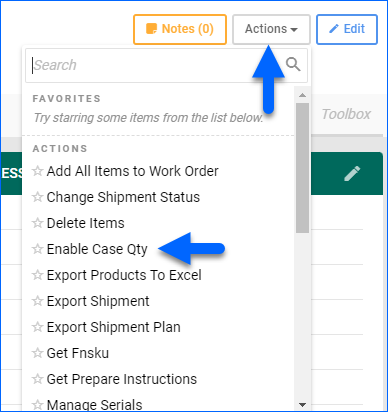
- This converts the Qty To Ship column in the Products Panel to two new columns: Case Qty and Qty Per Case. Make sure to refresh the page to see and edit them.
- As an example, if your Qty Per Case is 60, and you set the Cases Qty to 3, you will add a total of 180 units to the shipment.
- If you have configured the default Case Quantity per product, when you enable Case Quantity for a shipment, the product’s Cases Qty and Qty Per Case will automatically be set up accordingly. However, you can still update both fields and set a different Qty Per Case.
Case Quantity Per Product
You can specify each product’s default Quantity Per Case, Case Weight, and Case Dimensions. You can do this manually for one product at a time or for multiple products in bulk.
These properties can be presented in imperial or metric units of measurement. You can set the default for all Sellercloud Companies with a Client Setting called Default Unit of Measure. In addition, you can select a measurement unit per company from the main Company Settings page’s Unit Of Measure setting.
Manually
To set a default Case Quantity and related properties at the product level for a single product:
- Go to the Product Details Page.
- Click Toolbox and select Purchasing.
- Click Edit.
- In the Inventory panel, click the Case Information dropdown.
- Enter the Qty Per Case, Case Weight, and Case Dimensions.
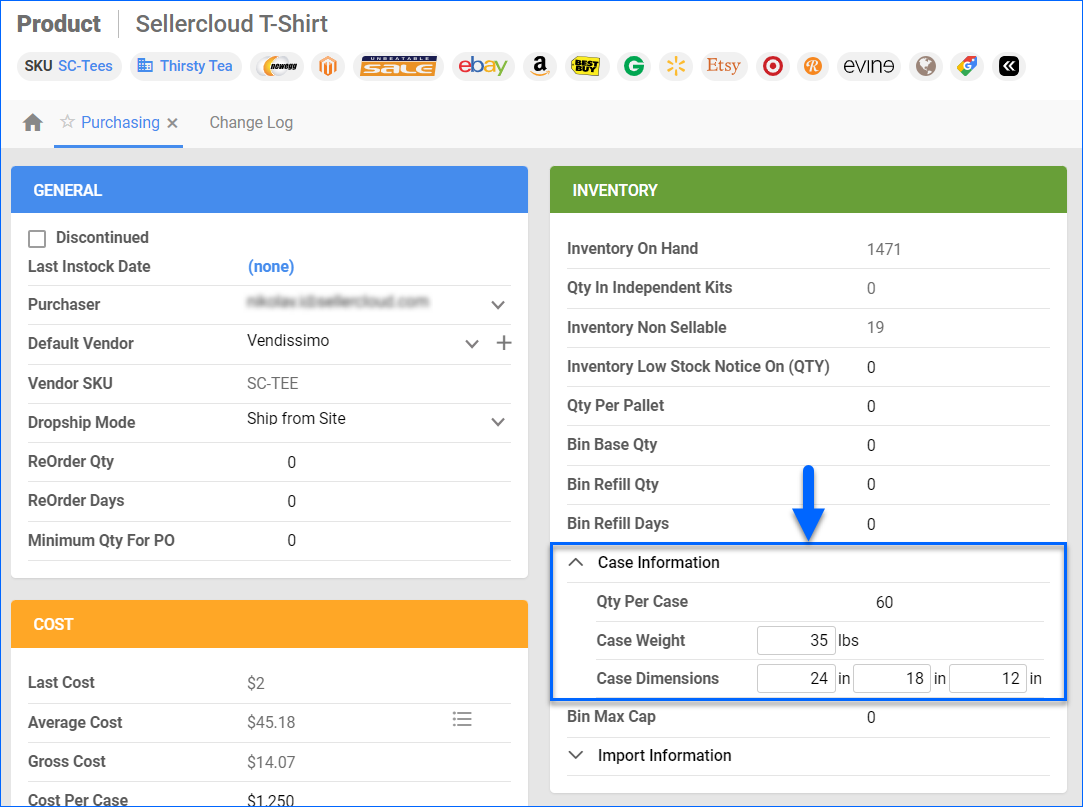
- Click Save.
In Bulk
To set a default Case Quantity and related properties at the product level for multiple products:
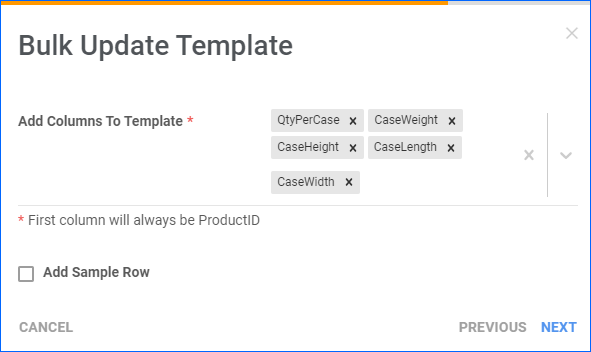
- Follow the steps to Bulk Update Products.
- Add the following column headers to your template:
Overview
FBA inbound shipments are often split and directed to multiple Amazon fulfillment centers unless you have signed up for Amazon’s Inventory Placement Service, a per-unit-fee service. Amazon may even split units of the same SKU into different shipments – if you create a shipment with 100 units of a SKU, Amazon may send 50 to one center and 50 to another.
However, if you create a shipment with the Case Quantity Mode enabled, Amazon will not split it. Let’s say you create a shipment with 100 units of a SKU:
- If the Case Quantity is 100, Amazon will direct all 100 units to the same fulfillment center.
- If the Case Quantity is 25, Amazon may direct the shipment to 4 different fulfillment centers.
Products in cases are multiples of the same item, typically packaged by the manufacturer, with each case having the same quantity. See Case Quantity to learn how it works with Purchase Orders.
In Sellercloud, you can enable the Case Quantity feature per FBA Inbound Shipment. You can also set up default case quantities on the product level. See the following sections or the videos below for step-by-step guides to each option.
Set Case Quantity Per Shipment
You can enable Case Quantity for a New FBA Inbound Shipment while creating it or for any already existing shipment that hasn’t been processed by Amazon yet.
- Create the FBA inbound shipment and add the items.
- Click the Action Menu > Enable Case Qty > Go.

- Click the Action Menu > Edit > Go.
- In the shipment’s Qty/Case field shown below, enter the quantity of items within a case; that’s 25 in the example below. This is a factor of the Qty to Ship. That is, the quantity of units you are shipping (100 in the example below) is divisible by the Qty/Case (25): There will be 4 cases shipping to up to 4 separate fulfillment centers.

- When done, click Save Shipment.
Case Quantity Per Product
You can specify each product’s default Quantity Per Case, Case Weight, and Case Dimensions. You can do this manually for one product at a time or for multiple products in bulk.
These properties can be presented in imperial or metric units of measurement. You can set the default for all Sellercloud Companies with a Client Setting called Default Unit of Measure. In addition, you can select a measurement unit per company from the main Company Settings page’s Unit Of Measure setting.
Manually
To set a default Case Quantity and related properties at the product level for a single product:
- Go to the Product Details Page.
- Click Toolbox and select Purchasing.
- Enter the Qty Per Case, Case Weight, and Case Dimensions.
- Click Save.
In Bulk
To set a default Case Quantity and related properties at the product level for multiple products:
- Follow the steps to Bulk Update Products.
- Add the following column headers to your template:
- QtyPerCase – The number of product units in a case.
- CaseWeight – The weight of a case.
- CaseHeight – The height of a case.
- CaseLength – The length of a case.
- CaseWidth – The width of a case.
