Overview
In Sellercloud, you can easily generate and send Return Shipping Labels to your customers, simplifying the often complicated RMA process for returning purchased items. These labels typically contain all the required information for the return, including addresses, tracking numbers, and sometimes instructions for returning the item.
Prerequisites
To get started, you must:
- Configure your Shipping API Credentials
- Set up your Return Address
Manage Return Labels
In Sellercloud, you can manage your labels in various ways. Learn more about that below.
Generate RMA Labels
To generate a Return Label:
- Navigate to Orders > Manage RMA > Open an RMA.
- Click Toolbox > Shipping Labels.
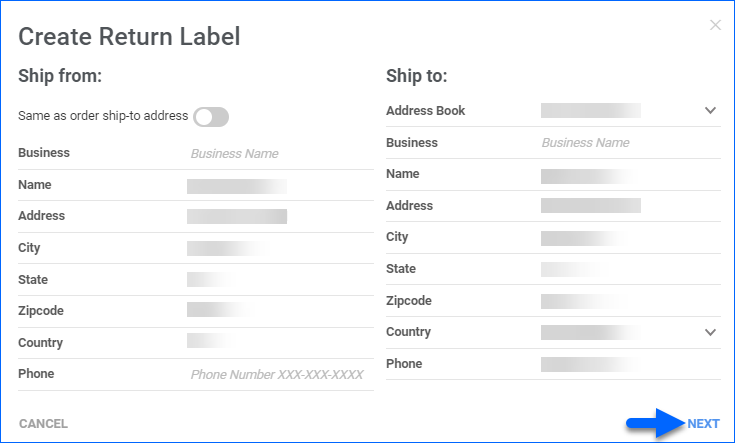
- Click on the + button to Create a Return Label.

- Enter Ship from and Ship to details.
- Click Next.
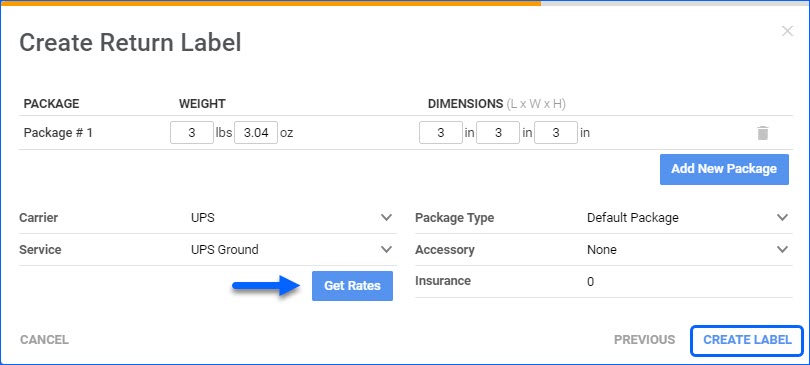
- Enter Weight and Dimension details. Optionally, you can Add New Package.
- Click on Get Rates to select a Service.
- Click Create Label.
If the RMA has a value filled in Order Source RMA# it will be added to RMA labels printed from UPS, FedEx, and USPS.
Email RMA Labels
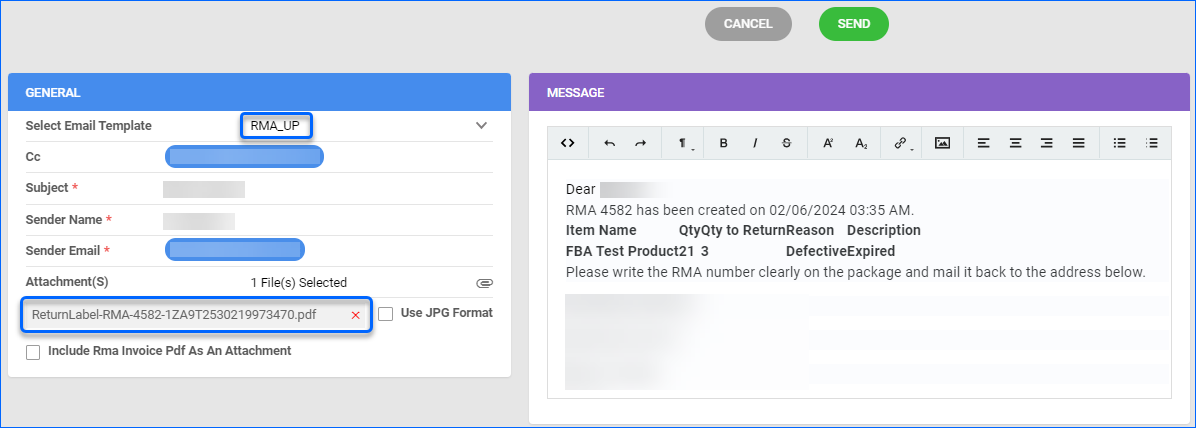
Once you generate the RMA label, you can email it directly to the customer or download it to your local device as a PDF file.
To send an email with the RMA label from Sellercloud:
- Open the RMA > Toolbox > Shipping Labels.
- Select the label/s you want to email to the customer.
- Click on the Mail icon which will automatically attach the PDF label file.

- You will be redirected to a new page where you can compose and send your email.
Void RMA Labels
If you want to cancel your shipment’s return or have created the RMA label by mistake, you can Void it.
To void a label:
- Go to Orders > Manage RMAs > Open an RMA.
- Action Menu > Manage Return Shipping Labels.
- Select your label > Click on the Void Return Label icon in the grid.
- The status of the label will change to Void.

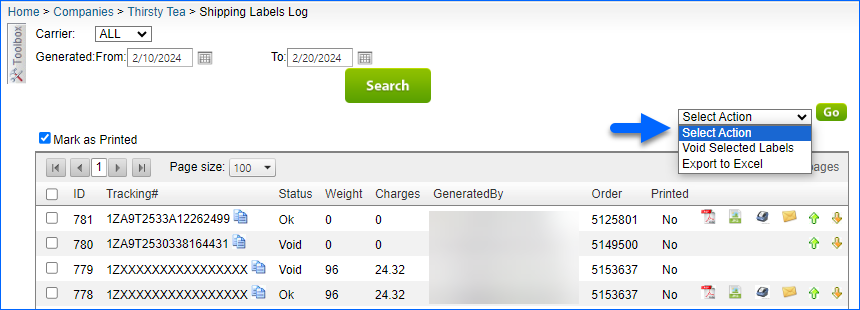
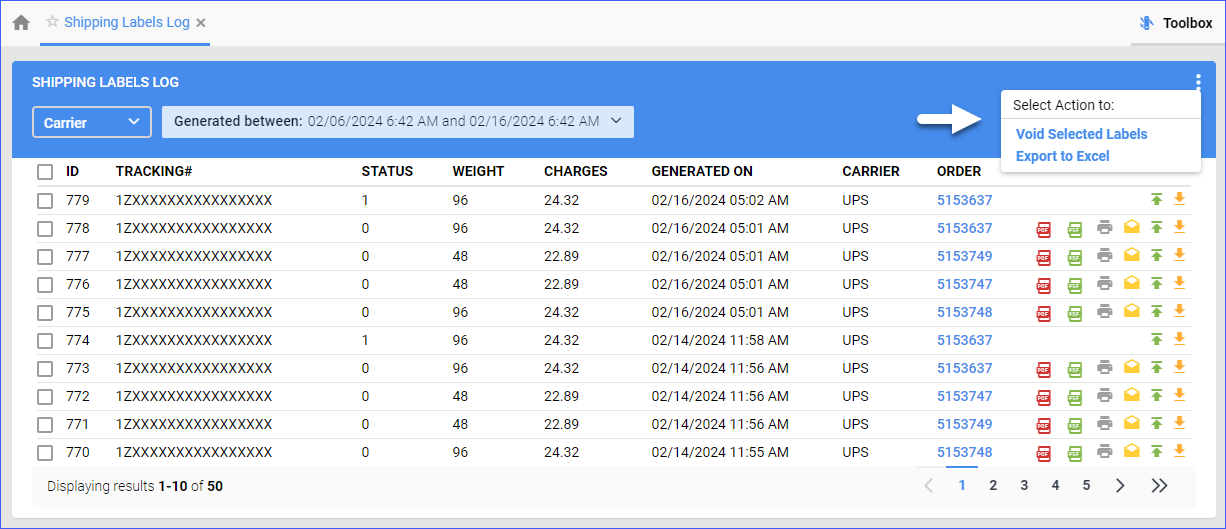
Shipping Labels Log
You can track all generated return labels by navigating to your company’s Shipping Labels Log.
- Go to Company Settings.
- Click Toolbox and select Shipping Label Logs.
- From this page, you can Void and Export selected labels.
Overview
In Sellercloud, you can easily generate and send Return Shipping Labels to your customers, simplifying the often complicated RMA process for returning purchased items. These labels typically contain all the required information for the return, including addresses, tracking numbers, and sometimes instructions for returning the item.
Prerequisites
To get started, you must:
- Configure your Shipping API Credentials
- Set up your Return Address
Manage Return Labels
In Sellercloud, you can manage your labels in various ways. Learn more about that below.
Generate RMA Labels
To generate a Return Label:
- Navigate to Orders > Manage RMA > Open an RMA.
- Click Action Menu > Manage Return Shipping Labels.
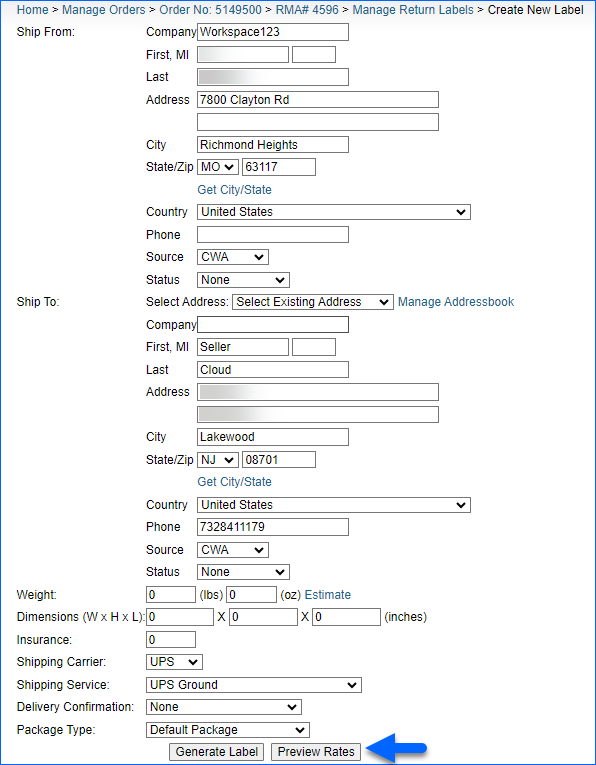
- Click Create New Label.

- Enter Ship from, Ship to Weight, and Dimension details.
- Click on Preview Rates to select Service.
- Click Generate Label.
Email RMA Labels
Once you generate the RMA label, you can email it directly to the customer or download it to your local device as a PDF file.
To send an email with the RMA label from Sellercloud:
- Open the RMA > Action Menu > Manage Return Shipping Labels.
- Click on the Mail icon in the grid, which will automatically attach the PDF label file.

- You will be redirected to a new page where you can compose and send your email.
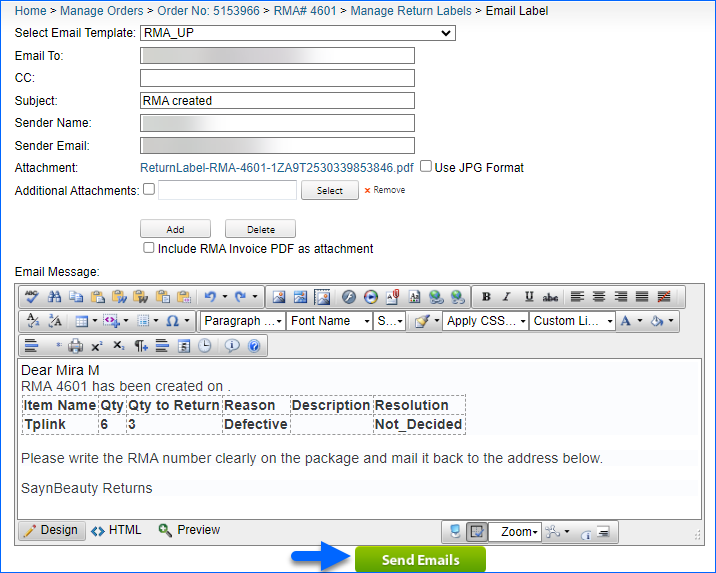
The email body and SMTP profile will default to ones assigned to the RMA Created trigger on the Email Template Assignment page. Valid SMTP credentials are required. You can select different templates from the dropdown menu based on your needs.
Void RMA Labels
If you want to cancel your shipment’s return or have created the RMA label by mistake, you can Void it.
To void a label:
- Open an RMA > Action Menu > Manage Return Shipping Labels.
- Select your label > Action Menu > Void Label > Go.
- The status of the label will change to Void.
- You will be redirected to a new page where you can compose and send your email.
Shipping Labels Log
You can track all generated return labels by navigating to your company’s Shipping Labels Log.
- Go to Company Settings.
- Click Toolbox and select Shipping API > Shipping Label Logs.
- From this page, you can Void and Export selected labels.