Overview
The Wish Account Integration lets you seamlessly manage your Wish orders directly from the Sellercloud interface. It allows you to download orders, update their fulfillment status, map shipping methods to specific carriers and services, issue refunds, and more.
To explore other related topics, refer to our Wish Category.
Download Orders and Upload Tracking
You can download orders from Wish automatically or manually.
Automatically
To enable automatic order synchronization between Wish and Sellercloud:
- Go to Company Settings.
- Click Toolbox and select Channels > Wish > General Settings.
- Click Edit.
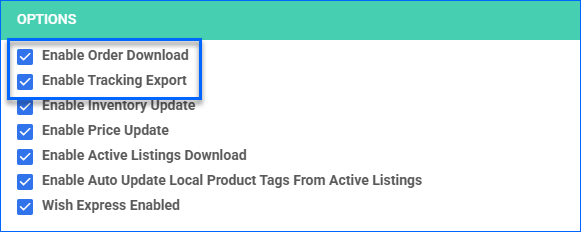
- In the Options panel, enable these options:
- Enable Order Download – Download Wish orders to Sellercloud automatically. Orders are downloaded approximately every 30 minutes.
- Enable Tracking Upload – Upload tracking information and ship dates to Wish automatically to update the order status there.
- Click Save.
Manually
You can manually Download Orders from Wish based on your preferred date range, Import Order Information From a File, or simply use the built-in action:
- Go to Company Settings.
- Click Toolbox and select Channels > Wish > General Settings.
- Click Actions and select Download Orders.
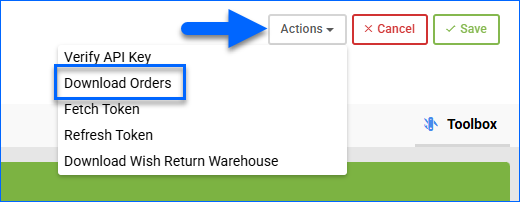
- A Queued Job is created, and once completed, your order download will be ready. Click the Notification to go to the Queued Job page.
Manage Wish Orders
Cancel an Order
You can only cancel an order before it is marked Ship Confirmed. If it is already Ship Confirmed, you must issue a refund. If the item is being returned to your warehouse, use the RMA workflow instead.
To cancel a Wish order only in Sellercloud:
- Go to the Order Details page.
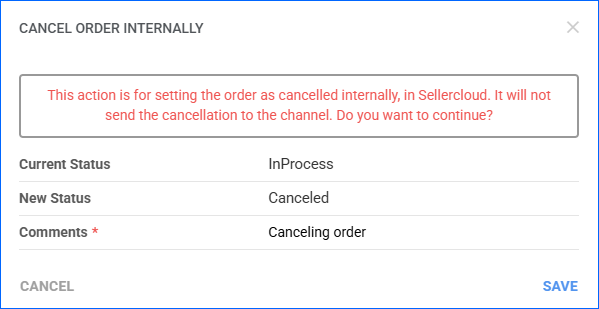
- Click Actions and select Set Cancelled Internally.

- Enter cancellation Comments and click Save.
Refund an Order
You can submit refunds to Wish or issue them locally in Sellercloud to keep the Order Profit & Loss information correct.
To refund a Wish order:
- Go to the Order Details page.
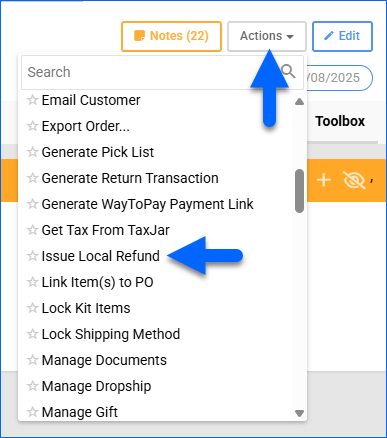
- Click Actions and select Issue Refund.
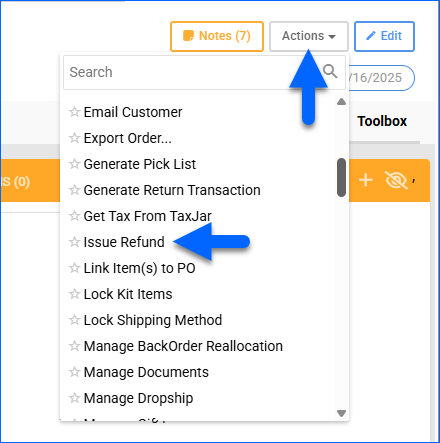
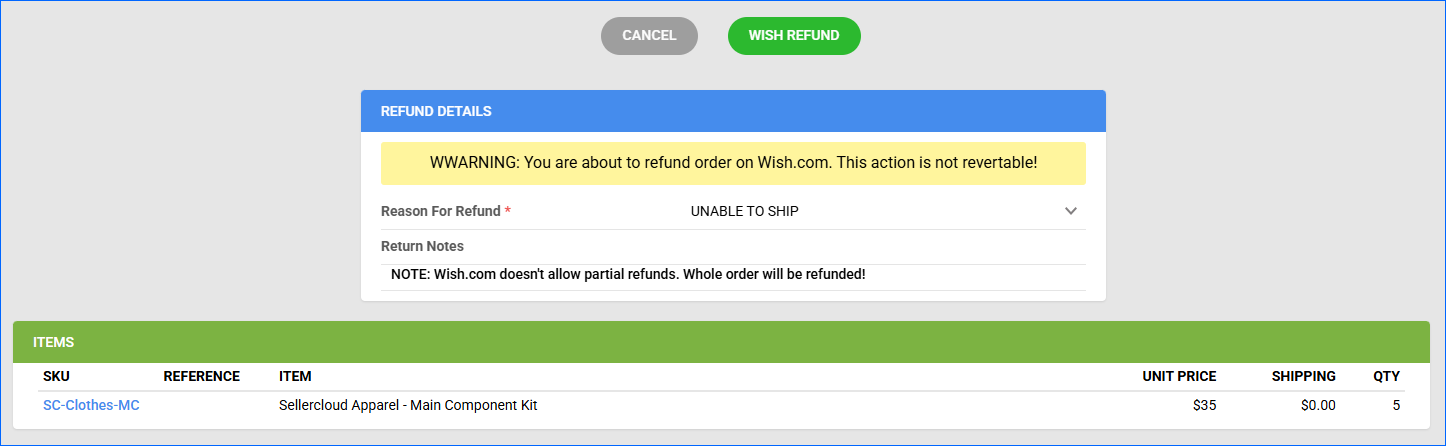
- Enter the Reason for Refund.
- Optionally, you can enter Return Notes.
- Click Wish Refund. Sellercloud will submit the refund information to Wish and adjust the payment status of the order. After the refund has been processed, Wish will issue the refund.
To refund an order only in Sellercloud:
- Go to the Order Details page.
- Click Actions and select Issue Local Refund.
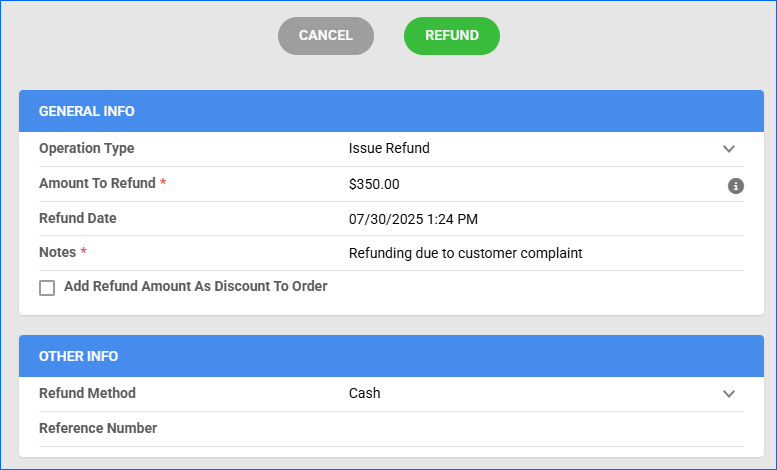
- In the General Info panel:
- Enter the Amount to Refund and Notes.
- Optionally, you can adjust the Refund Date and select the Add Refund Amount As Discount To Order checkbox to apply the refund amount as a discount to the order instead. This action will initiate an internal cash refund that will not be sent to the channel and will offset the outstanding dues by the specified amount.
- In the Other Info panel, optionally, you can select the Refund Method and Reference Number.
- Click Refund.
Wish Shipping Method Mapping
Shipping Method Mapping allows you to customize shipping for each channel integrated with your account. Using this feature, you can map the shipping methods sent for each Wish order to a preferred shipping carrier and service.
To ensure the correct shipping method is applied to each order, enter the shipping code for each respective shipping service. When orders are imported into Sellercloud, the shipping method chosen by the customer will also be imported.
To set up shipping method mapping for Wish:
- Go to Company Settings.
- Click Toolbox and select Channels > Wish > Shipping Method Mapping.
- Click Edit.
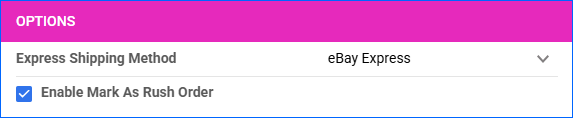
- In the Options panel:
- Express Shipping Method – Assign a preferred shipping method to use for Wish Express
- (Optional) Enable Mark as Rush Order – Mark Wish Express orders as Rush Orders.
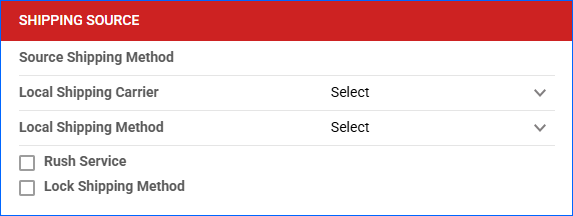
- In the Shipping Source panel:
- Source Shipping Method – Enter the shipping method name coming from Wish. This name represents the method as passed from Wish orders to Sellercloud.
- Local Shipping Carrier – Choose the shipping carrier that Sellercloud should use when orders using the Localized Currency come in with the specified Source Shipping Method.
- Local Shipping Method – Select the specific service from the chosen Local Shipping Carrier that will fulfill the order.
- (Optional) Rush Service – Indicate if the selected method is intended for Rush Orders.
- (Optional) Lock the shipping method. This will prevent your employees or any Sellercloud services from changing it.
- In the Shipping Mapping panel:
- For each Source Method Name, select a Shipping Method. These mappings are for standard (non-localized, non-Express orders).
- (Optional) Indicate if the selected method is intended for Rush Orders.
- (Optional) Lock the shipping method. This will prevent your employees or any Sellercloud services from changing it.

- Click Save.
Wish Shipping Templates
With Wish shipping templates, you can define which countries (and optionally which states or regions within them) are eligible for shipping, what the shipping charges will be, and whether to enable Wish Express. These templates support both fixed and product-level pricing logic.
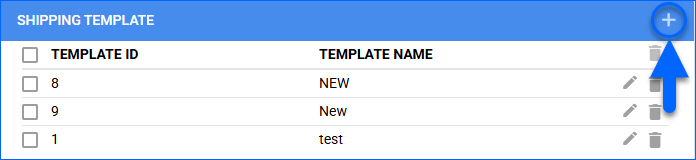
- Go to Company Settings.
- Click Toolbox and select Channels > Wish > Shipping Templates.
- Click the Add New Template button.
- For each Country Code, indicating the destination country to which the shipping rule applies, specify the following:
- Shipping Price – A flat shipping cost (in USD) to charge for this country unless product-specific shipping overrides it. If the Use Product Shipping box is checked, this value is ignored.
- Shipping Enabled – Enable shipping for the selected country.
- Use Product Shipping – Checked this box for the Shipping Price from the Wish Product Properties page to override the value in the Shipping Price column here.
- Wish Express Enabled – Check to enable Wish Express for this country.
- Use Shipping Region – Restrict the shipping rule to specific states or regions within the selected country. For example, “CA” restricts shipping to California within the United States.
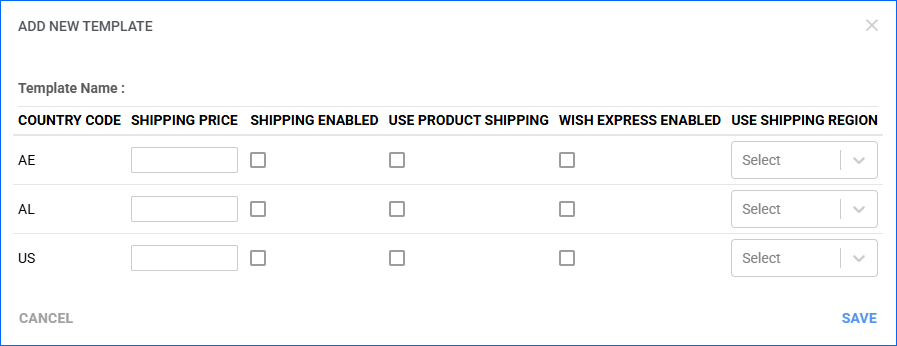
- Click Save.
Configure PDF Invoices
PDF Invoices consist of information about your orders and the products they include. You can print invoices with any specific requirements if needed. You can also choose between Standard Invoice, Channel Specific, Word to PDF, or a plugin.
- Go to Company Settings.
- Click Toolbox and select Invoice Settings.
- Click Per Channel Preferences.
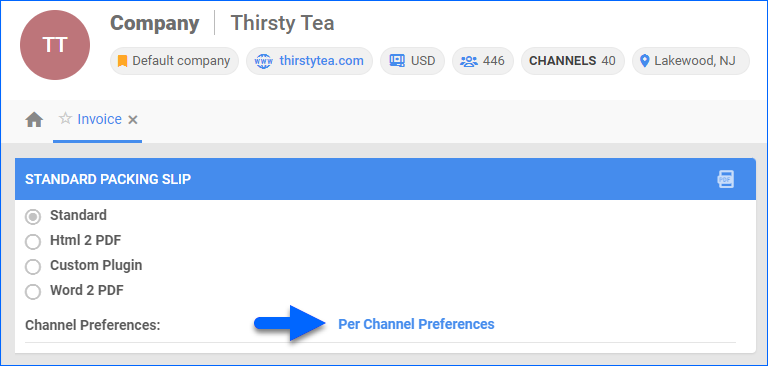
- Locate Wish in the list and select your preference.
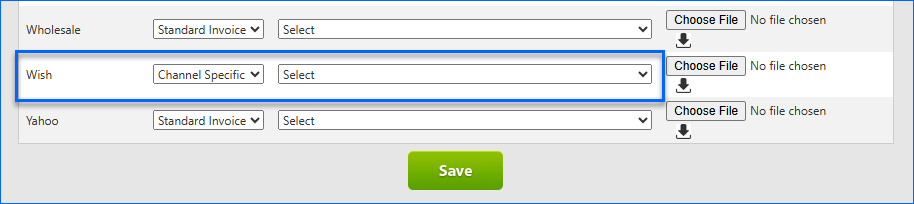
- Click Save.