Overview
Shipbridge offers a user-friendly installation manager and configuration wizard specifically designed to help you during the setup process. The Configuration Wizard lets you select default carriers, shipping services, invoice types, and printer settings.
Furthermore, you have the option to review and test any changes before applying them to your station. You can always adjust your choices or configure advanced Options later on.
Shipbridge Configuration Wizard
The Configuration Wizard runs as a part of the standard installation process. However, you can use it anytime you need to edit the options set up during the initial installation.
To launch the Configuration Wizard:
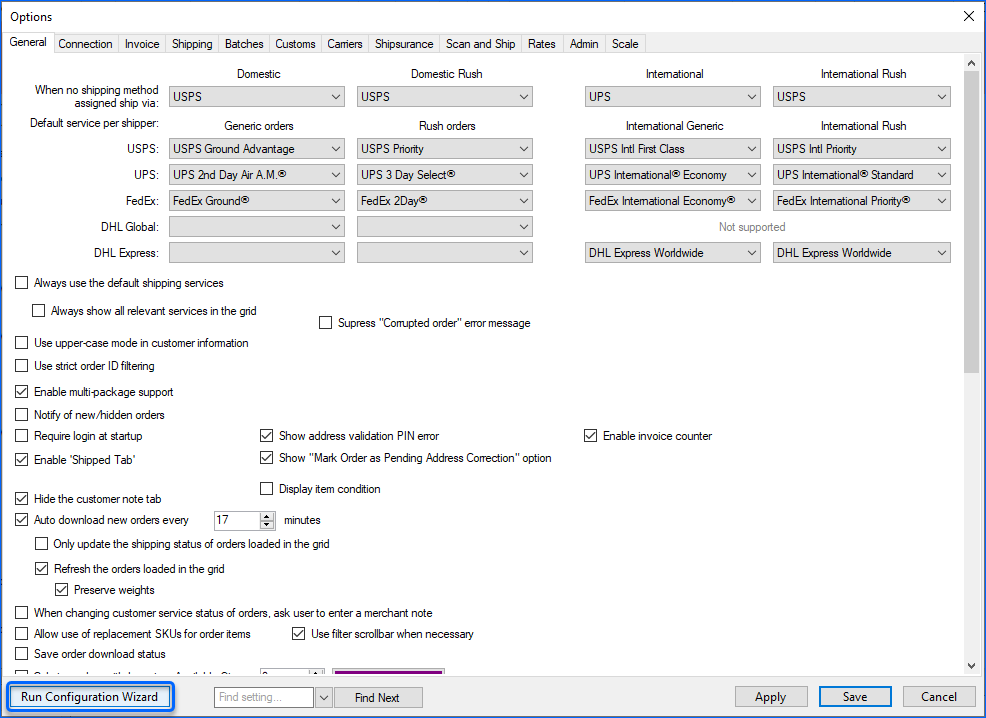
- Click Menu > Select Options.
- Click on Run Configuration Wizard at the bottom of the window.
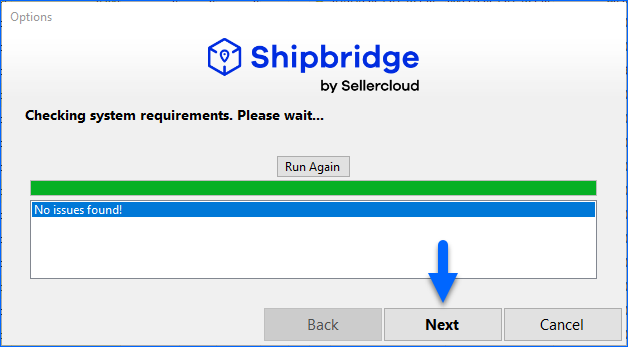
- Shipbridge will check if you meet the minimum system requirements. Read more about system requirements in our Install Shipbridge article.
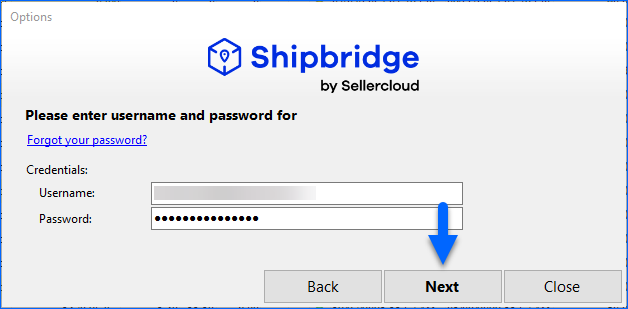
- Click Next and enter your credentials.
- Team Name
- Username and Password
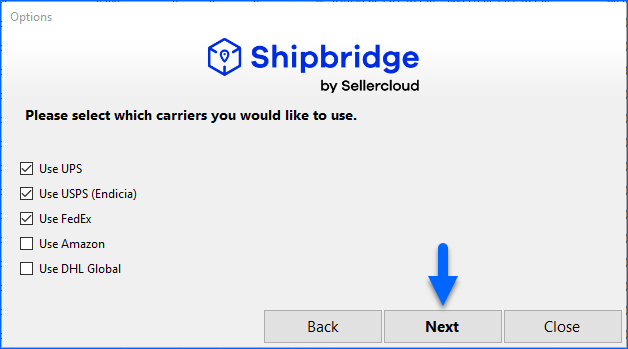
- Click Next to select which carriers you would like to use.
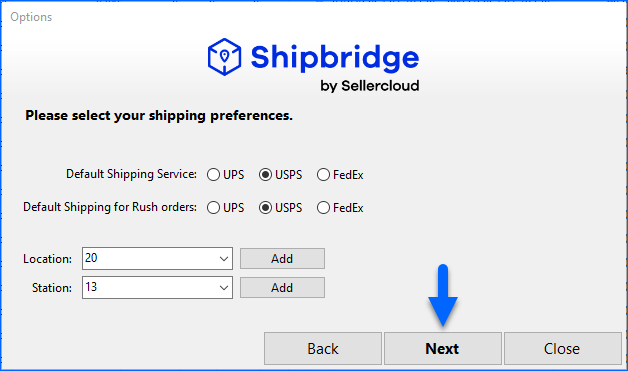
- Click Next and select your default Shipping Preferences.
- Default shipping service for non-rush and Rush Orders.
- Locations and Stations
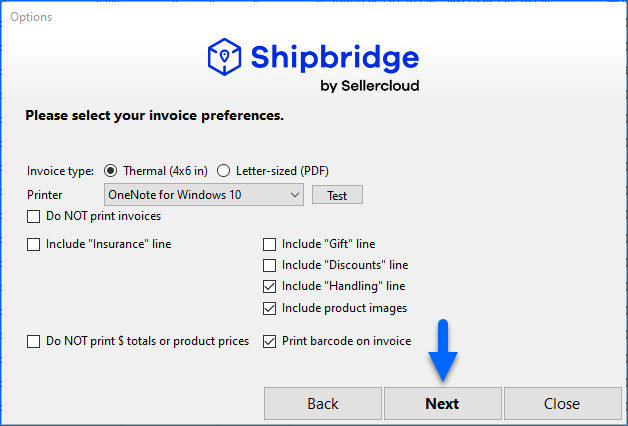
- Click Next and set up your Invoice Preferences.
-
- Invoice Type
- Printer
After changing the invoice type, you need to select the correct printer. You have the option to print a test page.
-
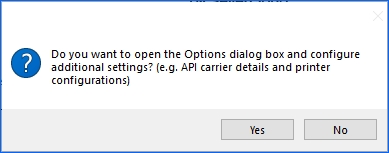
- Click Next and enter the credentials for your chosen carriers.
- Click Next to proceed.
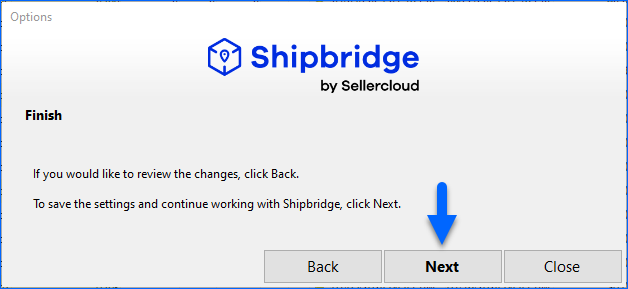
- A pop-up window will appear asking if you’d like to open the Options panel to configure additional settings. This is useful if you want to set up options beyond those included in the configuration wizard.
- Click Yes/No according to your needs and finalize the setup.
Settings Folder
All the options you set during or after installation are stored in the Settings.xml file. You can find this file by navigating to Help > Open ShipBridge Settings Folder.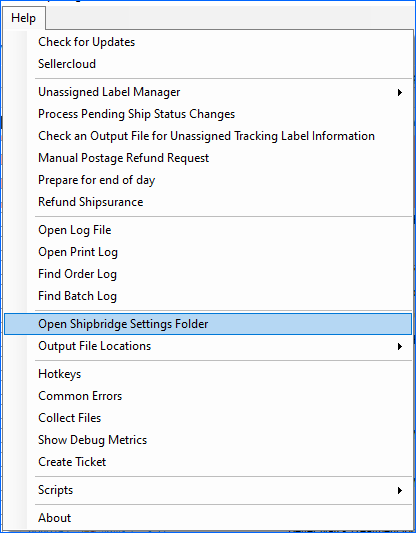
Once you configure Shipbridge, you can access the designated folder to copy the settings file and then upload it to every computer that requires the same configuration. This way you can run the same setup on different Shipbridge stations.
Similar to the Backup/Restore process, this approach allows you to speed up the initial configuration process for multiple computers.