Overview
This article provides detailed information on the various Shipbridge interface panels and how to navigate them. See our Customize Shipbridge Interface article for detailed information on how to personalize the application according to your business needs.
Navigate Shipbridge
Organized by functionality, the Shipbridge interface can be divided into five panels.
- Settings
- Filters
- Order Grid
- Address
- Log
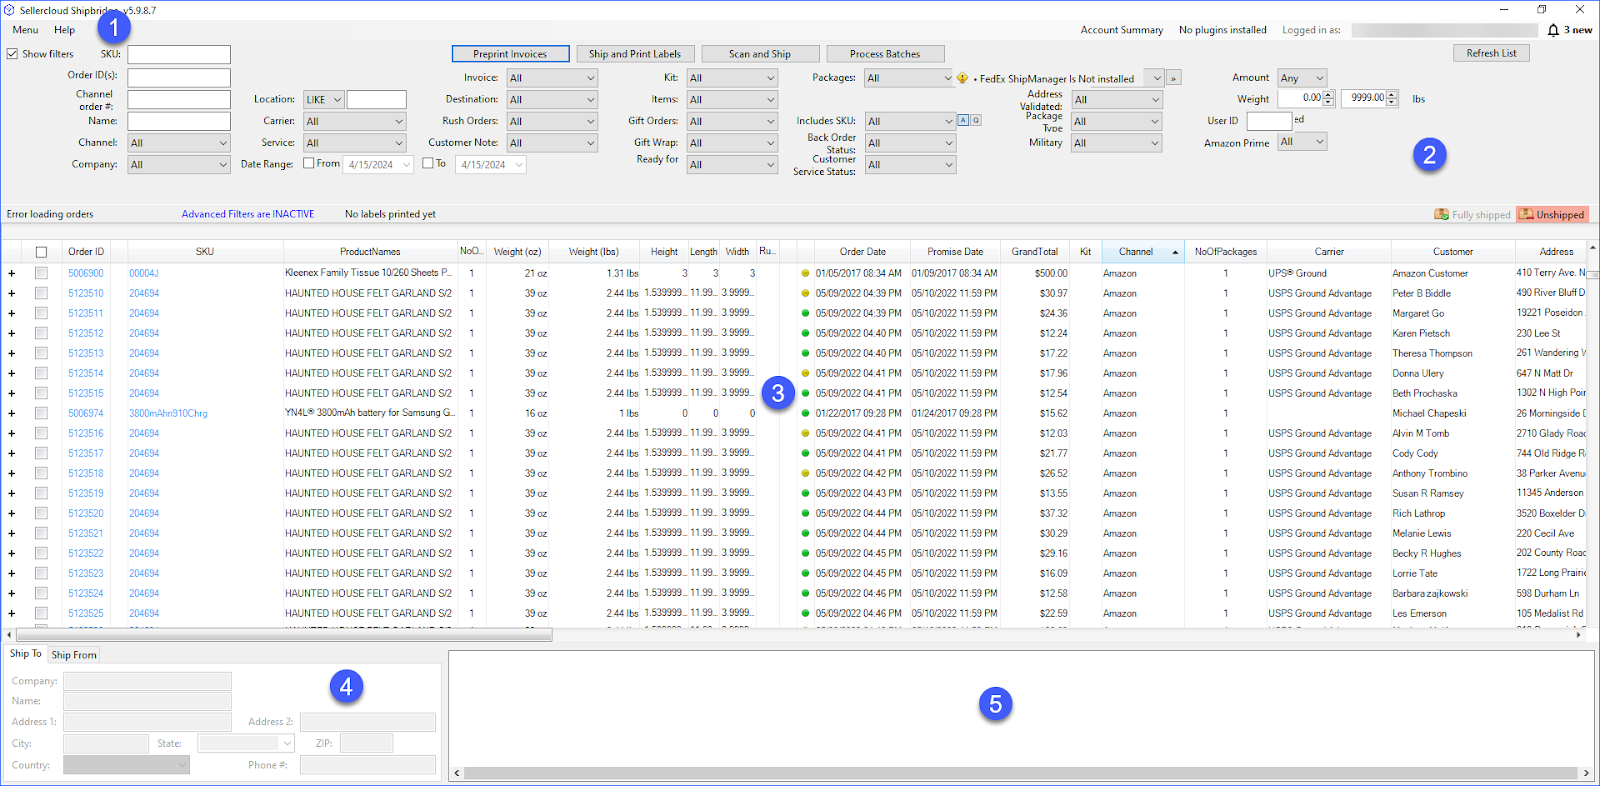
Settings Panel
At the top of the application window, you will find the Settings panel.
This area includes the Menu and Help drop-downs, a list of Installed Plugins, and Login Information. To manage your Shipping Carriers, go to Menu > select Options, and click on Carriers.

Additional options available in the Settings Panel are:
- Show Filters – This will display the Filter Panel described in the next section.
- SKU – Enter SKU to find associated orders.
- Reprint Invoices – This option will reprint the invoice and mark it as reprinted. You need to select an order from the grid beforehand.
- Ship and print labels – This option will open a window to Ship a selected order and print a label.
- Scan and Ship – Select an order and click on Scan and Ship to process your order further.
- Process Batches – Select orders from the grid and click on this option to process shipping methods in batches.
- Refresh List – Refresh the Order list in the grid.
Click on the bell icon in the upper-right corner to expand the Announcements window, where you will see various notifications regarding your Shipbridge installation. 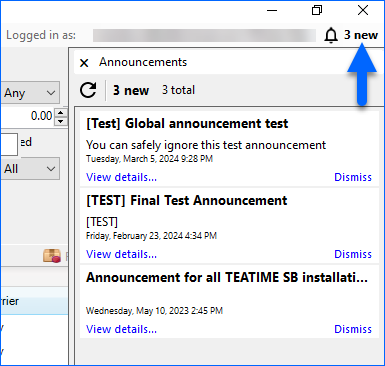
Filter Panel
The Filter panel has various options that can be used to narrow down order searches. These include common filters like SKU, Order ID, Customer name, Channel, and Company. 
To select which filters to display in the filter area, go to Menu > Select Customize Interface and click on Filters. Select the fields you want and click OK. By default, all boxes are enabled. Read more about Filter options in our Customize Shipbridge Interface article.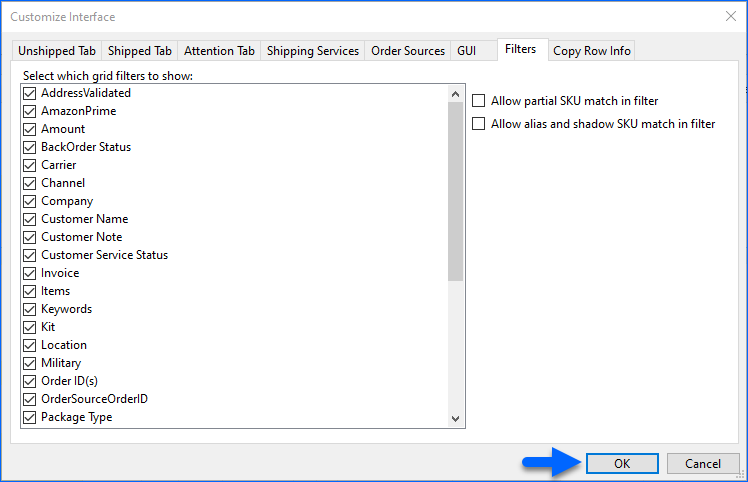
Order Grid Panel
The Order Grid panel shows Shipped, Unshipped, and Requires Attention orders. Each tab shows Order information, separated by columns. Slide the horizontal bar to see all the columns. To rearrange the columns’ order, simply drag and drop them according to your preference. The Order ID column remains fixed on the left. 
To display or hide certain Orders’ columns:
Click on Menu > Customize Interface > Select or unselect columns from each tab and click OK. You can use the Move Up and Move Down buttons to move the position of the column on the row. 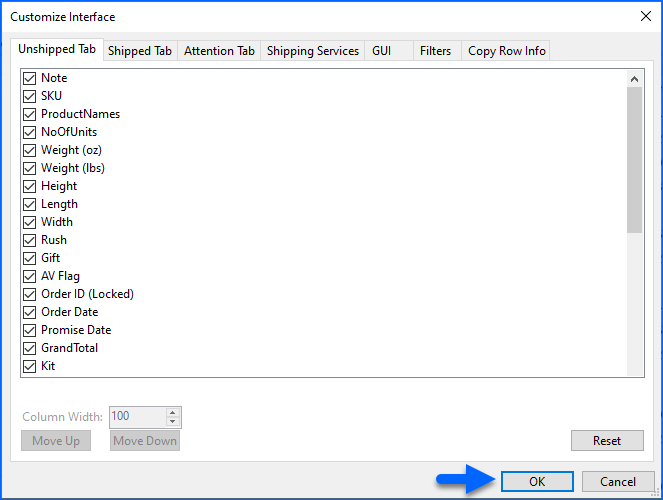
You have the flexibility to highlight orders with items running low on stock. To do so, enable the Colorize orders with Inventory Available Qty setting in the General Settings tab. Then, specify the desired quantity threshold and pick a color to highlight these orders with. 
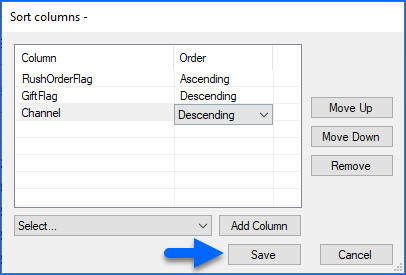
To sort the information in each tab to display in descending or ascending order:
- Open the Menu and click on Select Grid Column Sort.
- Choose the tab from the side menu where you want to sort columns. (Requires Attention, Shipped or Unshipped).
- Pick the columns you want to sort from the dropdown list and add them to your sorting list.
- Decide if you want to sort them in ascending (from A-Z or smallest to largest) or descending (from Z-A or largest to smallest) order.
- Click Save.
If you have Multi-Package Orders, the number of packages will display on the left of your Order checkbox in the grid. Click on it to expand package information.
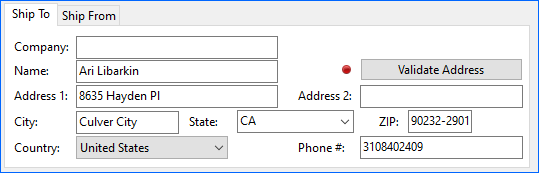
Address panel
The Address panel shows the Ship To and Ship From addresses.
The Ship To panel displays the customer’s address and contains the Validate Address button. On the other hand, the Ship From address is used for Shipping Cost Calculations. The label’s Ship From address is pulled from the Company Address by default, however, you can set a different address, depending on the channel where the order was placed. Read our Channel Company Profile guide for relevant information.
Log and Notifications Panel
At the bottom of the right corner, you can see both the Log and Notifications panels. The Log area shows important information about order changes or error messages. If you double-click on the error message, the Error Log file will show on your screen.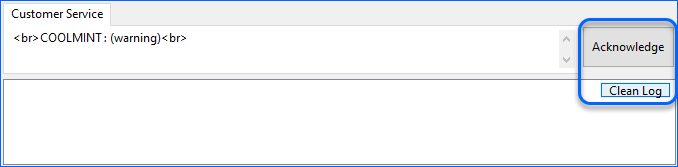
The Notifications area shows any type of order-related notifications, such as Customer Service notes or Gift Wrap notes. Click on the Acknowledge button to switch the note icon status in the Order Grid. 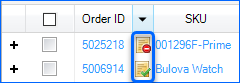
ShipBridge Hot Keys
ShipBridge hotkeys can be used to easily perform the following actions:
- Ctrl+O – Opens the Shipbridge Options window.
- Ctrl+I – Opens Customize Interface window.
- Ctrl+P – Opens the Postage Log.
For the below-mentioned shortcuts, you need to select an order beforehand.
- F6 – Opens the Rate Calculator and shows shipping rates.
- F7– Opens Scan and Ship.
- F10 – Opens Ship and Print labels.
- F11 – Opens the invoice PDF file and marks it as reprinted.
- F12 – Read weight from scale.
Navigate to Help > Hotkeys for all available Shipbridge shortcuts.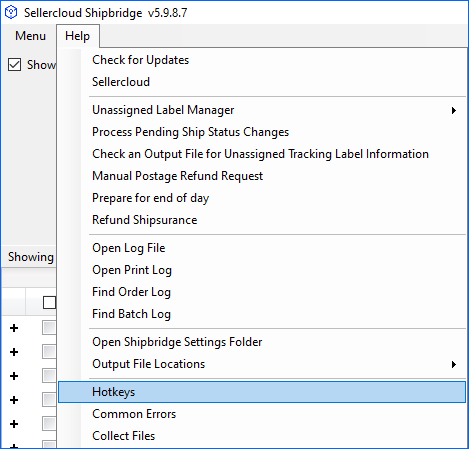
Refresh Cache Option
If you encounter any issues with the Shipbridge Interface, for example, if recent changes aren’t reflecting properly, clearing the cache might resolve the issue. Refreshing the cache could also speed up the functionality of your Shipbridge application, though it might take a bit longer for the application to start.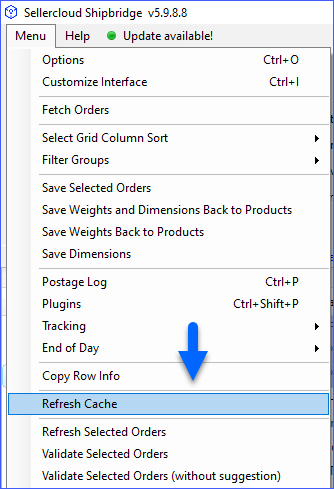
Make sure to Update your Shipbridge station to the latest version available. Navigate to the Release History page to see all available versions and specific updates.