Overview
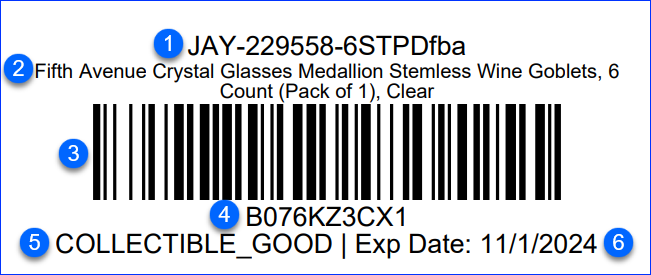
FBA product labels are 3×1-inch labels applied to products in the FBA program that help Amazon identify and track inventory. These labels display essential product details, ensuring accurate storage and order fulfillment.
Sellercloud enables you to generate and print FBA labels that comply with Amazon’s requirements for each unit in your FBA Inbound Shipments. Typically, these labels are printed one per page using a thermal printer or 30 per page on an Avery-style sheet.
FBA Label Features
FBA product labels may include the following features:
- Product ID (Sellercloud SKU)
- Amazon Title – Up to 45 characters by default; up to 120 with the 30 Labels Per Page plugin.
If there’s no Amazon Title, the Product Name will be printed. - Barcode (of the FNSKU)
- FNSKU (when Amazon disallows using the item’s original barcode)
- Condition (on the Amazon Properties page, not the Product Condition on the Product Details Page)
- Expiration Date
- Number of Units – Only visible in Label Formats CaseLabelA, CaseLabelB, and CaseLabelD.
FBA Label Formats
To change the format of your FBA product labels:
- Go to the product’s Amazon Properties page.
- Make sure that the product is set to Fulfilled by Amazon.
- In the FBA panel of the Amazon Properties page, choose Amazon Label Format from the dropdown list and select from the following options:
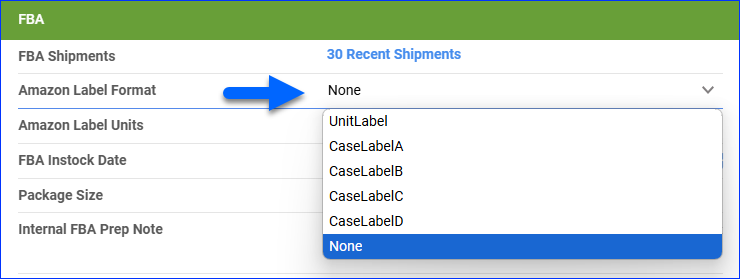
- UnitLabel or None – The default FBA product label. Includes the SKU, Amazon Title or Product Name, Barcode, FNSKU, Condition, and Expiration Date.

- CaseLabelA – Includes the SKU, Amazon Title or Product Name, Number of Units, Condition, and Expiration Date.
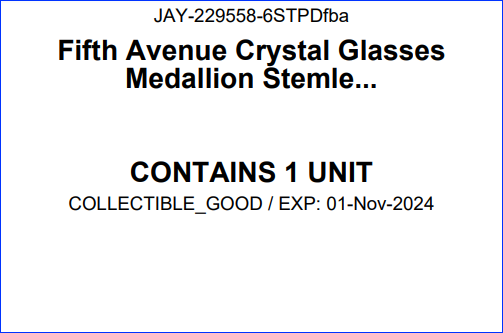
- CaseLabelB – Includes the SKU, Amazon Title or Product Name, Barcode, FNSKU, Number of Units, Condition, and Expiration Date.
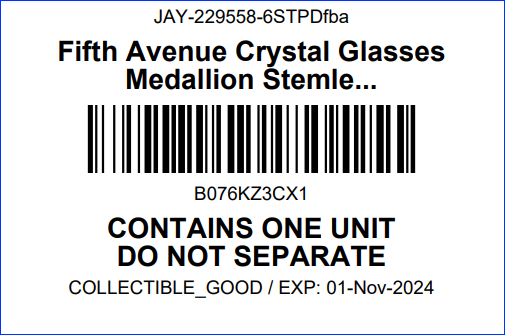
- CaseLabelC – Includes the SKU, Amazon Title or Product Name, Barcode, FNSKU, Condition, and Expiration Date.
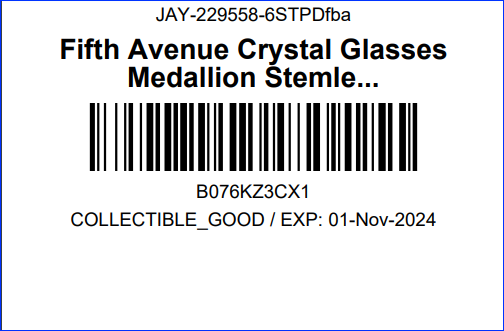
- CaseLabelD – Includes the SKU, Amazon Title or Product Name, Number of Units, Condition, and Expiration Date.
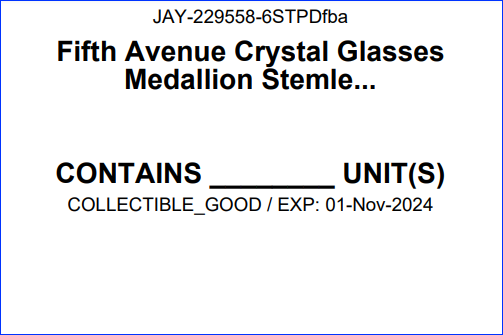
- UnitLabel or None – The default FBA product label. Includes the SKU, Amazon Title or Product Name, Barcode, FNSKU, Condition, and Expiration Date.
Expiration Dates
If you are shipping perishable items, the Expiration Date must be included on the product label.
To set expiration dates for items in your FBA Shipments:
- Go to the FBA Inbound Shipment Creation Wizard.
- On Step 5. Boxes:
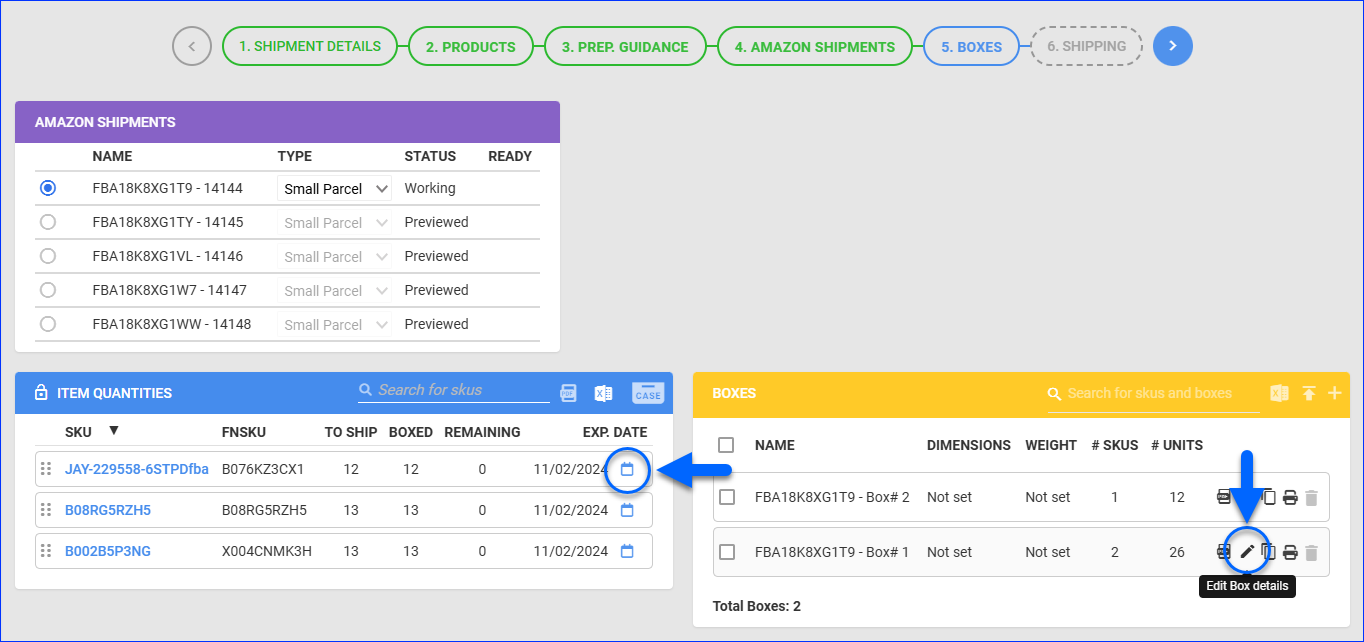
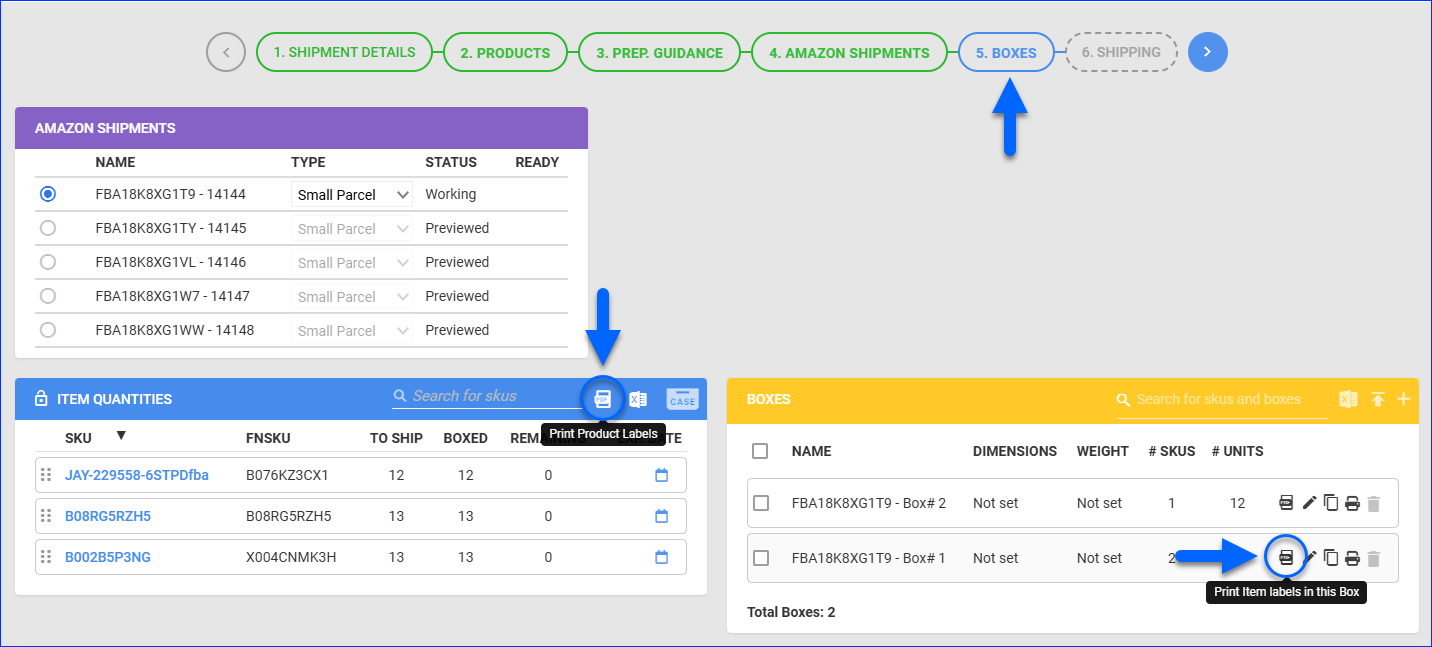
- For a single product, click the Calendar icon in the Item Quantities panel.
- For all products in a box, click the Edit Box Details icon in the Boxes panel.
Print 30 Labels Per Page
Printing one label per page can be less cost-effective if you’re working with multiple units of the same product or several SKUs. However, you can cut costs when processing large inbound shipments by printing 30 labels per page on Avery-style sheets, which is ideal for bulk labeling. These labels are the same as the Default FBA Labels, except the Amazon Title can be up to 120 characters.
You can do this with the generic 30 Per Page FBA Label plugin:
- Open a ticket with Sellercloud Support to request the plugin.
- Once installed, you can set it as your Default format or select it manually when Printing Labels.
Set a Default Plugin
If you have a plugin for FBA product labels (such as the generic 30 Labels Per Page plugin), you can set it as your default label printing method.
To set a default FBA product labels plugin on the client level:
- Go to Client Settings.
- Toggle the Advanced switch on.
- Under Channels, set the Default FBA Label Printing Plugin.
- Click Save.

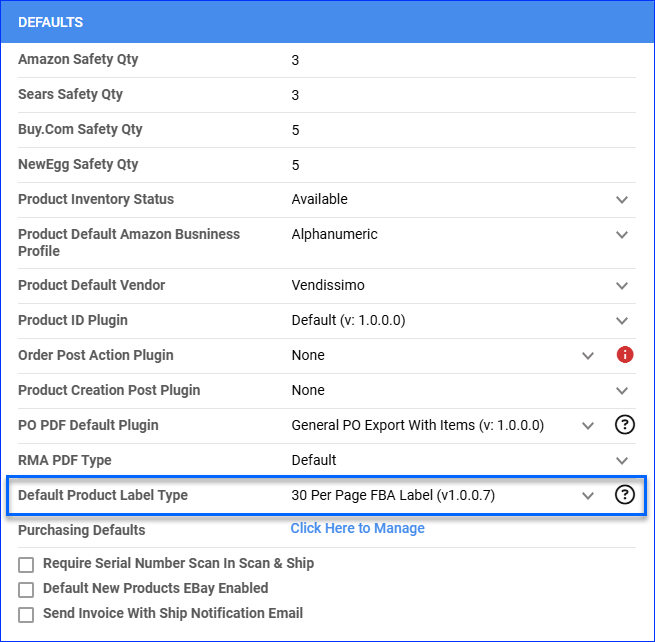
To set a default FBA product labels plugin on the company level:
- Go to Company Settings.
- Click Toolbox and select Defaults.
- Click Edit at the top right.
- Set the Default Product Label Type.
- Click Save.
Print FBA Product Labels
There are several pages in Sellercloud where you can print FBA product labels.
From an Inbound Shipment
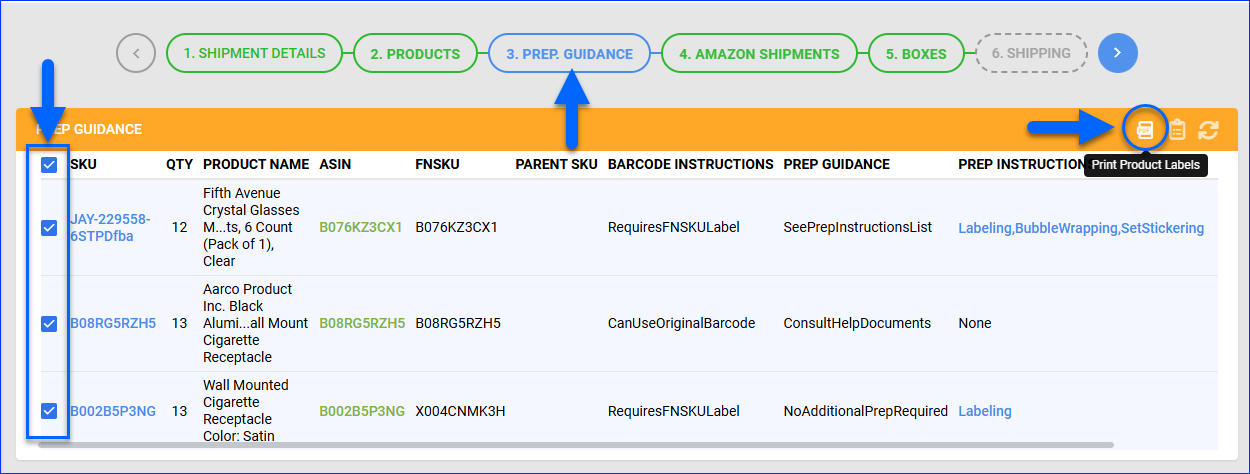
In the FBA Inbound Shipment Creation Wizard:
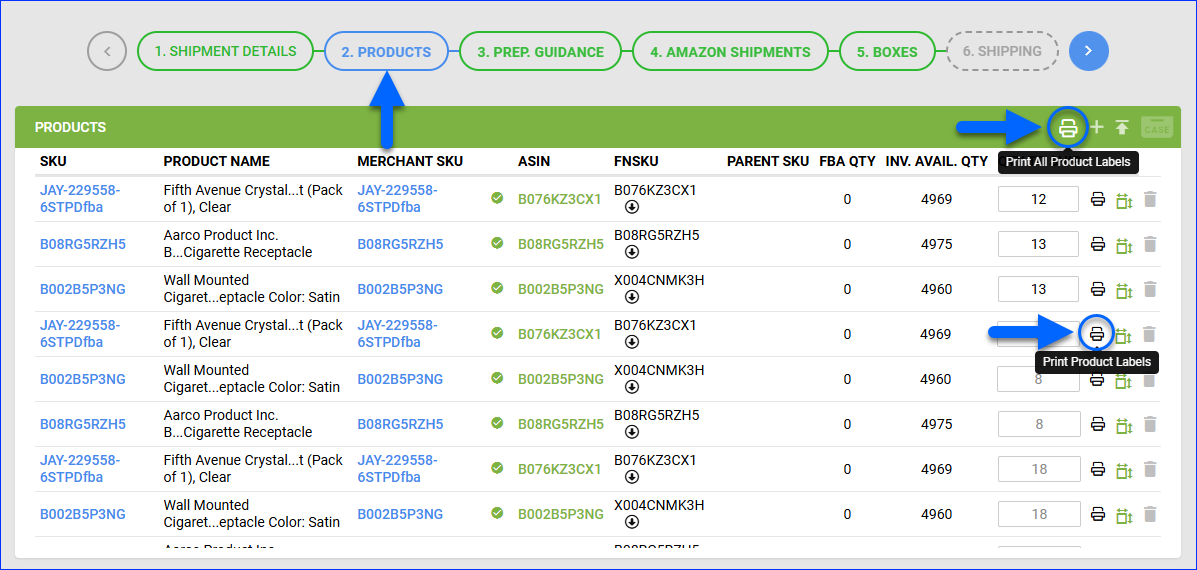
- On the Products tab:
- On the Prep Guidance tab, select products, then click Print Product Labels to print labels for the selected products.
- On the Boxes tab:
On the FBA Inbound Shipment page:
- Select shipments in the Amazon Shipments panel.
- Click the Print Product Labels icon at the top right.

From a Purchase Order
To print FBA product labels from an associated PO:
- Go to the Product Details Page.
- Click Toolbox and select Items.
- Select the items.
- Click the Three dots icon at the top right and select Print FBA Barcode.

From the Catalog or Inventory
To print FBA product labels from the Manage Catalog or Manage Inventory pages:
- Go to Catalog > Manage Catalog or Inventory > Manage Inventory.
- Select products.
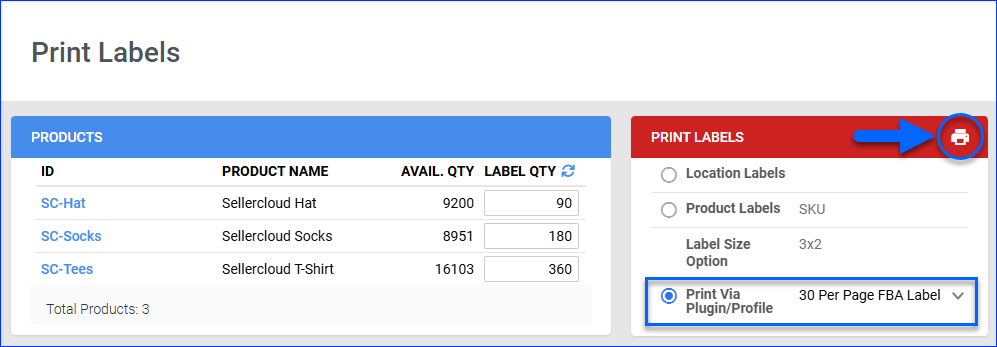
- Click Actions and select Print Labels.
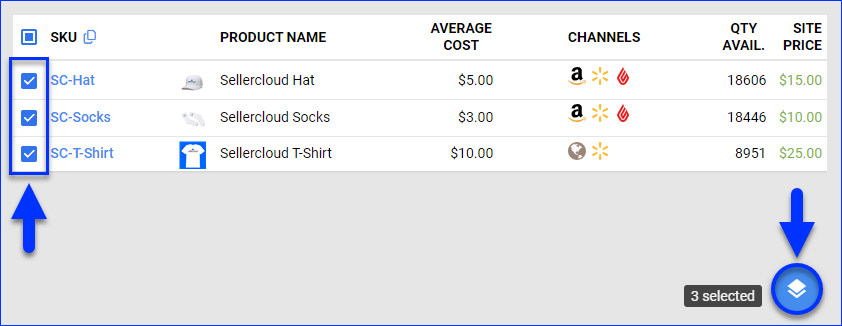
- In the Print Labels panel, select Print via Plugin/Profile, choose your plugin, and click Print.
FBA Label Service
To have Amazon apply labels on your behalf, you must enroll in the FBA Label Service.
- Log into your Seller Central account.
- Click the Settings dropdown and select Fulfillment by Amazon.
- Click the Edit button on the Optional Services section.
- Under Who labels?, select Amazon to enroll in the FBA Label Service. This sets the default labeling option, but you can still override it on each individual shipment.
- Click Update.
