Overview
Sellercloud lets you seamlessly manage your product images, allowing you to store and distribute them across multiple sales channels when publishing or updating your catalog. For example, if you upload an image for a product, it can automatically be used when listing that product on channels like eBay, Sears, and Magento. In addition to that, you have the flexibility to manage image classifications, as well as Channel-Specific Images, giving you full control over how your products appear on each marketplace.
Prerequisites
To get started, ensure that your Image Hosting Options are configured correctly. Sellercloud hosts all your product images on the server, making them easily available for publishing across your integrated channels.
To access the Image Hosting Options, navigate to:
- Settings > Companies > Manage Companies > Select a company.
- Toolbox > Images Hosting Option.
- To produce a valid image URL, ensure the Images Web Path contains the URL https://__.cwa.sellercloud.com/images/products/, with your Sellercloud Server ID populated.
For example, if your Sellercloud URL is https://xx.cwa.sellercloud.com, then the Images Web Path should be https://xx.cwa.sellercloud.com/images/products/.
Product Image Types
You can classify your product images into five different categories:
- Gallery Image – Some channels use gallery images to display web page search results. Other channels, like eBay, use them for both search results and product detail pages.
- Description Image – For some channels, the description image is displayed full-size on the product details page. It is placed in the HTML product description template when publishing items to eBay.
- Supplemental Image – These images are displayed in the product’s extended image gallery.
- Swatch Images – Swatch images are used in variations. For instance, in a listing with multiple colors, the swatch image would be the image of the color. You can only have one swatch image.
- Other – Other non-primary images.
Manage Product Images
Upload images to your products individually, in bulk with a file upload, or via API.
Upload Individually
You can upload images from the product details page:
- Go to Catalog > Manage Catalog > Select a product.
- Optional: Go to Inventory to upload a warehouse image.
- Open the Image Manager by tapping the icon on the image or selecting Image Manager from the Toolbox.
- Upload a new image or update the existing one.
- You can drag and drop images using Imagebridge, Sellercloud’s desktop tool.
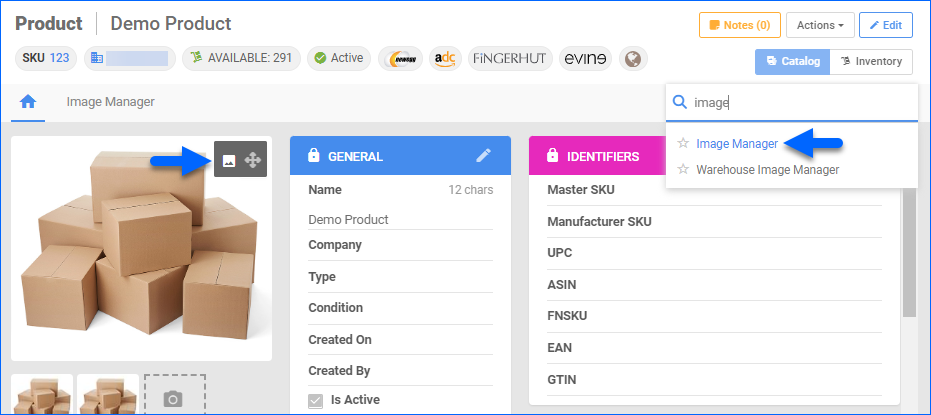
- You can drag and drop images using Imagebridge, Sellercloud’s desktop tool.
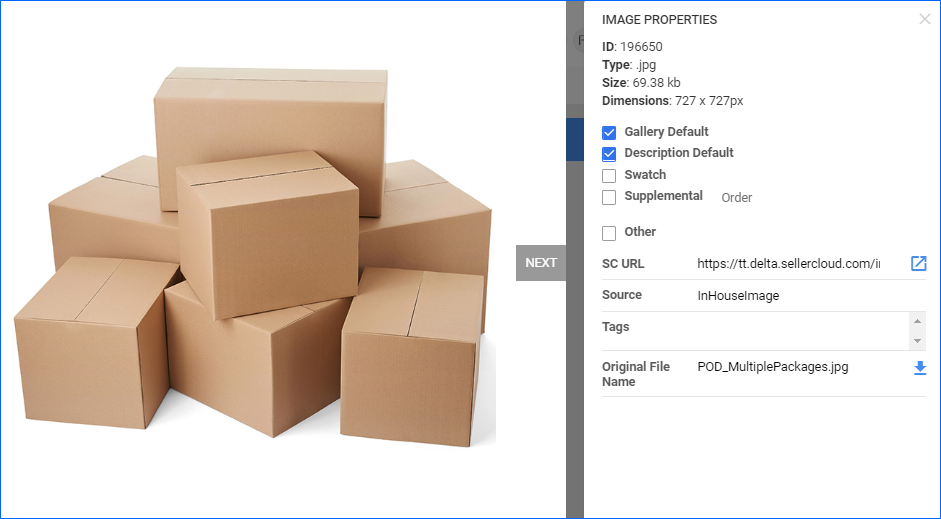
- On the Image Manager page, click on the Image to see its properties.
- You can see the image details like ID, Type, Size, and Dimensions.
- You can select different Image classifications, Image Sources, and enter Image Tags.
Upload In Bulk
- Go to Catalog > Tools > Import Product Info > Import Product Images.
- Download the template, enter the image URL into the FileName column, and use the other columns to set the image placement. Save the file.
- Return to Sellercloud and import the newly created sheet.
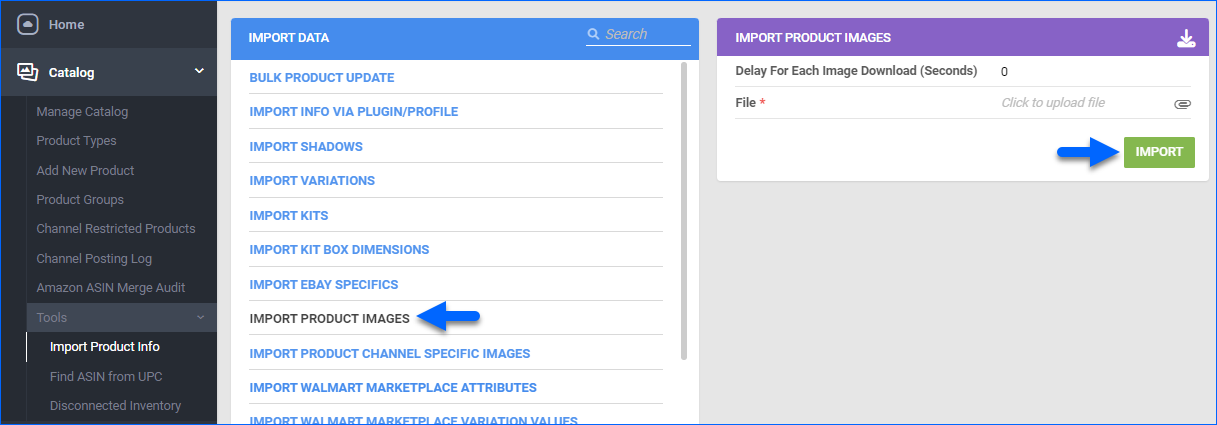
You can also delete product images in bulk if you add a new column at the right called _Action_ and enter DELETE as its value.
Alternatively, you can use the Bulk Product Update with column headers like GalleryImageURL, DescriptionImageURL, SupplimentalImageURL1, etc. This will add the image(s) to the product.
Via API
You can Add Images, Delete Images, and Retrieve Images using Sellercloud’s API. Retrieving images is the same as exporting them, but the operation provides the Image ID instead of the Excel output file.
Image Manager Page
То оpen the Image Manager page, you can either click the icon on the image or select Image Manager from the Toolbox. On this page, you can see all current images you have for that SKU, or filter them by Channel. Additionally, there are four actions you can perform:
- Clear Default Image Selection – click to unassign the image currently set as default without having to go through all the steps.
- Clear Description Image – click to unassign the image currently set as Description without having to go through all the steps.
- Delete All – click to remove all previously uploaded images.
- Download All – click to download all current images to your device.
Export Product Images
You can export your images on the Manage Catalog page.
- Go to Catalog > Manage Catalog > Select your product(s).
- Action menu > Export Products (Catalog).
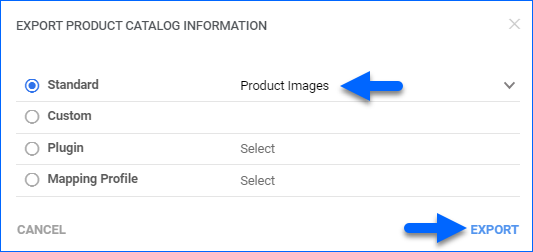
- Select one of the following methods:
- Standard
- Choose Product Images from the dropdown menu.
- Click on the Queued Job link and download the output file once the job is completed.
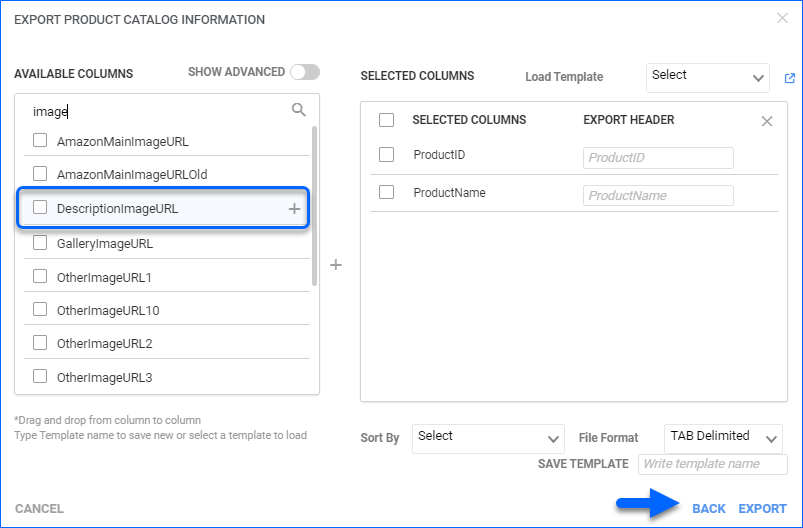
- Custom
- Select Custom and click Next.
- Select Columns by hovering over them and clicking the Plus button.
- Click Export and download the input file from the queued job.
Learn more about the different column headers you can use in the Bulk-Update and Custom Export Columns article.
- Plugin
- Select an Export type plugin from the drop-down menu
- Click Export.
- Mapping
- Select an Export Mapping Profile from the drop-down menu.
- Click Export.
Channel-Specific Images
The channel-specific images feature allows you to send different images for each channel listing. It can be set for channels like Amazon, Walmart, Magento, your Website, and more.
The Client Setting Enable Channel Specific Product Images must be enabled for this workflow. To enable the setting, navigate to Settings > Client Settings > General Client Settings.
See Channel-Specific Images for more details.
