Overview
Each Purchase Order in Sellercloud has its own PO Details page where you can access and update all PO-related information and settings. In this article, you will learn about all the available options on that page. This includes the panels with PO information that are always visible, as well as the Actions you can perform on your POs and all the Toolbox tabs with additional data and settings.
PO Details
You can view and manage different data associated with each product on its PO Details page. There are a few ways to access this page:
- Use the Global Search bar to search for a PO by PO#, Product Name, or SKU
- Click Purchasing > Manage POs, search for POs, and click a product’s PO#.
- Click the PO links anywhere else in the Sellercloud UI.
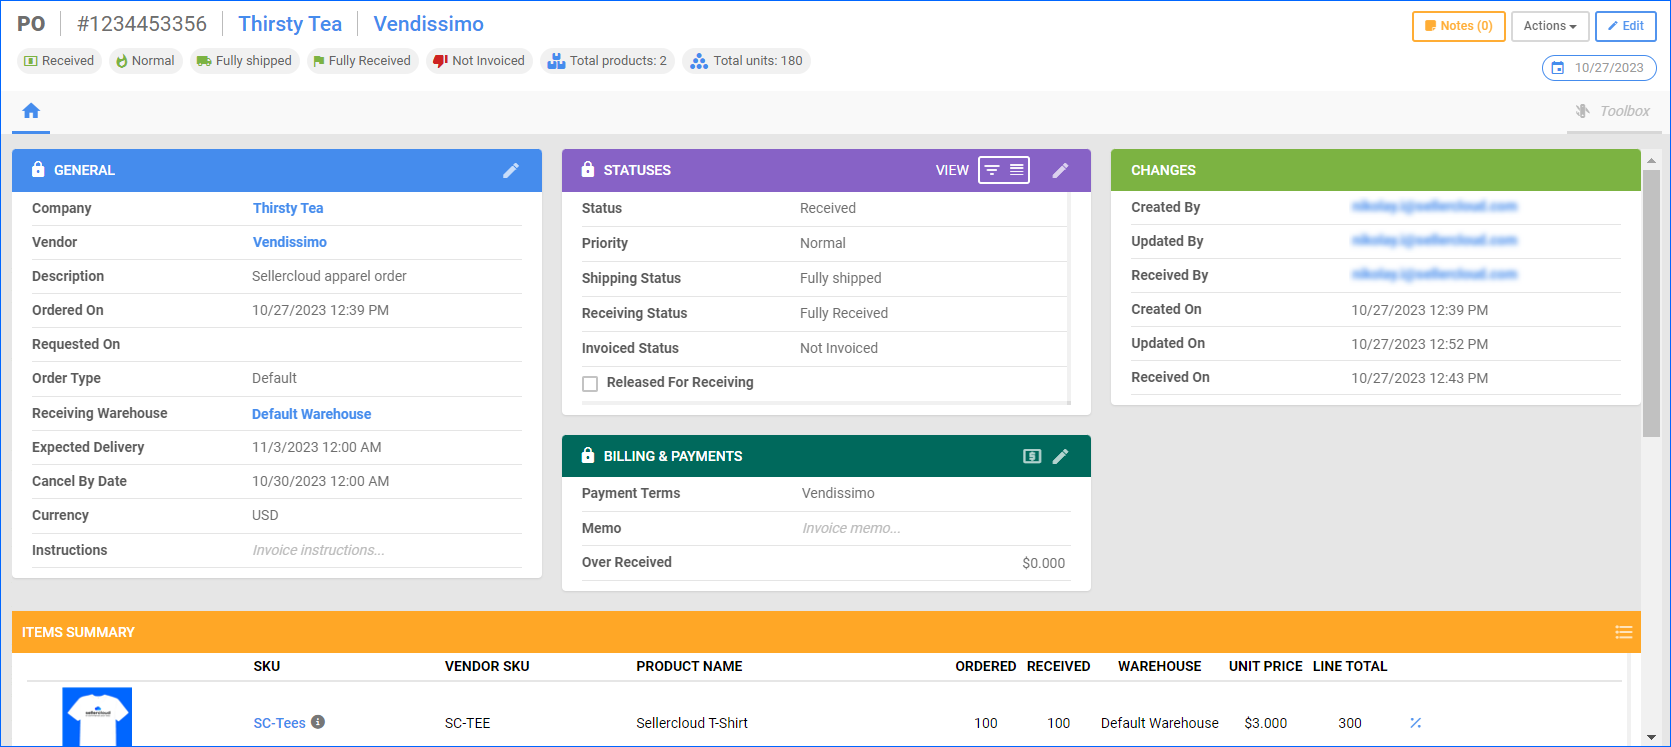
In any case, you will land on a PO Details page, which looks like this:
You can find essential information about the PO at the top of the page:
| Detail | Description |
| PO ID | The unique number assigned to the PO. |
| Company | The Sellercloud Company associated with the PO. |
| Vendor | The Vendor from whom the products are being ordered. |
| Tag | Description |
| PO Status | The current status of the PO. See Update PO Status for more information. |
| Priority | The priority level assigned to the PO. |
| Shipping Status | The status of product shipments related to the PO. |
| Receiving Status | The status of the receiving process for products in the PO. Clicking this tag is the quickest way to open the Receiving tab, where you can view and manage the order’s receiving status and details. |
| Invoice Status | The status of the invoice associated with the PO. Clicking this tag is the quickest way to open the Billing & Payments tab, where you can view and manage the order’s billing address, payment summary, and invoices. |
| Total Products | The overall count of different product items included in the order. |
| Total Units | The total quantity of individual units of products within the PO. |
| Creation Date | Displayed on the top right of the page; this is the date when the PO was initially generated or created. |
The panels below also show the above information, as well as a lot more:
General
| Option | Description |
| Company | The Sellercloud Company associated with the PO. |
| Vendor | The Vendor from whom the products are being ordered. |
| Description | A brief description of the PO. |
| Ordered On | The date when the PO was placed. |
| Requested On | The date when the PO was requested. |
| Order Type | The categorization of the PO – Default, Dropship, Regular, or Wrap and Label. |
| Receiving Warehouse | The Warehouse where the products will be received. |
| Expected Delivery | The anticipated delivery date for the products in the PO. |
| Cancel By Date | The deadline for canceling the PO. |
| Currency | The currency used for the PO. Selecting a currency other than USD also displays two additional fields – Rate To US$ and Rate From US$ where you can specify rates. |
| Instructions | Any special instructions provided for the PO. |
Statuses
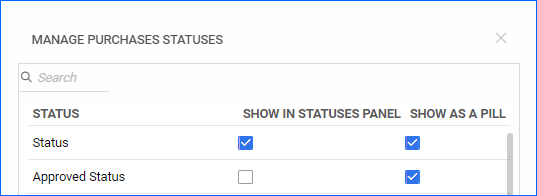
You can customize what information you see in the Statuses panel of the PO Details page. You can toggle between Filtered View and Show All. Click Edit in the top right corner of the page, press the pen icon in the panel header, or double-click the header itself to switch into edit mode. Then, click on the gear icon to open the pop-up window where you can configure which statuses will be visible.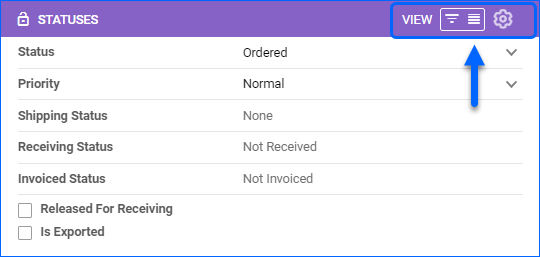
In the modal, you will see a list of all the available statuses. For each, you can check the corresponding box to Show in Statuses Panel or Show as a Pill.
| Option | Description |
| Status | The current overall status of the PO. Indicates its stage in the procurement process. You can update it for multiple POs in bulk on the Manage POs page. See Update PO Status for more information. |
| Approved Status |
Indicates whether the PO is approved for processing. You can change this status from the Po Action Manu. |
| Priority | The level of urgency or importance assigned to the PO. |
| Shipping Status | The status of product shipments related to the PO. |
| Receiving Status | The status of the receiving process for products in the PO. |
| Payment Status |
Indicates whether the PO has been paid, partially paid, or if it has no recorded payment. |
| Invoiced Status | The status of the invoice associated with the PO. |
| Inventory Count | When the inventory count is enabled, receiving the PO will increase your warehouse inventory. When disabled, the purchased quantity will not be added to your inventory. This is often used as part of the Dropshipping workflow. |
| Email Sent | Indicates whether an email has been sent. |
| Released For Receiving | Indicates whether the order has been authorized for the receiving process. |
| Picking Status | Indicates the unit picking progress. This status is only available for Credit Memo type POs. |
| Is Exported | Indicates whether the PO is exported. Clicking the checkbox replicates the Mark Exported/Mark Not Exported option from the Action Menu. |
Billing & Payments
| Option | Description |
| Payment Terms | The agreed-upon Payment Terms and conditions for payment associated with the PO. |
| Memo | A payments-related note about the PO. |
| Over Received | Shows if the quantity of products received exceeds the initial amount ordered. |
Changes
| Option | Description |
| Created By | The user responsible for creating or initiating the PO. |
| Updated By | The user who last updated or modified the PO. |
| Approved By | The user who approved the PO for processing. |
| Received By | The user for receiving and confirming the products in the order. |
| Created On | The date when the PO was initially created or generated. |
| Updated On | The date of the most recent modification to the PO. |
| Approved On | The date when the PO was officially approved. |
| Received On | The date when the products in the order were received. |
Items Summary
| Option | Description |
| Image | The primary image of the product, if available. |
| SKU | The Stock Keeping Unit (SKU) used to identify the product in the PO. Hover over the tooltip next to the SKU to see inventory information of the product, such as physical and available quantities. |
| Vendor SKU | The Vendor SKU assigned to the product by the supplier. |
| Product Name | The name of the ordered product. |
| Ordered | The quantity of the product ordered in the PO. |
| Received | The quantity of the product that has been received and confirmed. |
| Warehouse | The receiving Warehouse. |
| Unit Price | The price per product unit in the PO. |
| Line Total | The total cost for the quantity of the product ordered on the specific line item. |
| Case Qty/Cases Received/Case Price | These three columns become available when you Enable Per Case Quantity for the PO. |
Total
| Option | Description |
| Subtotal | The total cost of the items ordered before discounts and additional charges. |
| Multi Discount Total | The cumulative amount of Multi Discounts applied to the order. |
| Shipping Total | The total cost of shipping for the PO. |
| Dropship Fee Total | The total fees for dropshipping products in the order. |
| Shipping Total (3rd Party) | The total cost of third-party shipping services, if applicable. |
| Customs Total | The total fees related to customs duties or processing. |
| Tax Total | The total amount of taxes applicable to the PO. |
| Other Total | The sum of miscellaneous or additional charges not covered by other categories. |
| Credit Card Fee | Any fees associated with credit card payments for the order. |
| Unreceived Total | The total cost of products that have not yet been received. |
| Total Unpaid | The total amount of the order that remains unpaid. |
| Grand Total | The overall total cost of the PO, including all items, discounts, fees, and taxes. |
PO Level Multi Discounts
This panel allows you to add or remove PO Level Multi Discounts that apply to all items in the order.
Related Purchase Orders
You can use the Split PO action to Divide a PO into multiple separate POs. This panel shows split-order details – if you look at a parent PO, it will show the child PO, and the other way around.
PO Toolbox
The Toolbox is a key element on the PO page. It grants you access to additional PO-related tabs, where you can access other PO features and configure even more details, preferences, and settings.
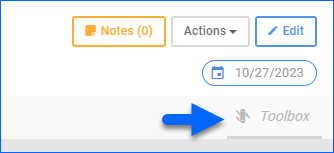
To access these tabs, click the Toolbox button on the PO Details page.
Now, you can select from the options listed in the table below. Click the star to pin any frequently used tab to the page for quick access.
| Tab | Description |
| Billing & Payments | View and manage the order’s billing address, payment summary, and invoices. |
| Change Log | View a log with records of any changes made to the PO. |
| Custom Columns | View and update any Custom PO Columns. |
| Documents | Upload any PO-related documents. |
| Email Logs | Send emails to the vendor and view any previously sent emails. |
| Extra Costs | Add and manage any general or item-specific extra costs. |
| Items | Manage PO item quantities, prices, notes, and more. |
| Receiving | View and manage the order’s receiving status and details. |
| Serial Numbers | Search and export Serial Numbers. |
| Shipping | View and manage the order’s shipping status, address, carrier details, and tracking numbers. |
| Shipping Containers | Add items to Shipping Containers. |
PO Actions
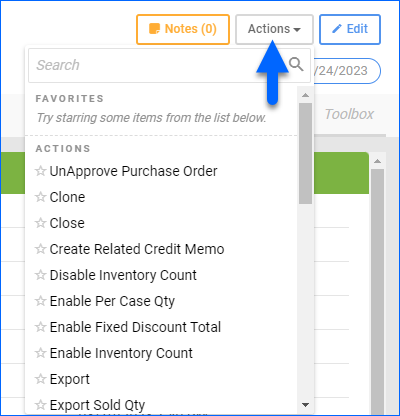
To access the PO actions, click the Actions button on the PO Details page.
Now, you can select from the actions below. Click the star to pin any frequently used action to the top of the actions list.
| Action | Description |
| Approve Purchase Order | Approve the PO for processing. You can do this for multiple POs in bulk on the Manage POs page. |
| Clone | Create a duplicate copy of the PO. |
| Close | Close the PO by setting the Status to Completed and the Receiving Status to Fully Shipped. |
| Create Related Credit Memo | Generate a Credit Memo associated with the PO. |
| Disable Inventory Count | Turn off inventory counting for the PO. You can do this for multiple POs in bulk on the Manage POs page. |
| Enable Per Case Qty | Activate Case Quantity management for the items in the order. |
| Enable Fixed Discount Total | Erase the current discounts and enable a fixed discount total for the order. |
| Enable Inventory Count | Enable inventory counting for the PO. You can do this for multiple POs in bulk on the Manage POs page. |
| Export | Export the PO using a plugin or Mapping Profile. |
| Export Sold Qty | Export the quantities of sold items from the PO to a spreadsheet. |
| Export to Excel | Export the PO to an Excel spreadsheet. You can do this for multiple POs in bulk on the Manage POs page. |
| Export to Excel (Merged SKUs) | Export PO data to Excel, where all lines with the same SKU are combined. |
| Make Payment | Enter payment for the PO on the Vendor Payments page. |
| Manage Invoices | Add and manage Vendor Invoices associated with the PO. |
| Merge Similar SKU Items | Combine all lines with the same SKU in the PO. |
| Print to PDF | Create a PDF document of the PO. You can do this for multiple POs in bulk on the Manage POs page. Additionally, there are several related Client Settings which allow you to customize the PDF, such as PO PDF Date Format and Print PO PDF Message. |
| Print to PDF (Merged SKUs) | Create a PDF document of the PO with merged SKU information. |
| Print to PDF (with discounts) | Create a PDF document of the PO, including discounts. |
| Recalculate Average Cost of Products | Update the Average Cost of the ordered products. |
| Recalculate PO | Recalculate the PO total. |
| Recalculate Last Cost of Products | Update the Last Cost of products in the order. |
| Ship Credit Memo | Send a Custom Credit Memo to the vendor. |
| Split SKU | Split a line item into multiple lines. |
| Sync To Fba Inbound Shipment | Link the PO with an Amazon FBA Inbound Shipment. |
| Update Default Vendors of Products | Update the Default Vendor of all products in the PO to the vendor of the PO. |
| Update Shipping | Go to the Shipping tab to view and manage the order’s shipping status, address, carrier details, and tracking numbers. |
| View Products in Manage Inventory | Access product details in the Manage Inventory section. |
| View Products in Manage Catalog | Access product details in the Manage Catalog section. |
| Send PO via Email | Send the PO to recipients via email. You can do this for multiple POs in bulk on the Manage POs page. |
| View Email Sent Log | Access a log of emails sent to the vendor regarding the PO and send new emails. |
| Split PO | Divide the PO into multiple separate POs. |
| Receive Shipment | Confirm and document the receipt of a shipment. |
| Receive Whole PO | Receive the entire PO. |
| Manage Shipping Labels | Redirects you to a page where you can create and void Shipping Labels for your PO. |
| Manage Custom Columns | Configure and manage any Custom PO Columns. |
| Delete PO | Permanently remove the PO from the system. |
| Sync To WFS Shipment Plan | Link the PO with a WFS Shipment Plan. |
PO Notes
You can use the PO Details page to view and post any PO-related notes. PO notes are helpful for better internal communication and collaboration among team members. For example, one way to use notes is to document changes and inform others – this way, they won’t have to check the Change Log.
To view and post PO notes:
- Click the Notes button on the top right.
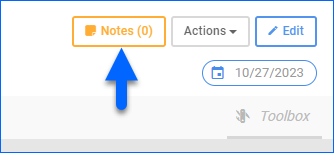
- Optionally, click the eye icon to Show or Hide System Notes. Sometimes, Sellercloud may post system notes to inform about product changes. However, the best way to track changes is the Change Log (accessible from the Toolbox) because all changes are recorded there.
- Select the Note Type – Purchase Note or Vendor Note to view different notes.
- To post a new note, type it below and click the post button.
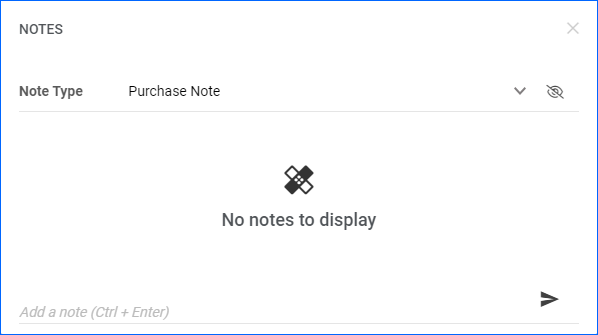
You can also add PO Item notes for specific items within the PO. You can add them:
- For one PO at a time by clicking Toolbox and selecting Items on the PO Details page.
- In bulk by going to Purchasing > Tools > Import Purchase Info > Import Purchase Orders.
