Overview
A Rush Order is a customer request for an order to be delivered faster than a standard shipment. They are typically time-sensitive and prioritized in picking, packing, and shipping workflows to meet urgent deadlines. They may also incur additional fees due to the expedited handling and delivery requirements.
Sellercloud provides various ways to mark orders as Rush:
- Automatically
- Configure client-level Shipping Service Preferences to mark orders as Rush based on their assigned shipping service.
- Configure Shipping Method Mapping.
- Configure Product Shipping Preferences.
- Use Custom Plugins.
- Configure eBay Rush Services.
- Manually
- Individually on the Order Details page.
- In Bulk on the Manage Orders page.
Mark Orders as Rush Automatically
This section explains how to automatically mark orders as Rush using different methods.
Shipping Service Preferences
To automatically mark orders with certain shipping services as Rush across all channels:
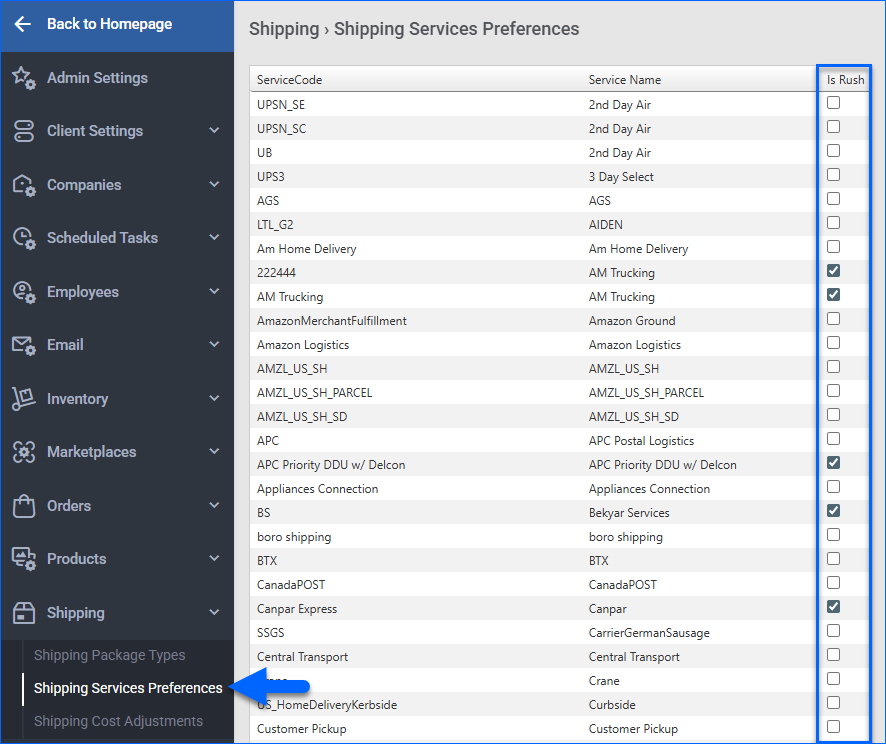
- Go to Settings > Shipping > Shipping Services Preference.
- Mark the corresponding services as Rush. You can open a ticket with Sellercloud Support to add any missing services.
- Click Update Settings at the bottom of the page.
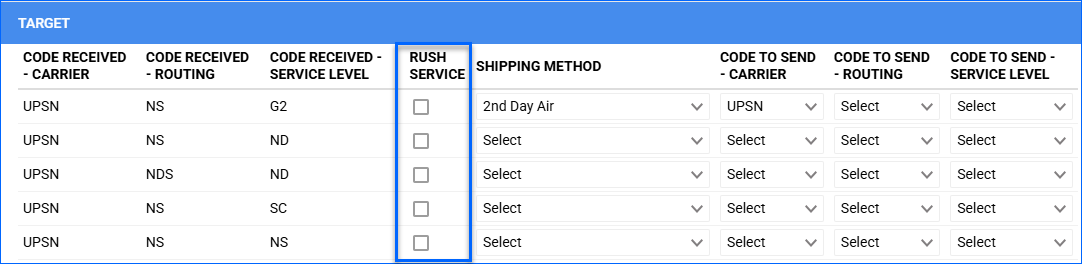
Shipping Method Mapping
Sellercloud’s Shipping Method Mapping enables automatic assignment of your preferred carrier and service based on the shipping methods received from each channel. Many channels also allow orders from mapped methods to be marked as Rush.
- Go to Company Settings.
- Click Toolbox and select:
- For a core integrated channel, select Channel > Shipping Method Mapping.
- For a Website Plugin Integration, select Website > Cart Shipping Method Mapping.
- Click Edit.
- Check Rush Service for the appropriate shipping methods.
- Click Save.
Product Shipping Preferences
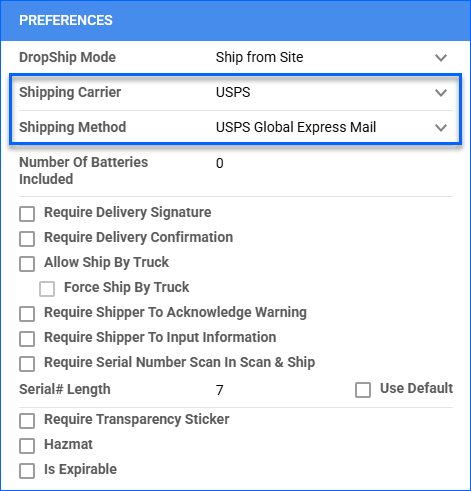
To configure Product Shipping Preferences:
- Go to a Product Details Page.
- Click Toolbox and select Shipping Preferences.
- Click Edit.
- In the Preferences panel, update the Shipping Carrier and Shipping Method.
- Click Save.
Custom Plugins
Sellercloud also supports using plugins to automatically mark orders as Rush based on any custom logic you may require. Two plugin types can be used for this purpose:
- Post-Order Plugins: These run immediately after an order is created in Sellercloud. A Post-Order plugin can run on all orders under a specific company if you set it up on the Company Defaults page, or be configured to execute when specific conditions are met with the Order Rule Engine.
- Order Export Plugins: These plugins can be configured to run automatically on a regular basis with Scheduled Tasks. You can also execute them manually at any time. See Export Orders for more information.
Open a ticket with Sellercloud Support to request a custom plugin specifically tailored to your workflow. Such customizations are billable.
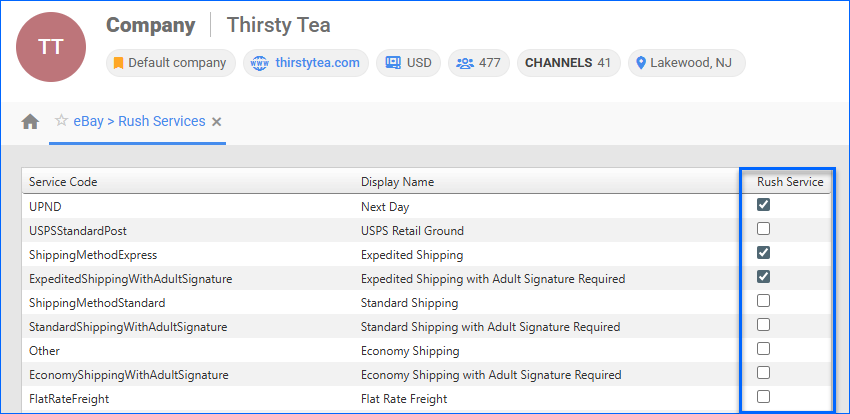
eBay Rush Services
To set up Rush Services for your eBay Orders:
- Go to Company Settings.
- Click Toolbox and select eBay > Rush Services.
- Check the Rush Service box.
- Click Save at the bottom of the page.
Mark Orders as Rush Manually
This section explains how to mark orders as Rush manually, either individually or in bulk.
Individually
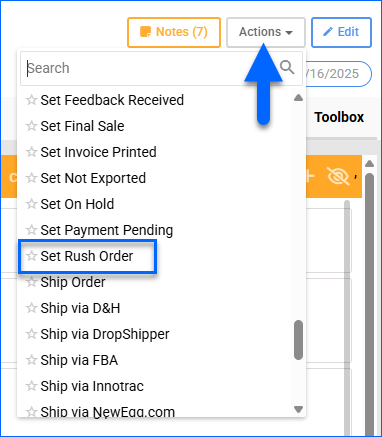
To mark a Rush order manually:
- Go to the Order Details Page.
- Do one of the following:
- Click Actions and select Set Rush Order.
- Click Edit, then check Rush Order in the Statuses panel, and click Save.

- Click Actions and select Set Rush Order.
In Bulk
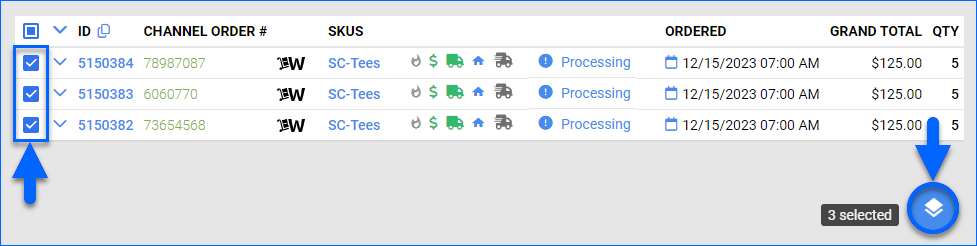
To mark multiple orders as Rush on the Manage Orders page:
- Go to Orders > Manage Orders.
- Search and then select orders.
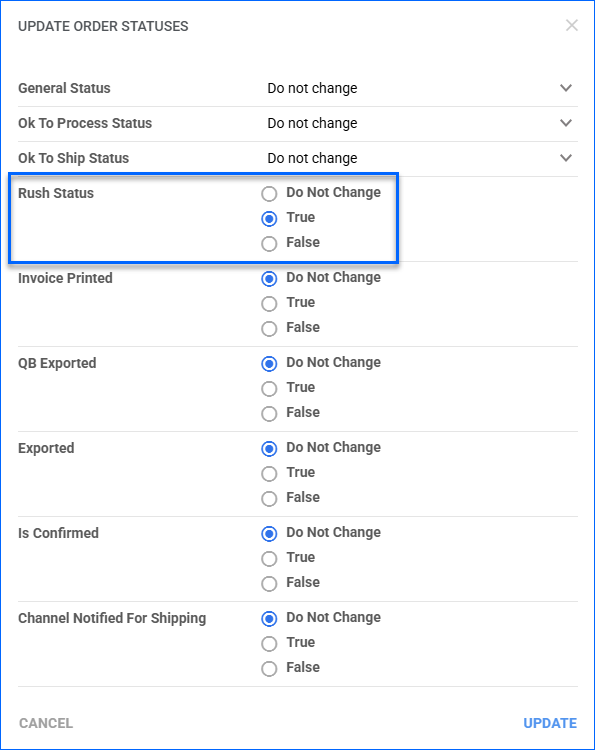
- Click the Actions icon at the bottom right and select Update Order Status.
- Set the Rush Status to True.
- Click Update.
View Rush Orders
Sellercloud and Shipbridge provide filters that show only Rush orders.
In Sellercloud
To view Rush orders in Sellercloud:
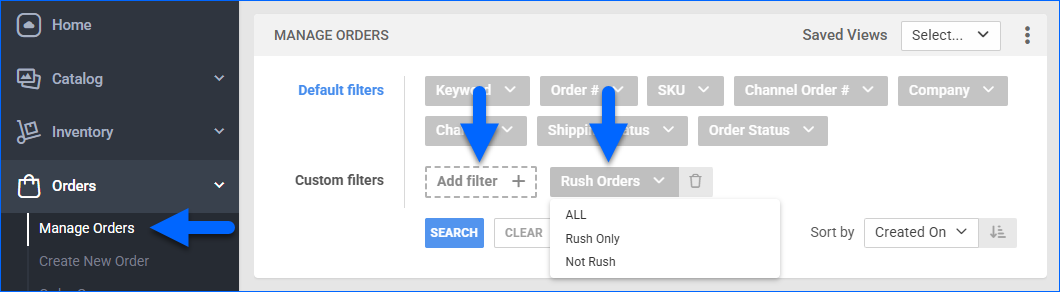
- Go to Orders > Manage Orders.
- Click Add Filter and add the Rush Orders filter.
- Click the Rush Orders filter, select Rush Only, and click Search.
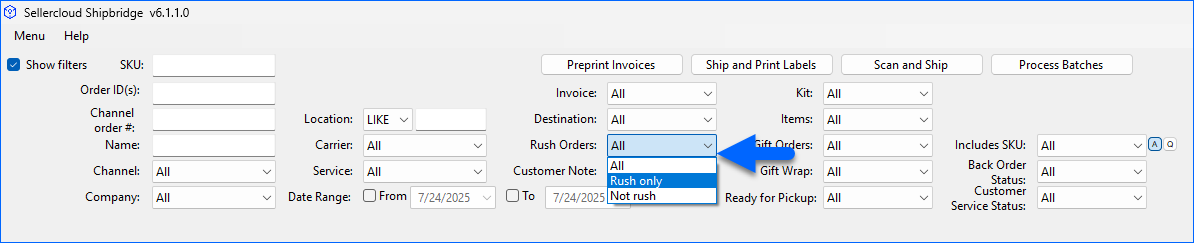
In Shipbridge
To view Rush orders in Shipbridge, set the Rush Orders filter to Rush Only.
Shipbridge Preferences
Shipbridge offers several settings designed to support the efficient handling of Rush orders, ensuring priority during fulfillment. These settings let you define preferred carriers, assign default expedited services, and limit rate display to high-speed delivery methods.
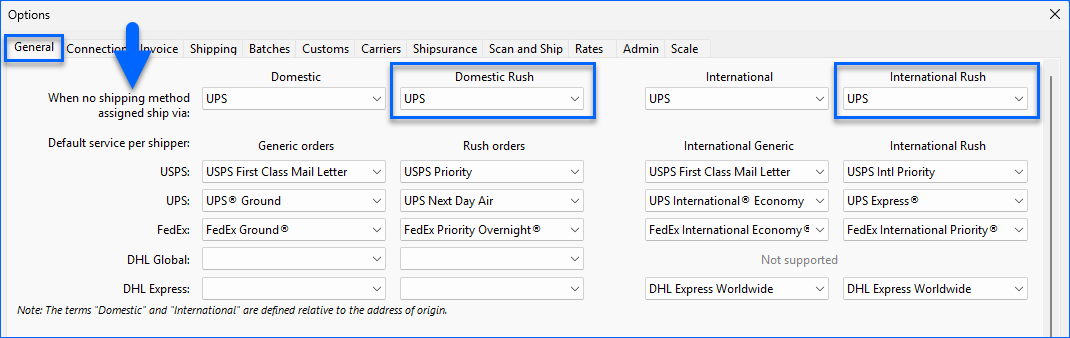
- Default Shipping Carriers for Rush Orders – Located under Menu > Options > General, the When no shipping method assigned ship via setting allows you to specify which shipping carrier to use when no method is assigned on the order. These fallback rules ensure that Rush Orders are never left without a designated carrier:
- Domestic Rush – Set the default carrier (e.g., UPS, FedEx) for domestic rush orders that don’t have a shipping method assigned.
- International Rush – Set the default carrier for international rush orders lacking a specified shipping method.
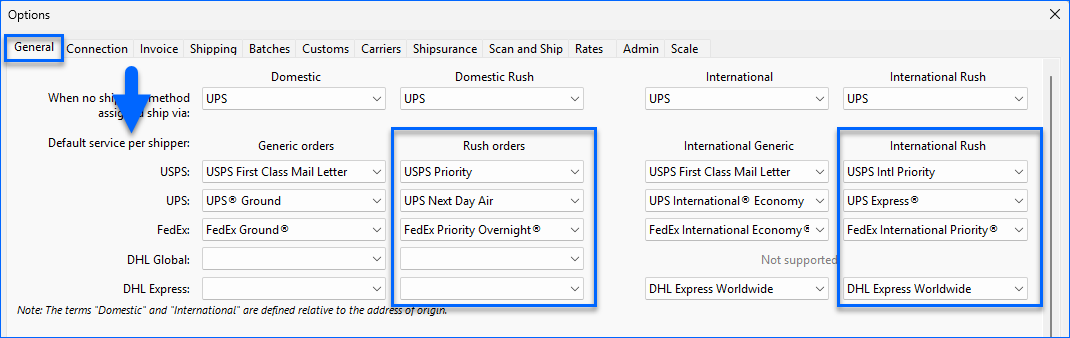
- Default Service Per Shipper – Also under Menu > Options > General, the Default service per shipper section allows you to define carrier-specific services that apply to Rush orders. For each supported carrier (USPS, UPS, FedEx, DHL Global, and DHL Express), you can configure:
- A default service for generic domestic and international orders
- A separate default service specifically for domestic Rush orders
- A separate setting for international Rush orders
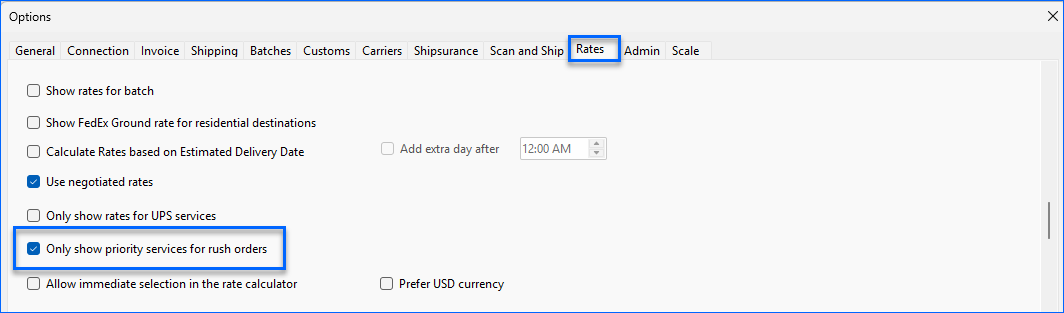
- Only Show Priority Services For Rush Order – Located under Menu > Options > Rates, the setting Only show priority services for rush order sets up Shipbridge to only display priority shipping options (e.g., Next Day, 2-Day, Express) when Calculating Rates for Rush orders, and exclude all slower or economy services (e.g., Ground, Standard). This setting applies across all workflows in Shipbridge, including but not limited to Scan and Ship.
Related Client Settings
The following Client Settings related to Rush orders are available:
- Enable Client Level Rush Order Preferences – Enables the Settings > Shipping > Shipping Services Preferences page, allowing you to set orders as Rush based on their selected shipping service.
- Prioritize Rush Orders in Backorder Calculation – Enable prioritization of the allocation of available quantities to Rush orders when recalculating Backorder quantities.