Overview
The Walmart DSV Integration lets you seamlessly manage your Walmart orders directly from Sellercloud. It allows you to download orders automatically, update their fulfillment status, map shipping methods to specific carriers and services, cancel orders, and more.
To explore other related topics, refer to our Walmart DSV Category.
Download Orders and Upload Tracking
You can download orders from Walmart automatically or manually, and once you ship them to the customer, Sellercloud can update Walmart with tracking information.
When Walmart orders are imported to Sellercloud:
- The Channel is Walmart.
- The Customer Email is [email protected].
- Orders are imported as Fully Charged.
- Each order item’s Unit Price on the Order Details Page comes from the item’s Initial Cost on the Walmart Properties Page. This is the price at which Walmart buys the item from you, not the retail price at which they sell the item to the customer.
Automatically
To enable automatic order synchronization between Walmart and Sellercloud:
- Go to Company Settings.
- Click Toolbox and select Walmart > General Settings.
- Click Edit.
- In the Controls panel, check:

- Enable Order Download to download Walmart orders to Sellercloud automatically, approximately every 30 minutes.
- Enable Order Fulfillment Upload to upload tracking and shipping dates to Walmart and automatically update the order status there. We send all related tracking numbers for multi-package orders.
- Optionally, you can also check Do Not Send Tracking On Saturday and Sunday.
- Check Requires Third Party Shipping to enforce Third-Party Shipping for Walmart orders. See DSV FedEx and UPS Carrier Accounts to learn more.
- Optionally, you can also check Use Unit Cost From Walmart DSV Order. When disabled, the Product Price field on Walmart DSV Orders will reflect the Unit Price (amount paid by the customer). When checked, we will use the Unit Cost instead (amount you receive from Walmart).
- Click Save.
Manually
To download orders from Walmart manually:
- Go to Company Settings.
- Click Toolbox and select Walmart > General Settings.
- Click Actions and select Download Orders.
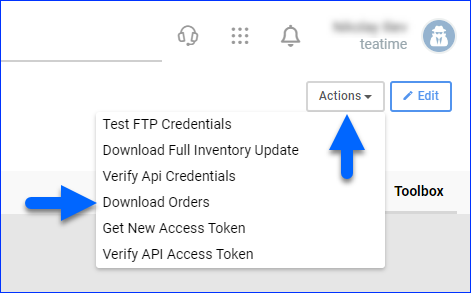
- This action creates a Queued Job, and once completed, your order download will be ready.
From a File
It’s also possible to Import Orders from a file. The supported formats are EDI, CSV, and XML. You can download orders from the Walmart portal.
To import orders from a file:
- Go to Orders > Tools > Import Order Info Via File.
- Select Import Channel Orders.
- Select a Company.
- Set the Channel to Walmart.
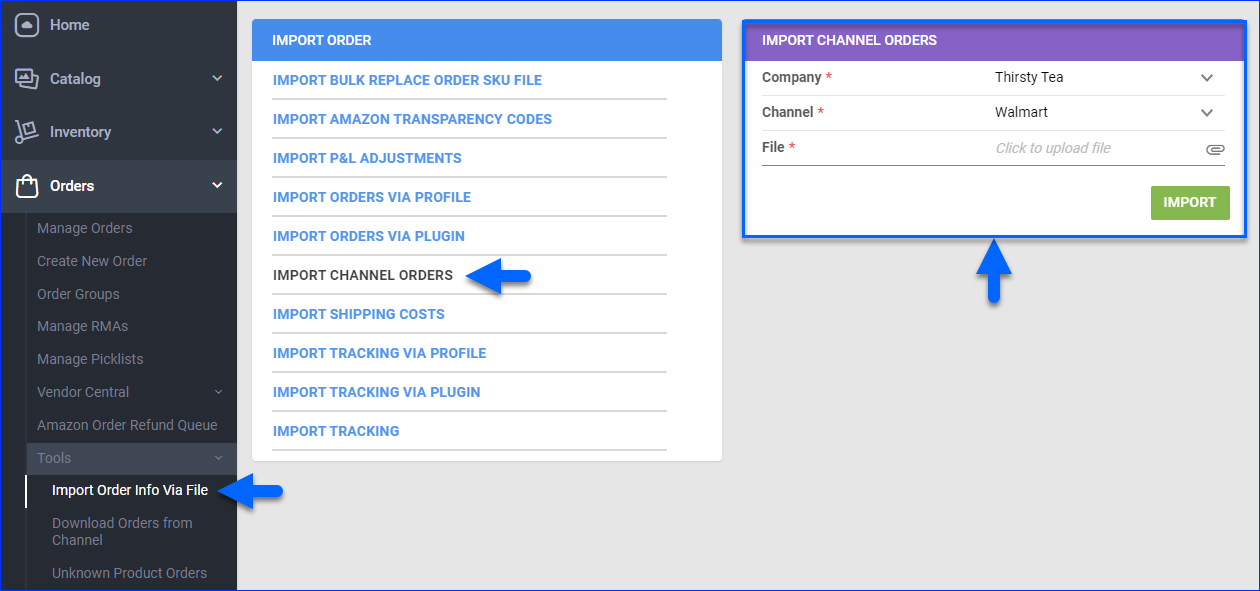
- Click File and select your order file. The following columns are required:
- Store Id – The unique identifier of the store from which the order was placed.
- Order# – The unique identifier of the order.
- Order Date – The date when the order was placed.
- Ship By – The latest date by which you must ship the order.
- Customer Name – The name of the customer who placed the order.
- Customer Phone Number – The phone number of the customer.
- Customer Shipping Address – The complete shipping address.
- Ship to Address 1 – The primary line of the shipping address.
- Ship to Address 2 – The secondary line of the shipping address.
- City – The city in the shipping address.
- State – The state in the shipping address.
- Zip – The ZIP code in the shipping address.
- Ship To – The name of the person or entity to which you are shipping the order.
- Shipping Method – The method used for shipping.
- Requested Carrier Method – The carrier and method requested for shipping.
- Line# – The item’s line number in the order.
- Qty – The number of units ordered.
- SKU – The item’s SKU.
- Item Description – A description of the item.
- Status – The status of the order.
- Click Import to create a Queued Job for your order import. Once it completes, you will receive a Notification.
Order Fees and Discounts
In addition to the settings described in the previous section, which cover order processing and fulfillment, you can also configure settings related to fees and discounts that affect the Order Profit and Loss.
To configure these order settings:
- Go to Company Settings.
- Click Toolbox and select Walmart > General Settings.
- Click Edit.
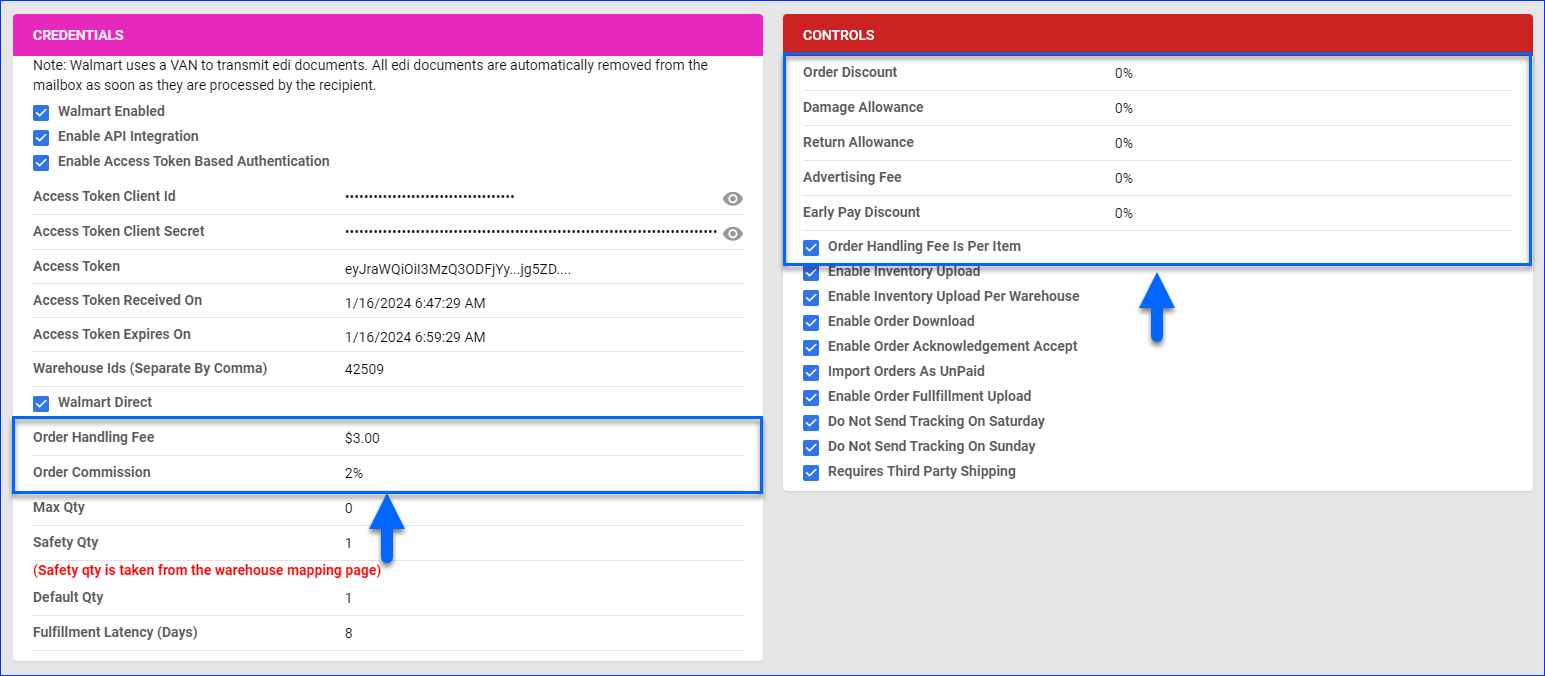
- In the Credentials panel:
- Order Handling Fee – Expenses related to order handling, including warehouse storage costs, shipment costs, packing costs, and so on. By default, this fee is per order, but you can make it per item by checking Order Handling Fee Is Per Item in the Controls panel.
- Order Commission – Adds an order commission percentage owed to Walmart.
- In the Controls panel:
- Order Discount – A discount for all orders handled by Walmart.
- Damage Allowance – A percentage owed to Walmart for handling damaged products.
- Return Allowance – A percentage owed to Walmart for processing returns.
- Advertising Fee – A percentage paid for advertising on Walmart.
- Early Pay Discount – A discount percentage buyers receive when paying invoices early.
- Order Handling Fee Is Per Item – Calculate handling expenses per item instead of per order.
- Click Save.
Learn more about Co-op Fees for Dropship Channels.
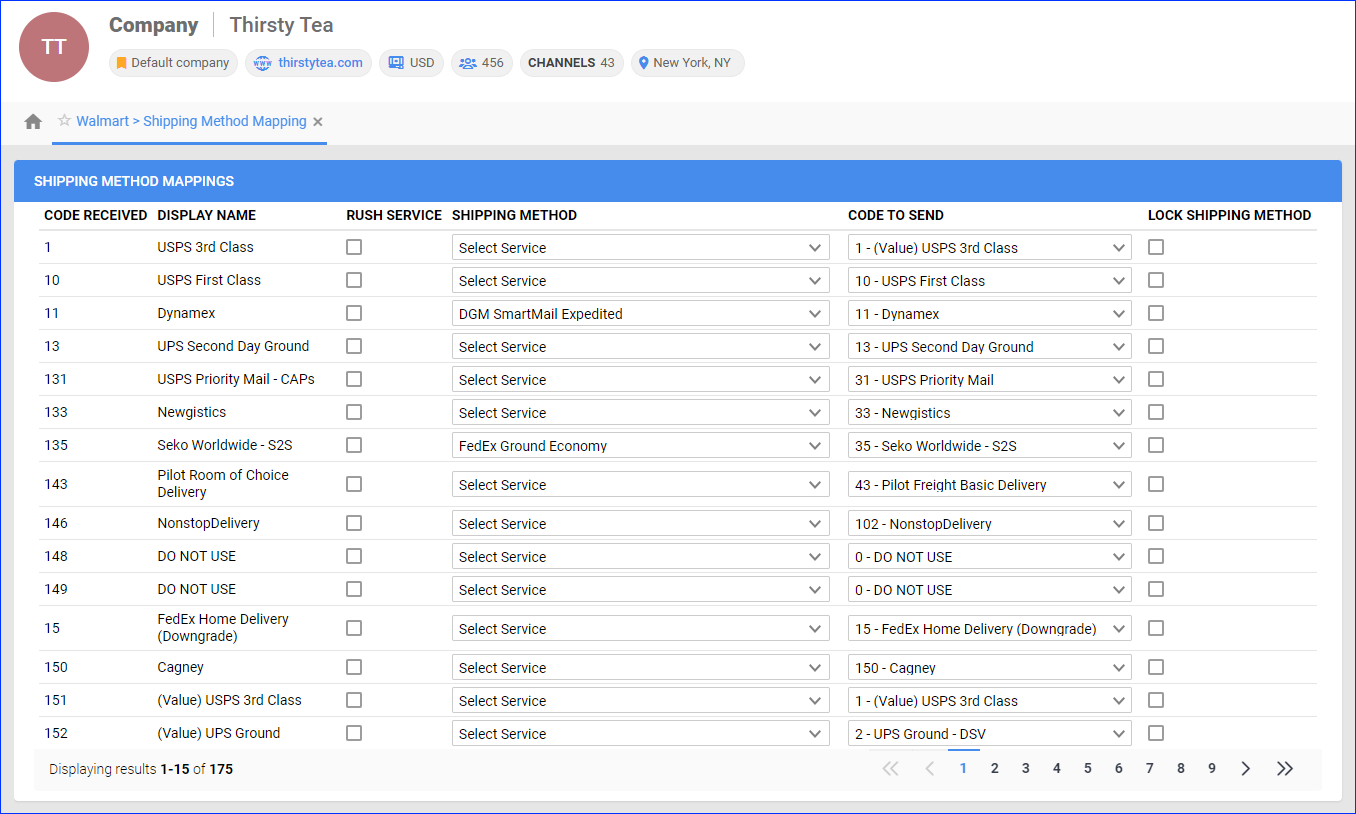
Shipping Method Mapping
The Shipping Method Mapping tool allows you to map the shipping methods received for each Walmart order to a specific shipping carrier and service.
To configure shipping method mapping for Walmart:
- Go to Company Settings.
- Click Toolbox and select Walmart > Shipping Method Mapping.
- Click Edit.
- For each Code Received and Display Name, select a Shipping Method and Code to Send.
- Check Rush Service to automatically mark orders as Rush.
- Click Save.
Manage Walmart Orders
You can only cancel a Walmart order before it is marked Ship Confirmed. If it is already Ship Confirmed, you must issue a refund. If the item is being returned to your warehouse, use the RMA Workflow instead.
Cancel an Order
When a customer submits a cancellation request on Walmart, Sellercloud automatically marks the order as Cancelled if it hasn’t been shipped yet. There are a few cases where Sellercloud will set the order status to On Hold instead of Cancelled:
- If the order in Sellercloud has any Picked quantity.
- If the order is set to Dropship from a Vendor.
- If the order is multi-item, Sellercloud will split the cancelled item into another order placed On Hold.
While customers can initiate order cancellations, you can also cancel orders yourself. To cancel a Walmart order:
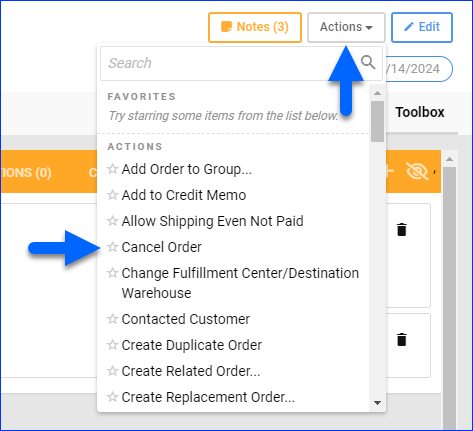
- Go to the Order Details Page.
- Click Actions and select Cancel Order.
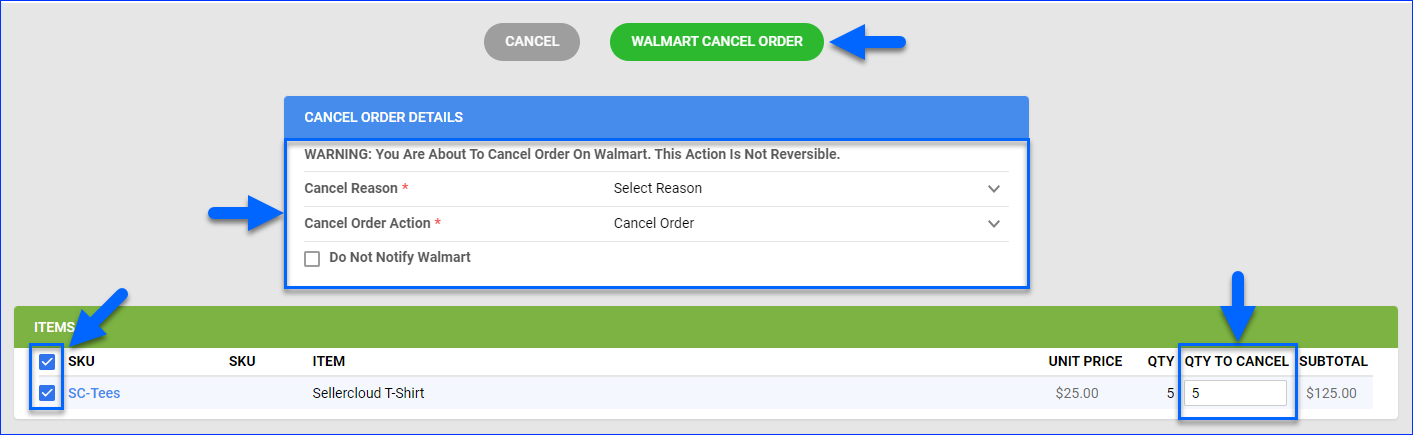
- Check the boxes on the left to select one or more SKUs.
- For a partial cancellation, adjust the Qty To Cancel.
- Select the Cancel Reason.
- Select the Cancel Order Action.
- Check Do Not Notify Walmart to cancel the order only internally and update the Order Profit & Loss information without cancelling on Walmart.
- Click Walmart Cancel Order.
Refund an Order
In Sellercloud, you can only issue refunds locally to keep the Order Profit & Loss information correct. To be able to issue a refund, you must Create an RMA and then Set a Resolution.
Configure PDF Invoices
Walmart requires you to print specific invoices to ensure consistency and compliance with their invoicing standards. With a plugin, you can print the invoices from Sellercloud or while processing orders in Shipbridge.
The plugin prints one 8×11 packing slip and one 4×5 SSCC label for each package in the order. Each packing slip only includes the items in the pertinent package. The SSCC label/UCC label is only printed for orders received from Walmart with specific shipping method codes.
You can also use a plugin to print a site-to-store label or UCC label.
Prerequisites
First, open a ticket with Sellercloud Support and request the latest invoice plugin to be installed on your server.
Once you have the plugin, create this Custom Company Setting:
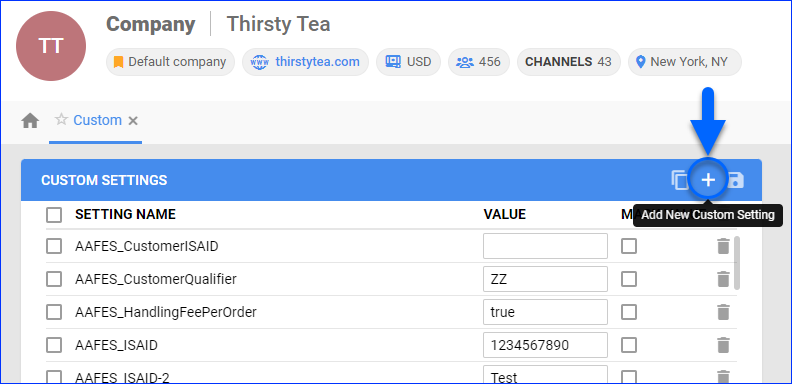
- Go to Company Settings.
- Click Toolbox and select Custom Settings.
- Click the Add New Custom Setting plus icon at the top right of the panel.
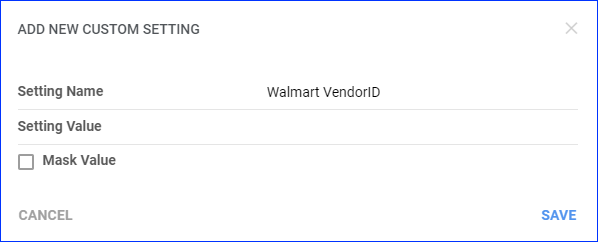
- Set the Setting Name to Walmart VendorID.
- For the Setting Value, enter the 6-digit Walmart Vendor Number on your Walmart account page.
- Click Save.
Per Company
If you have a company specifically for Walmart DSV orders:
- Click Toolbox and select Invoice Settings.
- Click Edit.
- In the Standard Packing Slip panel, select Custom Plugin and then choose the Walmart Invoice plugin.
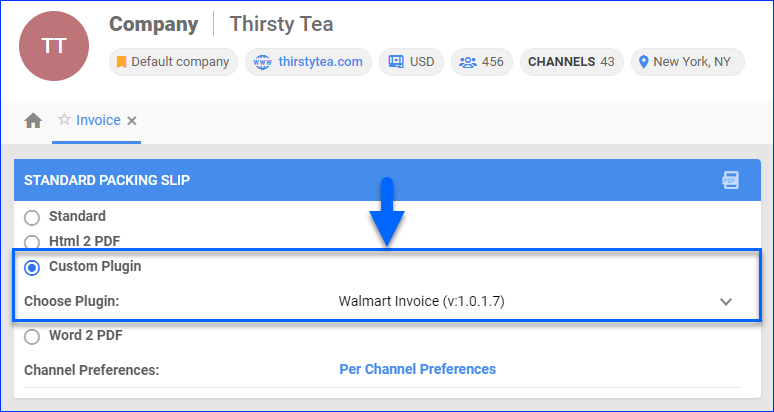
- Click Save.
Per Channel
If you don’t have a separate company for Walmart DSV, and you also print PDF invoices for other channels:
- Go to your Client Settings and check Enable Per Channel Based PDF Invoices.

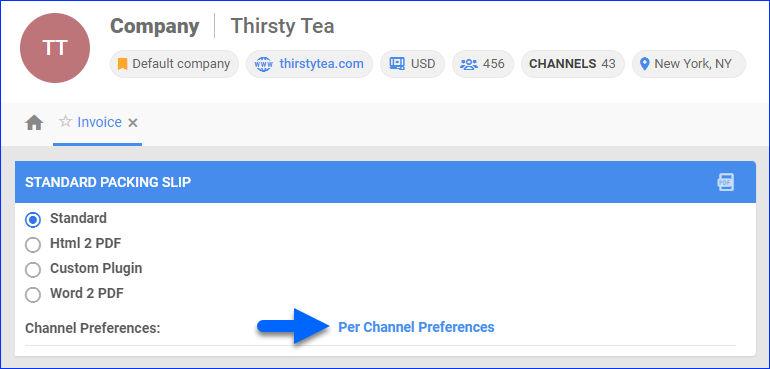
- Click Toolbox and select Invoice Settings.
- Click the Per Channel Preferences link.
- Locate Walmart in the grid:
- In the Invoice Type drop-down menu, select Plugin.
- In the Plugin drop-down menu, select a plugin.
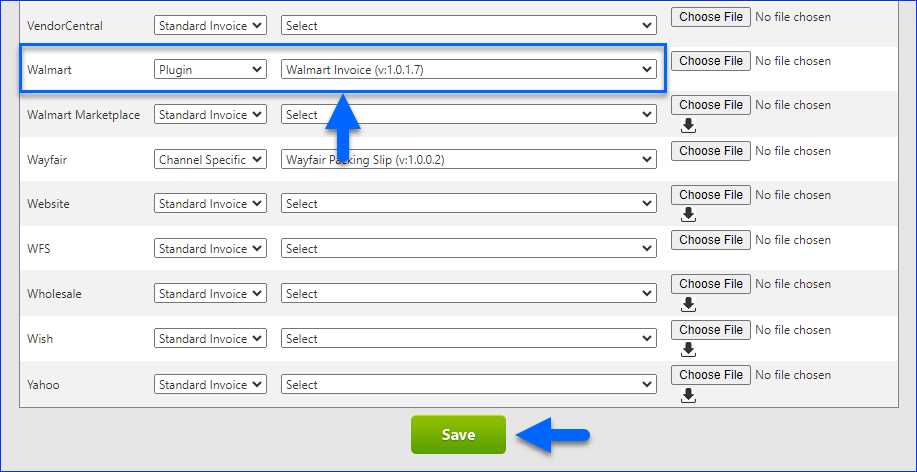
- Click Save.
Print Invoices
To print invoices from Sellercloud:
- Individually: Go to the Order Details Page, click Actions, and select Print Invoice to PDF.
- In Bulk: Go to the Manage Orders Page, select orders, click the Actions icon, and select Print Invoices to PDF.
To print invoices from Shipbridge, first Configure Printers and your Invoice Settings, and then use Ship and Print Labels or Scan and Ship to ship orders and print invoices simultaneously.