Overview
The Rule Engine feature in Sellercloud can help you apply changes to your orders and items within your orders automatically. Similar to post-order plugins, the Rule Engine allows you to split an order, change warehouses, and more based on the conditions and actions configured in the rule.
Prerequisites
To enable the Rule Engine:
- Go to Settings > Client Settings > Orders
- Turn on Enable Rule Engine.

Additionally, you can enable the following Client Settings:
- Enable Rule Engine Action For Post Order Plugin – This setting allows the rule engine to control when and how the post-order plugins are executed. When enabled, post-order plugins will not run on their own. However, it lets you run multiple plugins on orders under the same company using the Order Rule Engine.
- Run Post order plugin on Replacement Orders – When enabled, it will trigger the Order Rule Engine and Post order plugins to apply to Replacement Orders as soon as they are created.
- Run Post order plugin on duplicate Orders – When enabled, it will trigger the Order Rule Engine and Post order plugins to apply to Duplicate Orders as soon as they are created.
- Run Order Rules and Post order plugin after split order – When enabled, it will trigger the Order Rule Engine and Post Order plugins to apply to Child Split Orders as soon as they are created.
By default, the Order Rule Engine is triggered immediately after order creation. However, in some cases, you may need to delay this for a while, for example, if there is a delay in receiving the order payment. To address such cases, you can delay the execution of the rule engine by a few seconds. This is controlled by an app setting: EnableRuleEngineExecutionQueue. Open a ticket with Sellercloud Support to configure it for your account. Once enabled, go to General Client Settings and set the time for how long the engine would be delayed in the Rule Engine Execution Queue Delay In Seconds field.
Manage Rules
You can create, test, copy, and delete rules under Settings > Orders > Rule Engine > Manage Rules.

To create a new rule:
- Go to Settings > Orders > Rule Engine > Manage Rules.
- Click the + icon in the panel header to Add New Rule.
- Enter the Rule Name.
- By default, rules will not be run on certain types of orders. Enable the following checkboxes to include those orders when running the order rule:
- Process FBA Orders;
- Process Fully Shipped Orders;
- Process Unpaid Orders.

- Add Conditions.
- Add Condition Name and select Condition Type. You can also add a Sublevel Condition controlled by the top-level condition. Read more about conditions in the section below.

- Add Condition Name and select Condition Type. You can also add a Sublevel Condition controlled by the top-level condition. Read more about conditions in the section below.
- Create Actions.
- Enter Action Name and select Action Type.
 The rule can populate a custom column with a time and date pulled from placeholders. When creating a new action, select the Action Type – Update an Order Custom Column. This is the placeholder: ${CurrentDateTime(Format)} – where Format can be any of the .NET DateTime to String formats. Spaces are allowed only inside the Format value. The rest of the string has to be written without any spaces between the brackets and the symbols.
- Enter Action Name and select Action Type.
- If the order meets the condition(s), the system will automatically perform the action(s) created for the rule.
- You can Enable/Disable conditions and actions.

- Click the Green Flag to finalize the rule creation.

Execute Manually
You can manually execute rules on one or more orders.
To execute your rules from the Manage Rules Page:
- On the Rule Engine > Manage Rules page, click the Execute Rules on Order(s) icon.

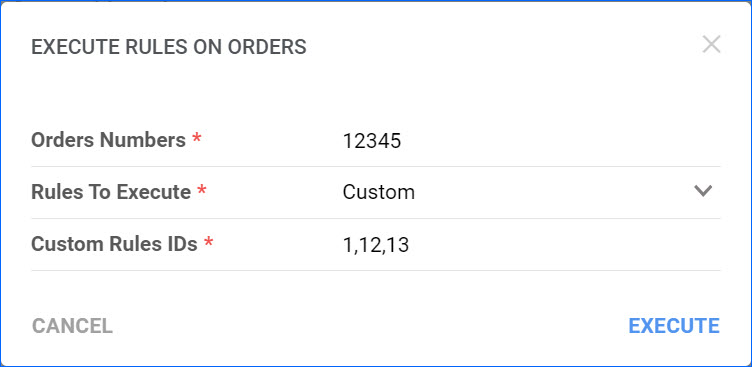
- You will see a pop-up where you can configure which rules to Execute:
- Enabled Only (Recommended) – choosing this option means that all currently enabled rules will be applied to the selected order(s).
- All – this option will cause all rules, enabled and disabled, to be applied to the order(s).
- Custom – if you select this option, you can enter the Rule IDs you want to execute (e.g., 2,12,13), and they will be applied. You can enter the IDs of both enabled and disabled rules.
- Next, add the Order ID(s) on which you want to execute the selected Rules.
- Click Execute.
To execute a specific rule from the Rules Details page:
- On the Rule Engine > Manage Rules page, open the Rule.
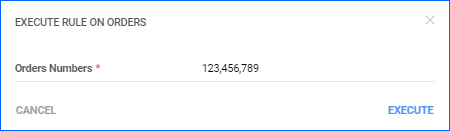
- You will see a few icons in the top right corner of the General panel > click the first icon to Execute Rule on Orders…
- In the pop-up, enter a comma-separated list of the order(s) > Click Execute.
To execute a rule from the Order Details page:
- Go to an Order Details page.
- Open the Actions menu and click Execute Rule Engine.

- Confirm the action in the pop-up window.
- If the order meets the conditions of multiple rules, all of them will be applied.
View Log
To view the execution log, go to Settings > Orders > Rule Engine > Execution Log.

Conditions
- Channel – Sets the rule for specified channels.
- Billing Address Country – Checks the provided billing address country. This condition has Is In, Is Not In, and Equals To operators and accepts multiple selections.
- Billing Address Postal Code – Sets the rule based on the billing address postal code.
- Billing Address State – Checks the State in the order’s billing address.
- Company – Sets the rule for specified companies.
- Customer – Sets the rule for specified customers.
- Gift Order – Includes or excludes Gift Orders.
- Order Group – Includes or excludes orders from the specified Order Group.
- Order Item Brand – Sets the rule for specified item Brands.
- Order Item Manufacturer – Sets the rule for specified Manufacturers.
- Order Item Product Group – Sets the rule for specified Product Groups.
- Order Item Product ID – Includes or excludes orders that have a specified product in them.
- Order Item Product Type – Sets the rule for specified Product Types.
- Order Item Ship From Warehouse – Sets the rule for orders set to ship from a specific warehouse.
- Order Kit Item Brand – Check the brand of the Kit Component(s) in an ordered Kit.
- Order Kit Item Manufacturer – Check the manufacturer of the Kit Component(s) in an ordered kit.
- Order Kit Item Product Group – Check the product group of the Kit Component(s) in an ordered kit.
- Order Kit Item Product ID – Check the SKU of the Kit Component(s) in an ordered kit.
- Order Kit Item Product Type – Check the product type of the Kit Component(s) in an ordered kit.
- Order Saved View – Check whether an order falls under a specific Saved View. This condition makes the rule engine incredibly flexible. However, the Saved View must not contain the filter Keyword.
- Order Status – Sets the rule for specified order statuses.
- Order Subtype – Sets the rule for specified order subtypes.
- Order Total – Sets the rule for a specified order total.
- Payment Method – Sets the rules for orders with a specific payment method recorded (Cash, Credit Card, etc.). You can also set it to work for all except a specific method.
- Payment Status – Sets the rule for specified payment statuses.
- Rush Order – Includes or excludes Rush Orders.
- Shipping Address Country – Sets the rule for domestic or international orders. This condition has Is In, Is Not In, and Equals To operators and accepts multiple selections.
- Shipping Address Postal Code – Allows you to specify the postal codes for the orders in the rule.
- Shipping Address State – Sets the rule for US or Canadian states.
- Shipping Carrier – Sets the rule for orders that are created with specified shipping carriers. You can also configure it to skip orders with a specific Shipping Carrier by using the Is Not In operator.
- Shipping Service – Sets the rule for orders that are created with specified shipping services. You can also configure it to skip orders with a specific Shipping Service by using the Does Not Contain operator.
- Shipping to PO Box – Sets the rule if the address is a PO box.
- Shipping Total – Sets the rule for orders with a specified shipping total.
- Shipping Weight – Sets the rule for a specific weight of the order.
- Total Units – Checks the total units to see whether the unit count is equal to, greater than, or less than a specified number or in a specified range.
Actions