
Overview
With Sellercloud, you can create a Warehouse Inventory Transfer (WITR) and keep track of your product inventory along the way. The most common scenarios for this feature include seasonal demand, expanding your operations, and space optimizations. Warehouse transfers differ from SKU to SKU Transfers, Physical Inventory Imports, and Product Inventory Adjustments.
Warehouse Inventory Transfers are also part of the FBA Removal and WFS Import Removal workflows.
Manage Warehouse Inventory Transfers
Sellercloud enables you to easily search for existing Warehouse Transfers, as well as create new ones.
Search WITR
To search Warehouse Transfers, follow the steps below:
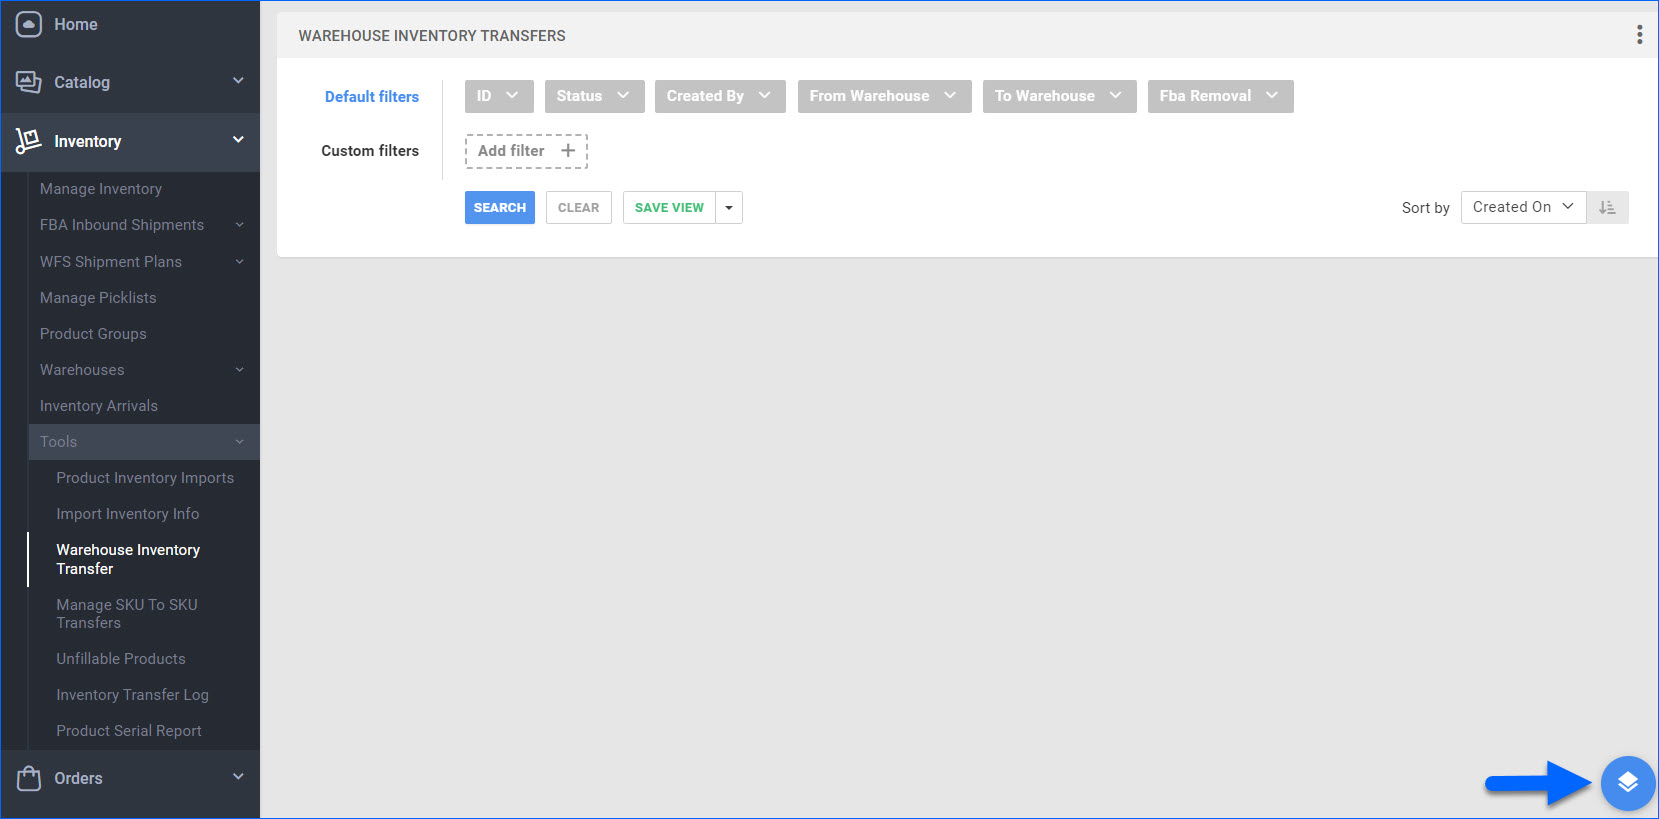
Navigate to Inventory > Tools > Warehouse Inventory Transfer.
-
Configure your Default filters to make sure that the results display exactly what you need. The available Default filters are:
ID
Status
Created By
From Warehouse
To Warehouse
Fba Removal
-
Optionally, you can add the following Custom filters:
Company
Created On
Created On Date
Open Status
Purchaser
Received On Date
Requested On Date
SKU
Shipped On Date
Title
Click Search. Each filter you apply gets highlighted. If a filter is gray or not displayed at all, it’s not active.
-
To manage the columns in the grid, click the three dots icon on the top right and select Customize Columns. You can:
Reorder columns by dragging them up or down in the list.
Hide columns by clicking the Trash icons.
Add columns by clicking Add column.
To arrange the data in a different order, use the Sort by menu.
To save your filtering and sorting options, click Save view, enter a Name, and click Save.
-
Access the Actions menu to:
Create New Transfer Request
Delete Selected
Export To Excel
Export To Excel With Products
Clear In-Transit Warehouse Inventory
Mark Transfer Requests Cancelled
Create WITR
You have 3 options to create WITR requests.
From a Product
To transfer inventory between warehouses for a single product:
Navigate to Catalog > Manage Catalog > Open a Product.
Open the Toolbox > Warehouse.
In the green dialog box, click Transfers > press the Pencil icon at the top right to Edit.
-
Click + to add a transfer. Fill in the following fields in the additional window:
Transfer From and Transfer To warehouse.
Qty to Transfer.
Transfer Reason.
Optionally, add Inventory Cost.
Once filled in, click Transfer.
WITR Page
You can also create a transfer from the Warehouse Inventory Transfer page:
Navigate to Inventory > Tools > Warehouse Inventory Transfer.
Access the Actions menu at the bottom right of the page and select Create New Transfer Request...
-
On the Details page, populate the following fields and click the blue arrow to proceed:
Title - Name the transfer.
Company - Select the applicable company.
From Warehouse - The warehouse from which the products will be shipped.
Interim Warehouse - An interim location through which the products will be transferred.
To Warehouse - A destination warehouse where the products will be stored.
Optionally, add Notes.
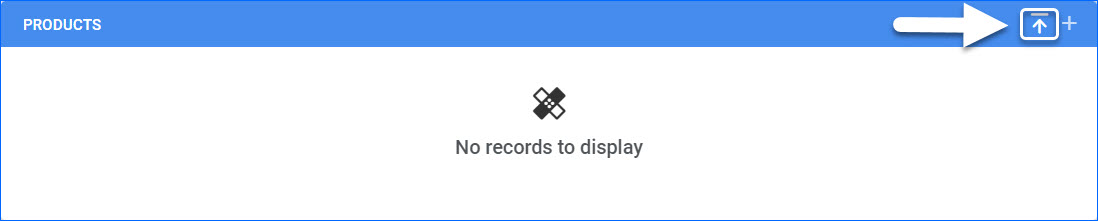
On the Products page, click the + icon to add products manually or the Upload Products icon to use a file upload. You can also add products and modify quantities later when the request already exists.
Once the desired products are added, indicate the quantity To move and click the green flag icon to create the transfer.
A pop-up will notify you that the request has been processed successfully. Click View Transfer Details to review it.
Add Products
You can easily search for and add products to a Warehouse Transfer Request:
Open the desired WITR, and click the Edit icon in its Products panel.
To search for single products, click the + icon and add one or more products separated by a comma in the additional window. Check the box next to each product and click Add Selected to add and continue with the search or Add & Close to add the products and close the window simultaneously.
When ready, click the Check icon to save the changes.
Alternatively, click the Upload Products icon to add products in bulk via a file.
File Import
To upload a WITR import file:
Go to Inventory > Tools > Import Inventory Info.
From the import options, select Import Warehouse Inventory Transfer.
Click the Down Arrow to download the Sample Format.
Fill in the sheet columns.
Click the Paper Clip icon to upload a file.
Click Import.
Process WITR
To complete the workflow and successfully move inventory across warehouses for multiple products at a time, follow the steps below:
Once you have added products to a WITR, open the Actions menu > Click Set Requested. This will change the status from Pending to Requested. At this stage, we will not move any inventory, but we can reserve it based on a Client Setting. Status Requested will notify your warehouse teams that your inventory is packed and ready to ship.
Then, from the Actions Menu, click Set Fully Picked.
-
When your products ship out, open the Actions menu > Click Set Shipped. At this stage, we will move your inventory to the selected Interim Warehouse.
To edit transfer quantities, use the Set Unshipped action, update, and use Set Shipped again.
When products arrive at the destination warehouse, open the Actions menu > Click Set Received. We will transfer the inventory from the interim warehouse to the Final Warehouse you have selected to reflect the movement in Sellercloud.
If the Ship From Warehouse is Bin-Enabled, you must pick the products with Skustack.
Inventory Transfer Log
For additional visibility, we have a separate page where you can monitor all of your WITR history. We display information about the Product, the Transfer Quantity, and the From and To Warehouses. You can also generate a bulk export file with the action Export to Excel from the Actions Menu at the bottom right.
To reach the page, navigate to Inventory > Tools > Inventory Transfer Log.
Warehouse Inventory Transfer - Additional Functionalities
The WITR workflow offers more functionalities that allow you to customize the process further:
Add Notes
You can keep important details for your warehouse team with notes directly within the transfer request. To add a note, click the Pencil icon in the orange dialog box, enter the information in the New Note field, and click the small Message icon to save the note. If a note is no longer relevant, simply click the Trash Bin icon right next to the message to remove it.
Print Product Labels
To print Product Labels directly through the WITR page, go to Inventory > Tools > Warehouse Inventory Transfer > Search Transfers > Open a Transfer > from the Actions menu, click Print Product Labels. An additional page will appear where you can choose the label format.
Add Serial Numbers
To add Serial Numbers to products in a WITR, go to Inventory > Tools > Warehouse Inventory Transfer > Search Transfers > Open a Transfer > from the Actions menu, click Select Serial Numbers. You will be redirected to an additional page where you can add multiple serial numbers to each product manually or via file import.
Delete WITR
You can quickly delete WITRs with statuses Pending or Requested. If client settings Enable Warehouse Inventory Transfer Request Reserves and Enable Warehouse Inventory Transfer Request Reserves Exclude Pending Transfer Status are enabled, and you delete a transfer request, we will remove any Product Reserves via a Queued Job and return the inventory back into your aggregate quantity.
You can delete WITRs individually and in bulk:
To remove a single WITR, go to Inventory > Warehouse Inventory Transfer > Open a Transfer > from the Actions menu, click Delete Transfer.
To remove multiple WITRs, go to Inventory > Warehouse Inventory Transfer > Search Transfers > Select Transfers > from the Actions menu, click Delete.
Related Settings
See all relevant WITR Client Settings:
-
Allow multiple receivings for warehouse inventory transfer request
If enabled, an additional page will appear when you use the action Set Received. On this page, you can add multiple transfer receivings and edit them at your convenience. If you receive less than the total qty, the transfer will obtain a PartiallyReceived status.
If disabled, you can enter a value in the Total Received field only once and it will not be editable after you use the action Set Received. To make changes, you must use the action Set Unreceived, change the quantity, and Set Received.
Allow warehouse inventory transfer from picklist - If enabled, an action called Transfer Between Warehouses will appear in the actions menu of a picklist which will allow you to select products within the picklist and create a transfer request.
-
Enable Warehouse Inventory Transfer Request Reserves - If enabled, we will reserve the inventory of products you have added to the request regardless of the transfer status.
Enable Warehouse Inventory Transfer Request Reserves Exclude Pending Transfer Status - If enabled, we will reserve the inventory of products you have added to the warehouse transfer for all statuses except for Pending. This setting requires Enable Warehouse Inventory Transfer Request Reserves to also be enabled.
Require PIN To Change Product Inventory Transfer Quantity - If enabled, you will be asked to enter a PIN every time you try to change warehouse inventory transfer quantities.
Transfer Serial Numbers While Transferring Inventory Between Warehouses - If enabled and you receive a Warehouse Inventory Transfer Request (WITR) for a product, we will also transfer any added serial numbers from the From Warehouse to the Destination Warehouse. This setting can help you preserve the purchasing history.