Overview
In this article, you will learn how to use the Product Details page, also known as the Product Properties page. The Product Details page is Sellercloud’s central hub for managing product-related information and settings. We will explore all the available options on the page, where you can configure product names, descriptions, unique identifiers, pricing, purchase details, and more.
In addition, we’ll go over the options available in the Toolbox on the Product Details page, which grants you access to tabs with even more product details, preferences, and settings. It’s also where you can find channel-specific pages with various controls and product properties.
Many fields on the Product Details page are defaults and will be sent to sales channels if the channel-specific product properties aren’t configured. For example, if there’s no Amazon Price set on a product’s Amazon Properties, the Site Price field will be sent as the product price.
Product Details
You can view and manage different data associated with each product on its Product Details page. There are a few ways to access this page:
- Use the Global Search bar to search for a product by Product Name or SKU
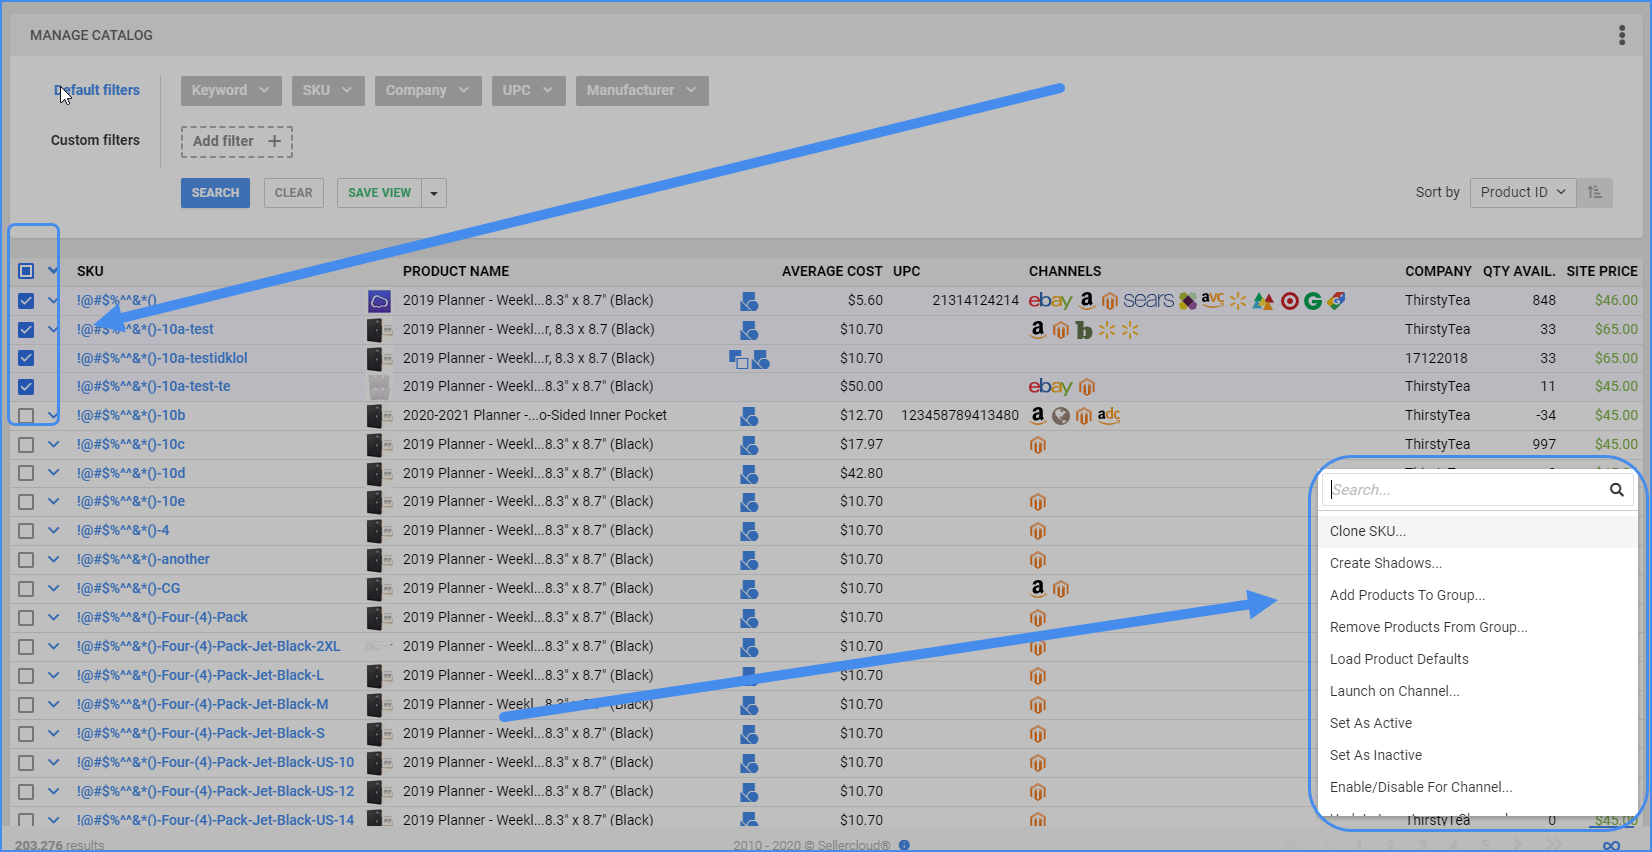
- Click Catalog > Manage Catalog, then search to find products, and click a product’s SKU.
- Click the product links anywhere else in the Sellercloud UI – in orders, POs, etc.
Regardless of which option you use, you will end up at a Product Details page, which looks like this:

Refer to the sections below for descriptions of the available options on the page.
Image Manager
On the left side of the page, next to all the panels with product information, is the Image Manager. Clicking there will open the Image Manager tab, which you can also access from the Toolbox > Image Manager.
The Image Manager lets you upload and configure images for all connected channels simultaneously or set up different images per channel, allowing you to send different images for each channel listing. Learn more about managing Product Images.
General Panel
| Option | Description |
| Name | The name or title of the product. |
| Company | The Sellercloud Company associated with the product. If you need to have the same product in a different company with shared inventory, you can use the Shadow Product functionality. |
| Type | The Product Type for categorization. Product types can be company or client-wide depending on the Enable Product Types To Be Client Wide Catalog Client Setting. |
| Condition | The product’s Condition (e.g., new, used, refurbished). |
| Created On | The date when the product was initially created. |
| Created By | The user email of the individual who created the product. |
| Is Active | Indicates if the product is currently active or Inactive. |
| Fulfilled By | Who fulfills orders – the merchant or FBA. Mirrors the Amazon Fulfilled By status field. |
| Available Qty | The current quantity of the product available for purchase. |
| Is Replenishable | Indicates if the product is Replenishable. |
| Is Digital Product | Indicates if the product is Digital. |
Identifiers Panel
| Option | Description |
| Master SKU | The master stock-keeping unit for the product. The Master SKU is useful in case of a SKU mismatch. This field can be used to link a SKU in a third-party master inventory system, like QuickBooks, to the Sellercloud SKU. |
| Manufacturer SKU | The SKU assigned by the product’s Manufacturer for tracking and identification. |
| UPC | The Universal Product Code, a unique barcode used for product identification and tracking. |
| ASIN | The Amazon Standard Identification Number, specific to Amazon products, for easy cataloging. |
| FNSKU | Amazon’s Fulfillment Network SKU used to identify products stored in their fulfillment centers. |
| EAN | The European Article Number is a unique barcode standard commonly used in Europe. |
| GTIN | The Global Trade Item Number is a unique product identifier used worldwide for retail products. |
Metrics Panel
The product metrics in this panel can be presented in imperial or metric units of measurement. To set the default for all newly created Sellercloud Companies, select it in the Client Setting Default Unit of Measure. In addition, you can select a different measurement unit per company from the main Company Settings page’s Unit Of Measure setting. To update the UoM of existing products, you must update the specific company’s unit of measure settings for displaying or processing the data.
Specifying your products’ shipping dimensions is useful when shipping orders. Learn more about Weight and Dimensions in Shipbridge.
| Option | Description |
| Prod. Weight | The weight of the product. If you enter more than 16 in the Oz field, Sellercloud will automatically recalculate the weight. For example, 20oz will become 1lbs 4oz. |
| Shipping Weight | The product’s weight, including packaging and any additional materials used for shipping. If you enter more than 16 in the Oz field, Sellercloud will automatically recalculate the weight. For example, 20oz will become 1lbs 4oz. |
| Product Dims. | The dimensions of the product in terms of length, width, and height. |
| Ship Dims. | The dimensions of the packaging used for shipping the product. |
Details Panel
| Option | Description |
| Manufacturer | The product’s Manufacturer. The Client Setting Require Manufacturer When Creating Product makes Manufacturer a required field when creating a new product. |
| Brand | The Brand name associated with the product. A Client Setting called Stop Using Brands (Use Manufacturer As Brand) makes it so that brands will not be accessible, and Sellercloud will not process or consider them even if you populate the fields. |
| Short Description | A brief and concise description of the product. |
| Long Description | A more detailed and comprehensive description of the product. |
| Priority | A value from 0 to 10 that indicates the product’s importance. |
| Rating | A rating from 0 to 10 associated with the product’s quality or performance. |
| Country Of Origin | The country where the product was originally produced or manufactured. |
| Has Proposition 65 Warning | A flag indicating whether the product carries a Proposition 65 warning pertaining to compliance with California state regulations. |
| Proposition 65 Message | The specific warning message related to Proposition 65 compliance. |
| Expirable | Indicates whether the product is Expirable. You can enable or disable this field with a Client Setting called Enable Product Expiry Workflow. |
| Custom Specifics | Customized product specifications or unique details. |
| Item Includes | Information about what is included with the product, such as accessories or additional items. |
| Location Notes | Notes related to the product’s storage location within your warehouse. |
| Tax Code | The product’s Tax Code, used by integrations such as Avalara and TaxJar. The Display Tax Code On Product Home Page Client Setting controls whether the field is visible on the Product Details page. |
| Key Product Features | A list of significant features or characteristics that define the product. |
Purchasing Panel
| Option | Description |
| Default Vendor | The primary Vendor from where the product is purchased. |
| Vendor SKU | The Vendor SKU is the product’s stock-keeping unit (SKU) assigned by the vendor. |
| Average Cost | The Average Cost associated with purchasing the product over time. |
| Discontinued | Indicates if the product is discontinued and unavailable for purchase from vendors. |
| Site Cost | The product’s cost, based either on the last PO when it is received or on the Average Cost. See Product Costs for more information. The Client Setting Require SiteCost And Buyer/Purchaser While Creating Product makes Site Cost a required field when creating a new product. |
| Sell Below Cost | If the Client Setting Validate Selling Price is greater than % of SiteCost is configured, the system will not allow you to set a Site Price lower than the specified percentage of the Site Cost. However, if you enable this checkbox, you can exclude the specific SKU from this validation and set its price lower than the Site Cost. This will also affect the listing on channels we send pricing updates to (Amazon, eBay, Website, etc.) |
| Gross Cost | The product’s Average Cost, excluding quantity from its calculation. See Product Costs for more information. |
| Qty Per Case | The quantity of the product contained in a single Case. |
| Qty Per Pallet | The quantity of the product that can be stacked on a single Pallet for shipping or storage. |
| Purchaser | The user email of the person responsible for procurement of the product. The Client Setting Require SiteCost And Buyer/Purchaser While Creating Product makes Purchaser a required field when creating a new product. |
Pricing
| Option | Description |
| Site/Retail Price | The default product price for all channels. Note that the Client Setting Require To Set Default Price When Creating Product makes the Default Price a required field when creating a new product, and it sets the product’s Site/Retail Price. |
| Standard/List Price | The field is used to set the Manufacturer’s Suggested Retail Price or Strikethrough Price. |
| Wholesale Price | The product’s Wholesale price. |
| Map Price | The Minimum Advertised Price is the lowest price at which the product can be advertised. |
| Local Store Price | The price for the product when sold in physical local stores. |
| Enforce Map | A setting to enforce the MAP Price for the product. |
| Use Map Price For Website | Set the MAP Price as the selling price on the Website channel. |
| Tax Exempt | Indicates if the product is exempt from taxes. |
Custom Columns
This panel is for all the Product Custom Columns, where you can store information that doesn’t fit into the default columns. See the linked article to learn how to enable or disable these columns. You must contact Sellercloud Support to have such columns created for you.
Product Toolbox
The Toolbox is a key element on the Product Details page. It grants you access to additional product-related tabs, where you can configure even more details, preferences, and settings. It’s also where you can find the channel-specific tabs with various controls and product properties.
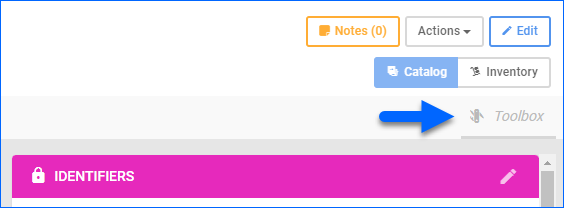
To access these tabs, click the Toolbox button on the Product Details page.
Now, you can select from the options in the table below. Click the star to pin any frequently used tab to the page for quick access.
| Tab | Description |
| Aliases | Create and delete Product Aliases. |
| Average Cost Details | Add, review, and update Average Cost details. |
| Change Log | View a log that stores all Product History Records showing who has made changes to products, what changes have been made, and when. |
| Channels | Access pages where you can configure channel-specific settings and properties, such as Amazon Properties and eBay Properties. |
| Custom Columns | Populate any Custom Product Columns previously created by Sellercloud Support. |
| Gross Cost Details | View details related to the Gross Cost, which is the same as the Average Cost but excludes the quantity from its calculation. |
| Image Manager | Upload, update, and delete Product Images. |
| Inventory Movement | View the product’s Inventory Movement History, which shows the current inventory stats, warehouse movements, and bin movements. |
| Jewel Properties | Access and update product properties specifically for Jewelry. |
| Kit | Create a Kit Product and add components. |
| Lot Numbers | View Lot Numbers per bin. |
| Manage ITF-14 | Manage ITF-14 Barcodes. |
| Manual Reserves | Create, edit, and delete Product Inventory Reserves. Controlled by a Client Setting called Enable Product Manual Reserves. |
| Prices | Manage products’ Site Cost, Site Price, and channel-specific prices with the Price Manager. |
| Product Groups | Add or remove the product from Product Groups. |
| Purchasing | Manage purchasing details such as Vendor SKUs and Prices, Product Costs, and more. |
| Rebates | Add or delete Product Rebates. Controlled by a Client Setting called Enable Rebate Based Discounts For Channels. |
| Recent Sales | See recent product sales and filter sales by Company, Channel, Shipping Status, Order Status, and Order Date. |
| Related Products | Add or remove Related Products. |
| Replacement Products | Add or remove Replacement Products. |
| Serial Numbers | Search and export Serial Numbers. |
| Shadows | Create, edit, and delete and Shadow Product relationships. |
| Shipping Preferences | Configure the product’s Shipping Preferences. |
| Variations | Create and manage Variation Products. |
| Verified Fields | See a list of the product fields that have been verified externally as containing the correct information. |
| Warehouse | View the inventory per warehouse, adjustments, transfers, physicals, and general stats. |
| Warehouse Bins | View and manage the Inventory Per Bin. |
| Warehouse Image Manager | Manage images for the Inventory version of the product (not sent to the channel). |
Product Actions
To access the product actions, click the Actions button on the Product Details page.
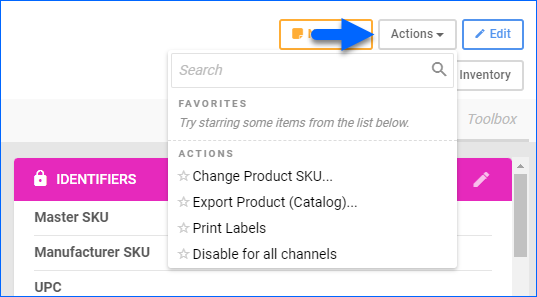
Now, you can select from the actions below. Click the star to pin any frequently used action to the top of the actions list.
| Action | Description |
| Change Product SKU | Change the product’s Stock Keeping Unit (SKU). |
| Export Product (Catalog) | Export product information using different methods. |
| Print Labels | Print Product Labels. |
| Disable for all channels | Disable the product for all enabled sales channels. |
You can also use some of these actions in bulk for multiple products at once on the Manage Catalog page.
Product Notes
You can use the Product Details page to view and post product notes. Product notes are helpful internally for better communication and collaboration among team members. For example, one way to use product notes is to document product changes and inform others – this way, they won’t have to check the product Change Log.
To view and post product notes:
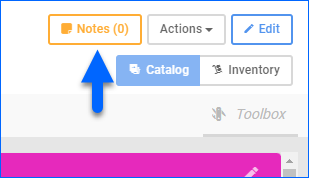
- Click the Notes button on the top right.
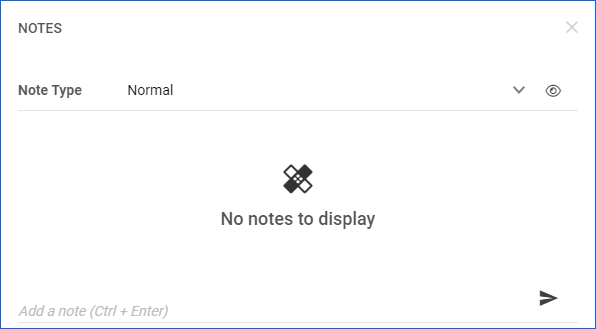
- Optionally, click the eye icon to Show or Hide System Notes. Sometimes, Sellercloud may post system notes to inform about product changes. However, the best way to track changes is the Change Log because all changes are recorded there.
- Select the Note Type – Normal or Aged Inventory to view different notes.
- To post a new note, type it below and click the post button.
Overview
In this article, you will learn how to use the Product Details page, also known as the Product Properties page. The Product Details page is Sellercloud’s central hub for managing product-related information and settings. We will explore all the available options on the page, where you can configure product names, descriptions, unique identifiers, pricing, purchase details, and more.
In addition, we’ll go over the options available in the Toolbox on the Product Details page, which grants you access to tabs with even more product details, preferences, and settings. It’s also where you can find channel-specific pages with various controls and product properties.
Many fields on the Product Details page are defaults and will be sent to sales channels if the channel-specific product properties aren’t configured. For example, if there’s no Amazon Price set on a product’s Amazon Properties, the Site Price field will be sent as the product price.
Product Details
The Product Details page allows users to see information, such as shipping length, width, and height, or aggregate qty. It also facilitates actions, including viewing the warehouses associated with each product, editing channel-related information, accessing the image manager, and printing product labels.
To access the Product Details page:
- Go to Inventory > Input your search criteria > Search.
- Select your product.

To manage panels:
Users can manage the collapsible panels on the page to easily access functions and relevant information (Kits, Shadows, etc.)
- Click the Arrow icon to view a panel. Click the X icon to remove a panel from the main page.

To customize panels:
- Go to Inventory > Input search criteria > Search.
- Select the product > Click Manage Panels.
- Check the panels you want to display on the main page.
- Optional: You can use the up or down arrows to rearrange the order of the panels on the main page.
- Click Save.

Product Notes
The Product Details page allows users to add product notes to keep track of additional information.

To add a product note:
- Go to Inventory > Input your search criteria > Search > Select the product.
- Click Toolbox > Notes.
- Click Add New Note. A pop-up tab will appear.
- Select your Note Type.
- Optional: Check Include in PO to include this note in your purchase orders.
- Click Save.
To edit a product note:
- Go to Inventory > Input your search criteria > Search > Select the product.
- Click Toolbox > Notes > Click Edit.
- Enter your edits > Click Save.
To delete a product note:
- Go to Inventory > Input your search criteria > Search > Select the product.
- Click Toolbox > Notes > Click Delete.
To delete product notes in bulk:
- Go to Inventory > Import Product Info > Import Product Notes.
- Click Download template.
- Open your template and input relevant information. Make sure the column headers NoteID and _ACTION_ are available. In the _ACTION_ header, write _DELETE_ for the notes you want to delete. If you do not see them, contact Sellercloud Support to add them.
- Save your template.
- Return to Import Product Notes > Click Choose File > Select your saved template > Click Import Notes.

Product Toolbox
The Toolbox feature gives you access to a variety of functions:
- Editing channel-related information on the individual product level
- Adding aliases
- Adding products to product groups
Navigate the Toolbox icon to open it and start exploring all your options.